11.2.4. Burn binary to flash for DA1469x, DA1470x and DA1459x
From Programmer menu select the Flash Code tool (Figure 199)
From Board menu select a UART or JTAG interface (Figure 200)
Press the Connect button on the bottom of the tool (Figure 204)
Press the Read button to read the contents of the flash. The contents are presented on the left table named “Content Read” (Figure 205). Verify that the flash is empty.
Select the Complete Flash section and press the Import from File button and the “Prepare Code Image” dialog appears.
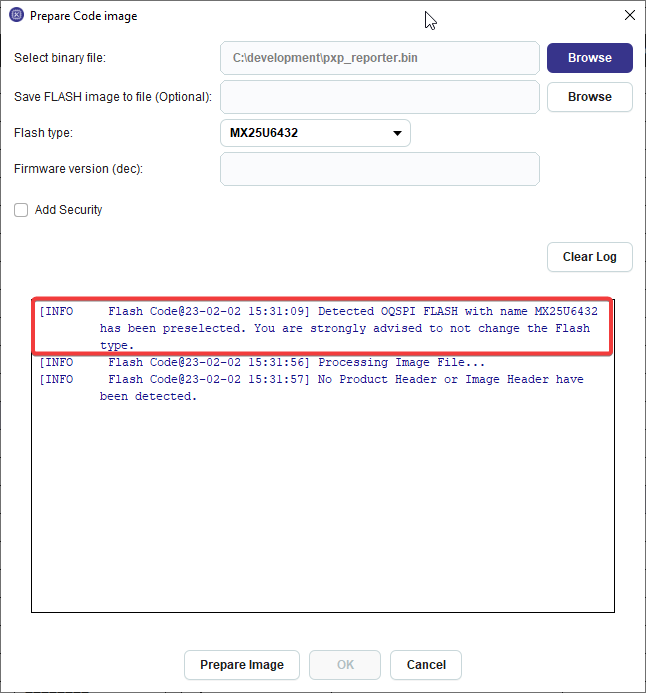
Figure 211 “Prepare Code Image” dialog
On DA1470x and DA1459x a flash detection function is executed when connecting to the device and a message is shown. The detected flash is preselected.
Press the Prepare Image button and then OK. The “Content to Burn” table is populated with flash image data.
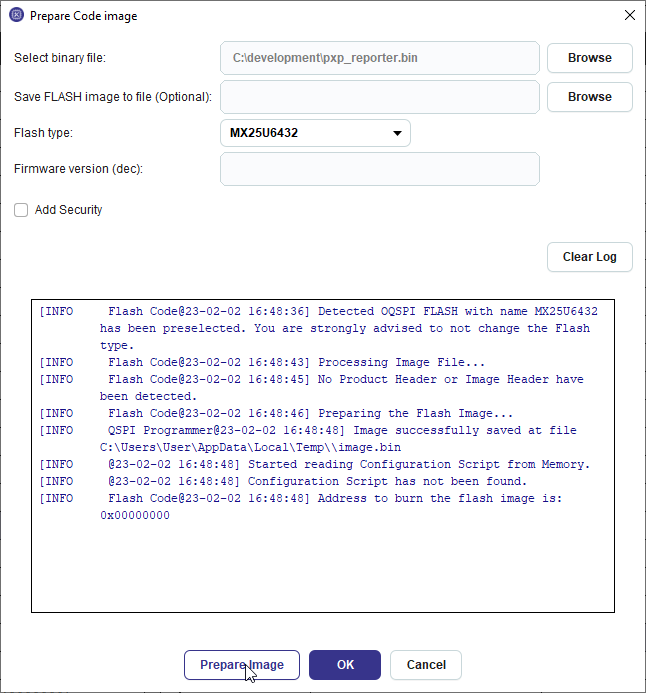
Figure 212 “Prepare Code Image” dialog after image preparation
The start address to burn the data is estimated during the flash image preparation. Press the Burn button to burn the flash image at the [redefined address.
After successful burn the “Content Read” table is updated. Press RESET button on the motherboard to start the application.
For full documentation of the Flash Code tool please refer to Flash Code