24. SUOTA Demonstration
A number of the example applications provided with the SDK6 implement the SUOTA service and can therefore be updated over-the-air. In this section we will use one of these examples (the proximity reporter) to demonstrate the complete SUOTA process. We will build, and then load, the SUOTA capable example application onto a DA145xx development kit board. We will then update this application firmware, over-the-air, using the Dialog SUOTA application running on an Android or iOS based SmartDevice.
Smartboot
The DA14535 module overcomes pinning constraints with a pre-programmed secondary bootloader in flash. On startup, it transitions from the default ROM booter to the secondary bootloader, enabling 2-wire UART (on pins P0_0/ P0_1) in step 4 of the booting sequence. The module also contains an image advertising SUOTA, facilitating new image downloads. Despite pin constraints, the bootloader supports 1-wire UART (on pin P0_5) and 2-wire UART interfaces. The dual image bootloader, discussed in the SmartBoot document, serves as a foundation for Software Update Over The Air (SUOTA) applications.
24.1. Preparing the Development Kit
Before getting started you need to ensure the jumper and switch settings on the development kit you are using are configured to use the external SPI flash the board contains.
24.1.1. DA14531 Development Kit - USB

Figure 65 Switch setting on the DA14531 Development Kit - USB
24.1.2. DA14531 DEVKT-P
Ensure that the switch on the daughter card is in the ‘H’ position (buck mode)
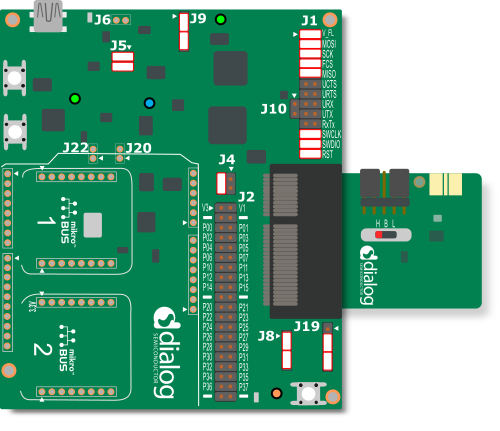
Figure 66 Jumper settings on the DA14531 Development Kit - Pro
24.1.3. DA1453x DEVKT-P
Ensure that the switch on the daughter card is in the ‘H’ position (buck mode)

Figure 67 Jumper settings on the DA1453x DEVKT-P
24.1.4. DA14585 Development Kit - Basic

Figure 68 Jumper settings on the DA14585 Development Kit - Basic
24.1.5. DA14585/6 Development Kit - Pro

Figure 69 Jumper settings on the DA14585/6 Development Kit - Pro
24.2. Software Update Over-the-Air Application
Once the development kit has been prepared, the next step is to download and install the Dialog SUOTA application on an iOS or Android based SmartDevice via the Apple App Store or Google Play (search for ‘Dialog SUOTA’).
24.3. Preparing the Proximity Reporter Application
Using the Keil uVision IDE, open the Proximity Reporter application (prox_reporter) located within the projects/target_apps/ble_examples/prox_reporter folder of the DA145xx SDK.
We will be using the Dialog SUOTA application to perform an update over-the-air. When connected to a DA1453x or DA1458x devices, this application reads the software and firmware version numbers from the Device Information Service characteristics and displays them for the user. By default, the prox_reporter application uses the SDK version number for both the software and firmware version numbers. We will modify this behaviour so that the firmware version number represents the SDK version, and the software version represents the application version number - making it easy to tell when an update has taken place.
To do this, we will first create a file called user_version.h containing the following, and place it in the projects/target_apps/ble_examples/prox_reporter/src folder:
#define SDK_VERSION "1.0.0"
Note
This macro MUST be named SDK_VERSION, even though it refers to the application version number, otherwise it will not be found by the tool used to create the images.
Next, we will use this version number to populate the software version number characteristic in the Device Information Service. To do this we first need to add the following callback function to the user_proxr.c file:
#include "user_version.h"
void user_app_on_db_init_complete(void)
{
    /* Set application version number in DISS */
    char sw_version[] = SDK_VERSION;
    struct diss_set_value_req *req = KE_MSG_ALLOC_DYN(DISS_SET_VALUE_REQ,
                                                      prf_get_task_from_id(TASK_ID_DISS),
                                                      TASK_APP,
                                                      diss_set_value_req,
                                                      sizeof(sw_version));
    req->value = DIS_SW_REV_STR_CHAR;
    req->length = sizeof(sw_version);
    memcpy(req->data, sw_version, sizeof(sw_version));
    ke_msg_send(req);

    default_app_on_db_init_complete();
}
Next add a prototype for this function to the user_proxr.h file as follows:
void user_app_on_db_init_complete(void);
Finally, redirect the stack to call this application defined callback by changing the definition of the app_on_db_init_complete pointer in the user_callback_config.h file to the following:
- .app_on_db_init_complete            = default_app_on_db_init_complete,
+ .app_on_db_init_complete            = user_app_on_db_init_complete,
24.3.1. Description of some important files
You can find some a brief description of some important SDK files for the SUOTA procedure.
File |
Description |
|---|---|
user_profiles_config.h |
Defines which BLE profiles (Bluetooth SIG adopted or custom ones) will be included in user’s application. Each header file denotes the respective
BLE profile. Be sure to |
user_periph_setup.h |
Holds hardware related settings relative to the used development kit. |
user_periph_setup.c |
Source code file that handles peripheral (GPIO, UART, SPI, etc.) configuration and initialization relative to the development kit. |
app_suotar.c |
Source code file that is implemented as SUOTA reporter application entry point. |
app_suotar_task.c |
Source code file that is implemented as SUOTA receiver application Message Handlers. |
app_proxr.c |
Source code file that is implemented as Proximity reporter application entry point. |
app_proxr_task.c |
Source code file that is implemented as Proximity reporter application task implementation. |
24.4. Creating Application Image Files
Now we will create two application images, each with a different version number so we can identify which image is currently being executed by the DA1453x or DA1458x device.
Firstly, create a folder called suota_images in projects/target_apps/ble_examples/prox_reporter/Keil_5 for the storage of the created images.
Now build the pxp_reporter application, using the Keil IDE, and copy the resulting hex file (prox_reporter_5xx.hex) from the prox_reporter/Keil_5/out_DA145xx/Objects folder into the ‘suota_images’ folder, and rename it fw_v1.hex.
Next, create an application image file based upon this hex file using the mkimage tool, more details about the tool could be found in section 6.2.7.4 of UM-B-119: DA1453x/DA1458x SW Platform Reference Manual.
Follwo the following steps to create your multi image. The multi image is a pair of single images with a product header appended to them that is burned in the external memory to reserve the space needed to support SUOTA.
Warning
The mkimage tool supports only .bin files. Please ensure your input file is in .bin format before proceeding.
STEP 1

Figure 70 Create the single encrypted image 1
STEP 2
Now we must create a new image, with a version number greater than the previous image, that will be used when we perform a software update over-the-air.
To do this simply update the version number in the sdk_version_2.h file, rebuild the prox_reporter application, and copy the resulting bin file (prox_reporter_5xx.bin) from the prox_reporter/Keil_5/out_DA145xx/Objects folder into the ‘suota_images’ folder and rename it fw_v2.bin.

Figure 71 Create the single encrypted image 2
STEP 3

Figure 72 Set the AES/IV key index for image 1
STEP 4

Figure 73 Set the AES/IV key index for image 2
STEP 5 and STEP 6

Figure 74 Set the ECC key index for image 1 and image 2
STEP 7 and STEP 8

Figure 75 Image 1 and Image 2 signing
STEP 9

Figure 76 Multi image creation
STEP 10

Figure 77 Burn Multi image to SPI flash using SmartSnippets Toolbox
In the next steps, we will be making some changes to the secondary bootloader utilities/secondary_bootloader as it is detailed in section 6.2.2 of UM-B-119: DA1453x/DA1458x SW Platform Reference Manual.
STEP 11
Define these configurations setting in da145xxx_config_basic.h
#define AES_ENCRYPTED_IMAGE_SUPPORTED (1)
Will make the bootloader support only encrypted images
#define SECURE_BOOT_ECC_IMAGE_SUPPORT (1)
In this example we are using the DA14535 Module, as it is indicated in Section 28.1 the PRODUCT_HEADER_POSITION macro SPI_FLASH_DEV_SIZE should be updated.
STEP 12
The DA1453x/DA1458x device should have up to 5 ECC public keys burned in the OTP in specific addresses so that the bootloader can load them when an image is downloaded.
You can find here: keytemplate.xml a pre-generated xml file containing a 5 ECC key pairs (5 private keys with their matching public keys).
A good method is to update this file with your own generated keys. In this example we genearetd the follwoing keys. Keep track of which index each key has (0-4) so that you know which index is associated with the public key whose private key was used to sign the image, this is detailed in STEP 3, STEP4, STEP 5 and STEP6.
image 1 / image 2
AES KEY: 06a9214036b8a15b512e03d534120006
AES IV: 3dafba429d9eb430b422da802c9fac41
Private Key: c9afa9d845ba75166b5c215767b1d6934e50c3db36e89b127b8a622b120f6721
Public Key:60fed4ba255a9d31c961eb74c6356d68c049b8923b61fa6ce669622e60f29fb67903fe1008b8bc99a41ae9e95628bc64f2f1b20c2d7e9f5177a3c294d4462299
Then the testkeys.txt will be updated as below:
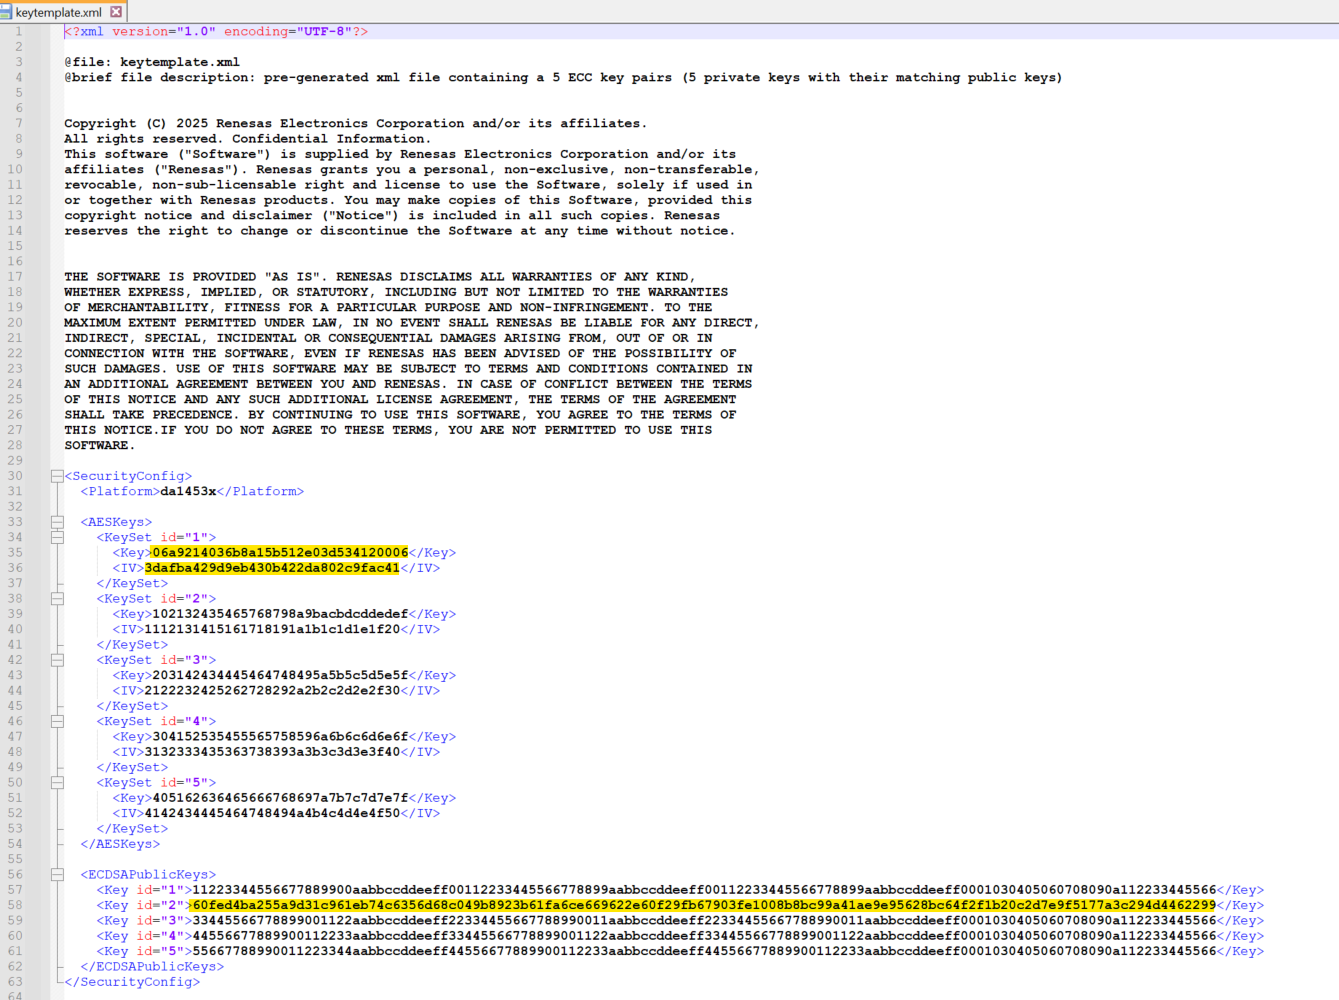
Figure 78 testkeys.txt file updated with AES KEY, AES IV, Private Key and Public Key
STEP 13
Generate the binary file to be burned in the OTP using keybinexport.py.

Figure 79 testkeys.bin file generation
STEP 14
Run the SmartSnippets Toolbox and Take the testkeys.bin containing the 5 public keys and burn them in the OTP based on the key storage description in section 6.2.4 of UM-B-119: DA1453x/DA1458x SW Platform Reference Manual.
For the DA14535 the OTP based adress is the 0x07F82CC8.

Figure 80 testkeys.bin binary programmed at 0x07F82CC8 in the OTP
STEP 14
With the same way you Program the secondary bootoader to the OTP at adress 0x07F80000

Figure 81 Secondary bootloader binary programmed at 0x07F80000 in the OTP
STEP 15
Application Programmed Flag #1 and Flag #2 should be programmed to YES

Figure 82 Application Programmed Flag #1 and Flag #2 set to YES
STEP 16: OPTIONAL
The SWD interface is disabled when OTP is programmed on DA1453x. It is possible to re-enable SWD in your application code via the configuration script, You can follow the steps mentioned in 7.2.1 of AN-B-072.
24.5. Performing a Software Update Over-the-Air
We will now update the firmware that is running on the DA1453x or DA1458x device from version 1 to version 2 using the Dialog SUOTA application running on a Android or iOS based SmartDevice.
Note
Ensure the Dialog SUOTA App is installed on your Smart Device before proceeding.
24.5.1. Running the SUOTA App on iOS
First we must transfer version 2 of the application image (the fw_v2.img file) to the iOS based device. This can be achieved by connecting the SmartDevice to a PC and using iTunes as follows:
Open iTunes and select the SmartDevice to which the image file is to be downloaded.
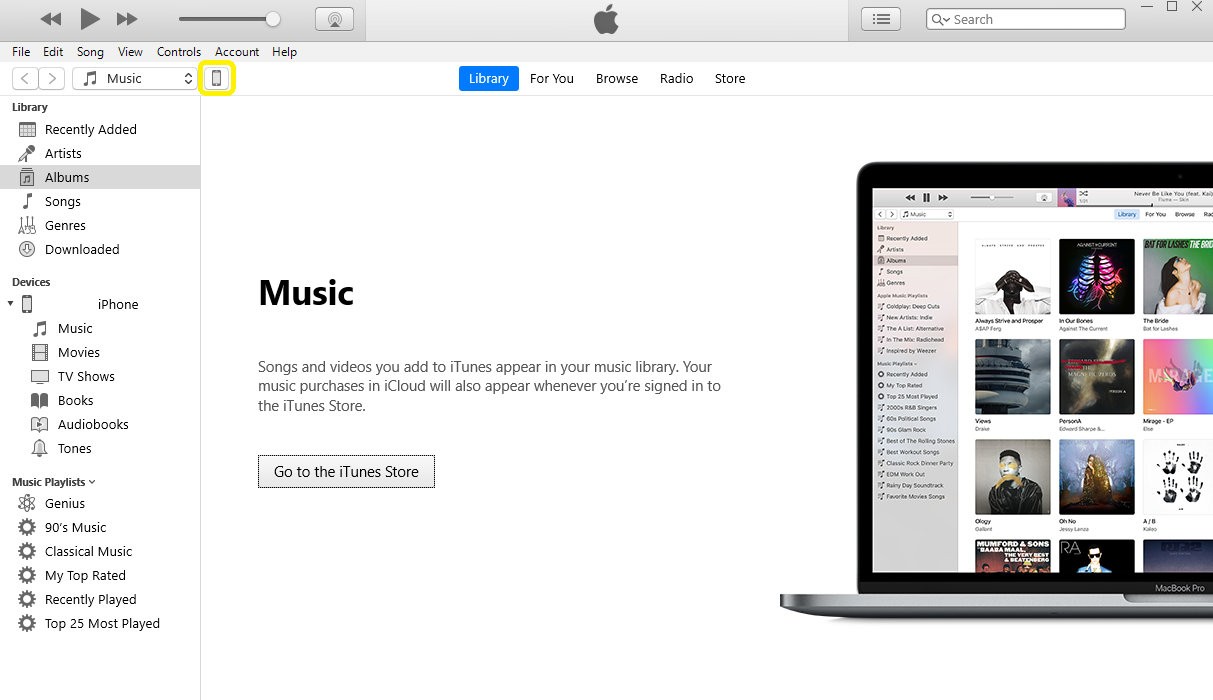
Figure 83 Select SmartDevice
Select the SUOTA App from the File Sharing menu.
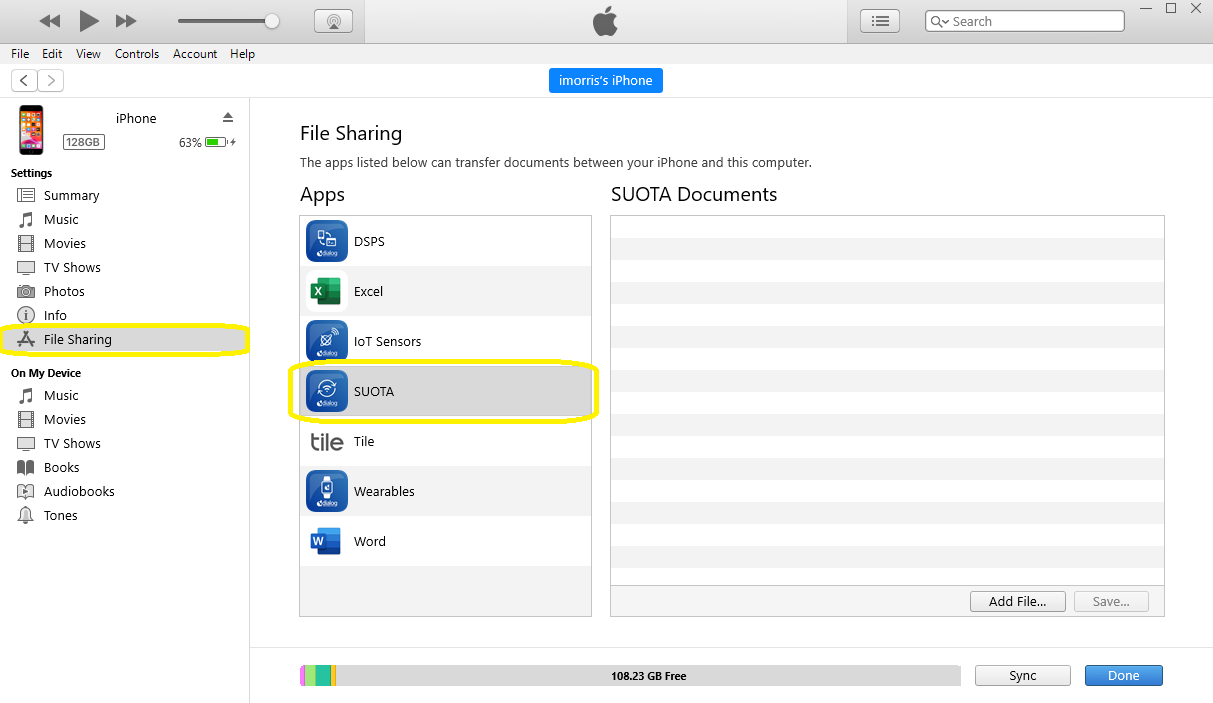
Figure 84 SUOTA App File Sharing
Add the application image file that is to be downloaded (
fw_v2.img).
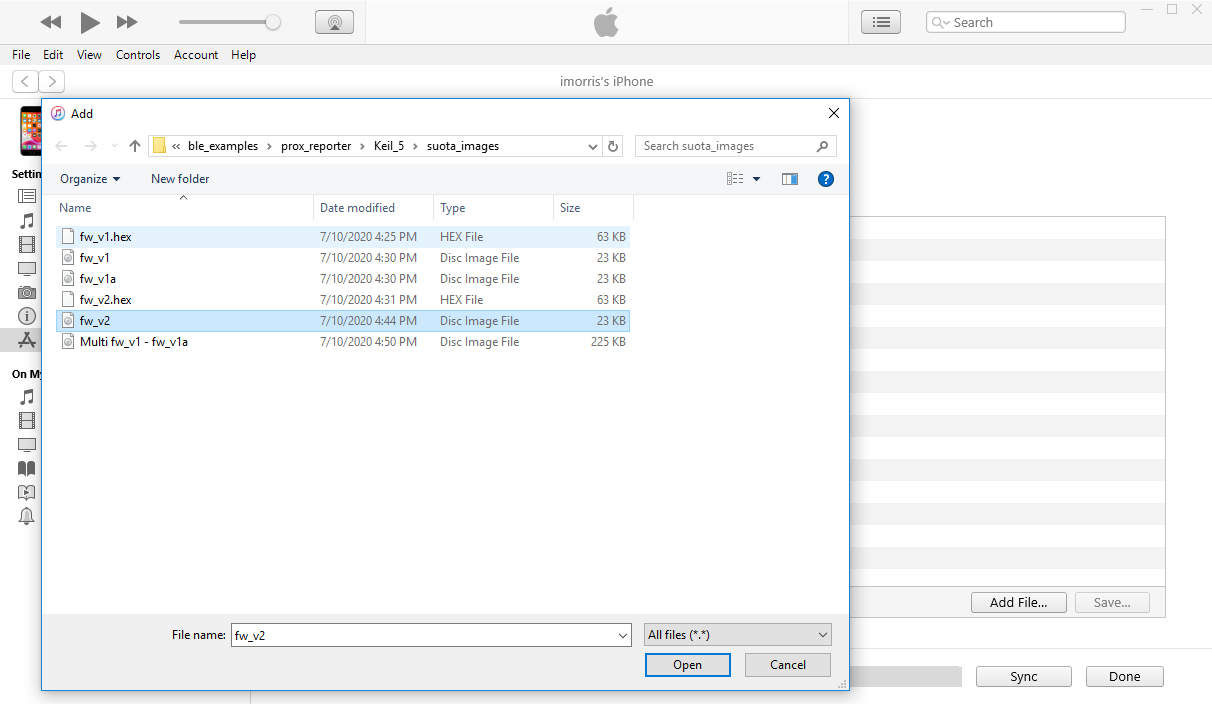
Figure 85 Add Application Image File
Press the “Done” button to downloaded the selected file to the SmartDevice.

Figure 86 Download Application Image File
We will now use the SUOTA App to updated the firmware running on the DA1453x or DA1458x5xx over-the-air.
Start the SUOTA App on the iOS based SmartDevice.
Figure 87 Start SUOTA App
You will see the DA1453x or DA1458x device adveritsing with the name DLG-PROXR, click on this device to connect.
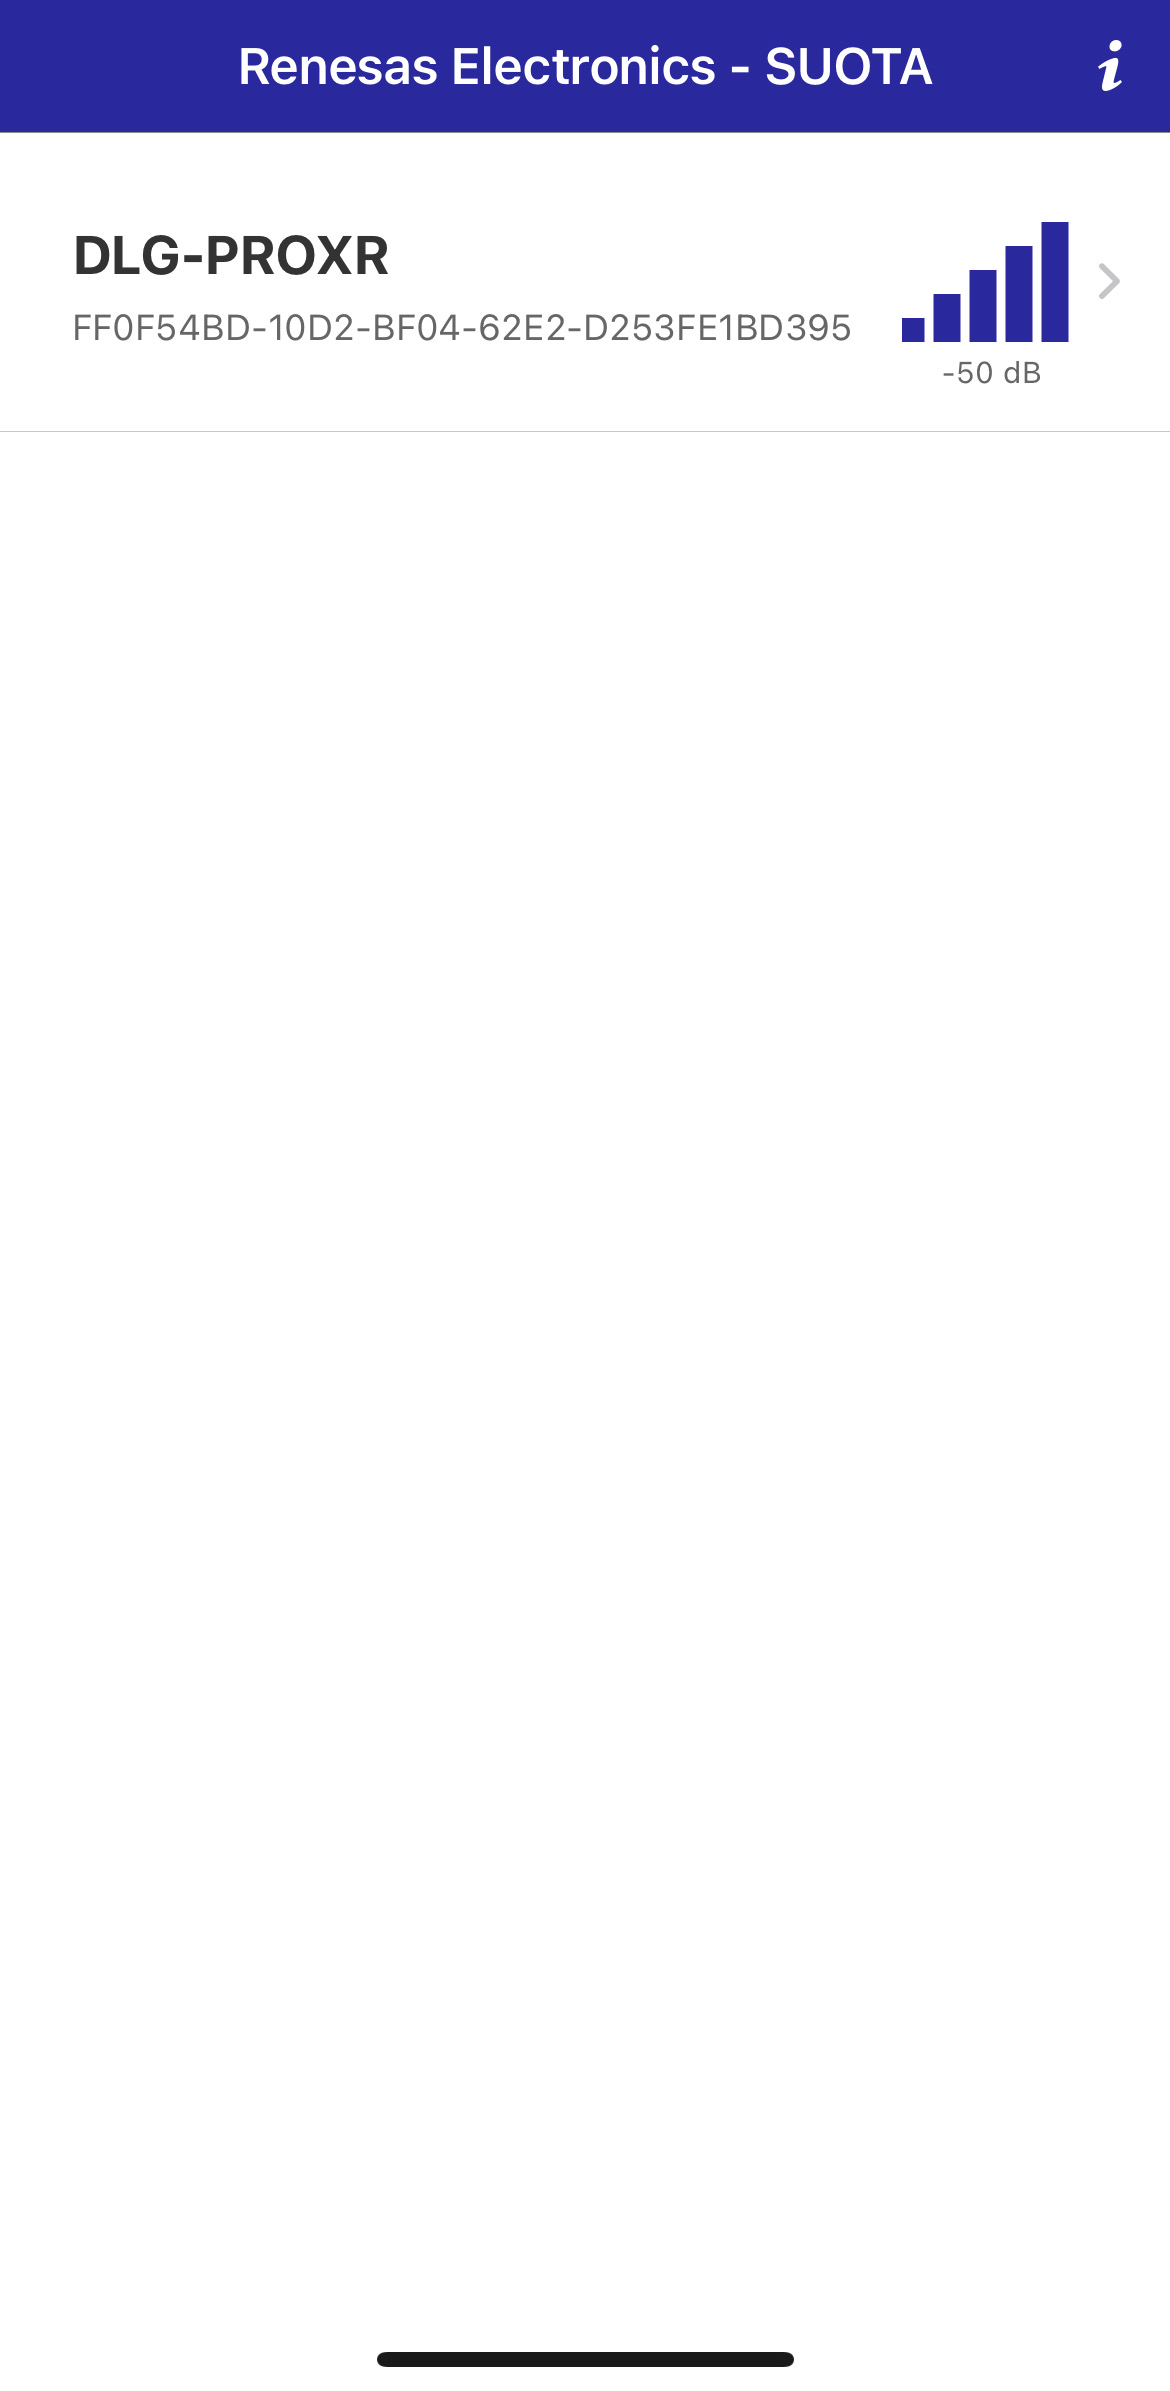
Figure 88 Connect to device
Once connected the contents of the Device Information Service will be displayed, note that the device is currently running version 1.0.0 of the application.
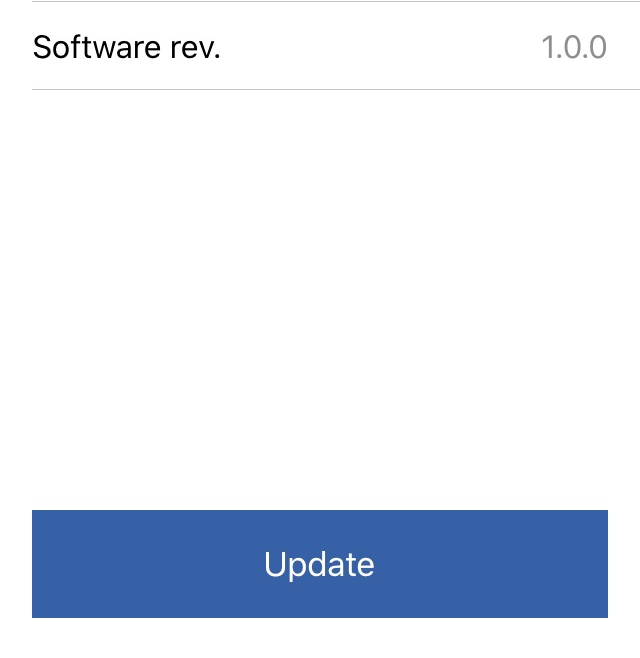
Figure 89 Review version number
Press the “Update” button to begin the process of downloading version 2.0.0 of the application image and select the
fw_v2.imgfile.
Figure 90 Start the update
Ensure that the interface to the non-voltaile memory matches that on your board. On all development kit boards the SPI interface is used to connect to external flash memory. The pins used to implement the SPI interface depend upon the board you are using:
- DA14531 or DA14535
MISO GPIO -
P0_3MOSI GPIO -
P0_0CS GPIO -
P0_1SCK GPIO -
P0_4
- DA14585
MISO GPIO -
P0_5MOSI GPIO -
P0_6CS GPIO -
P0_3SCK GPIO -
P0_0
Select the “Oldest” image bank and send press “Send to device” to start the update.
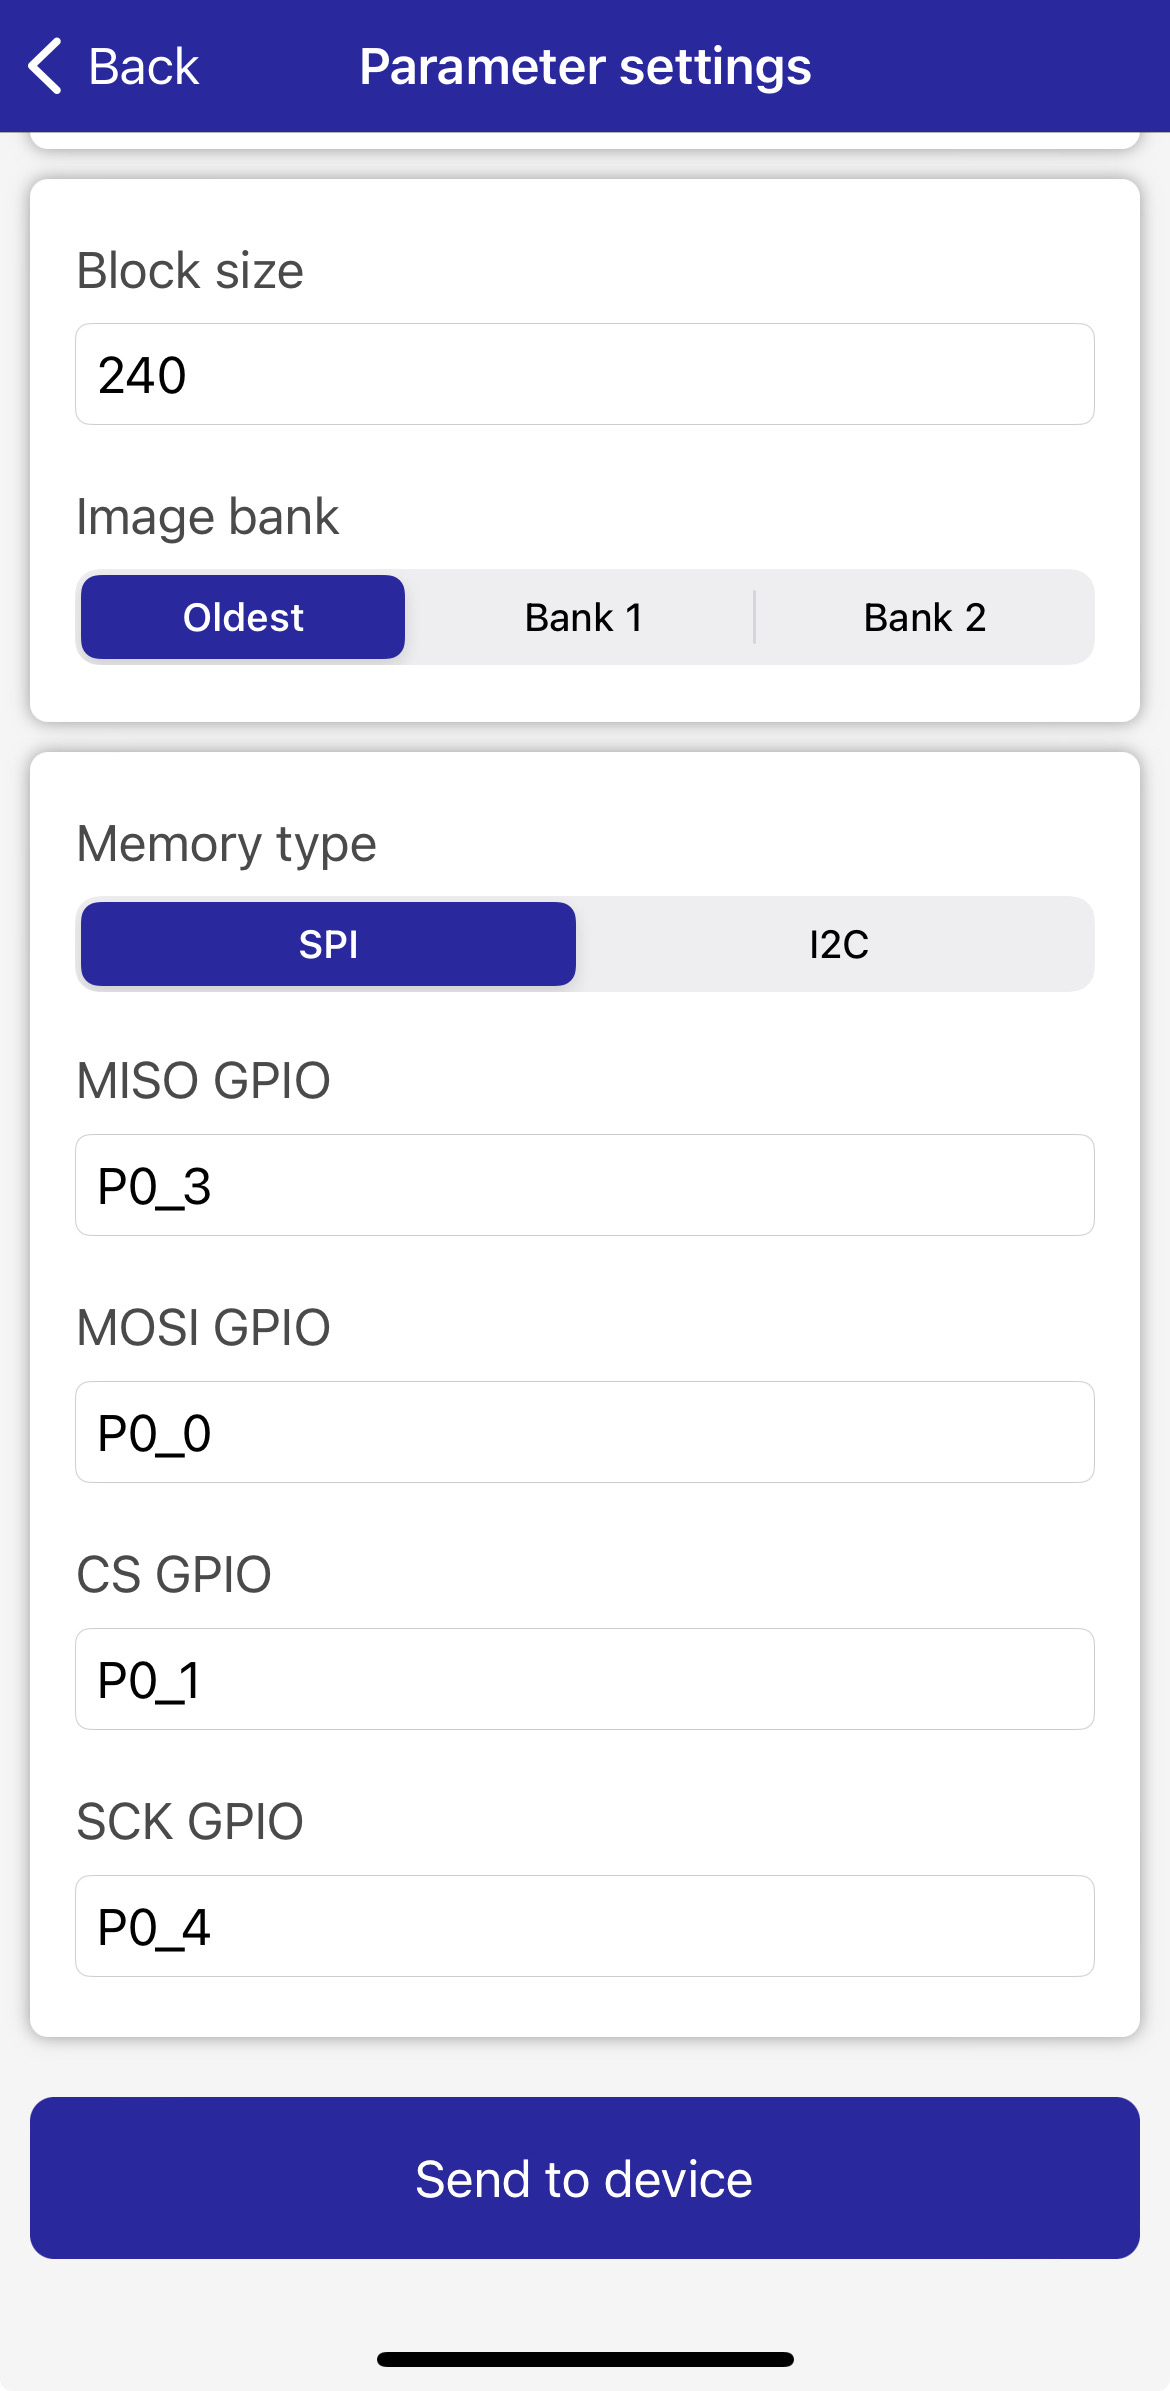
Figure 91 SUOTA Configuration
Update progress will be displayed.
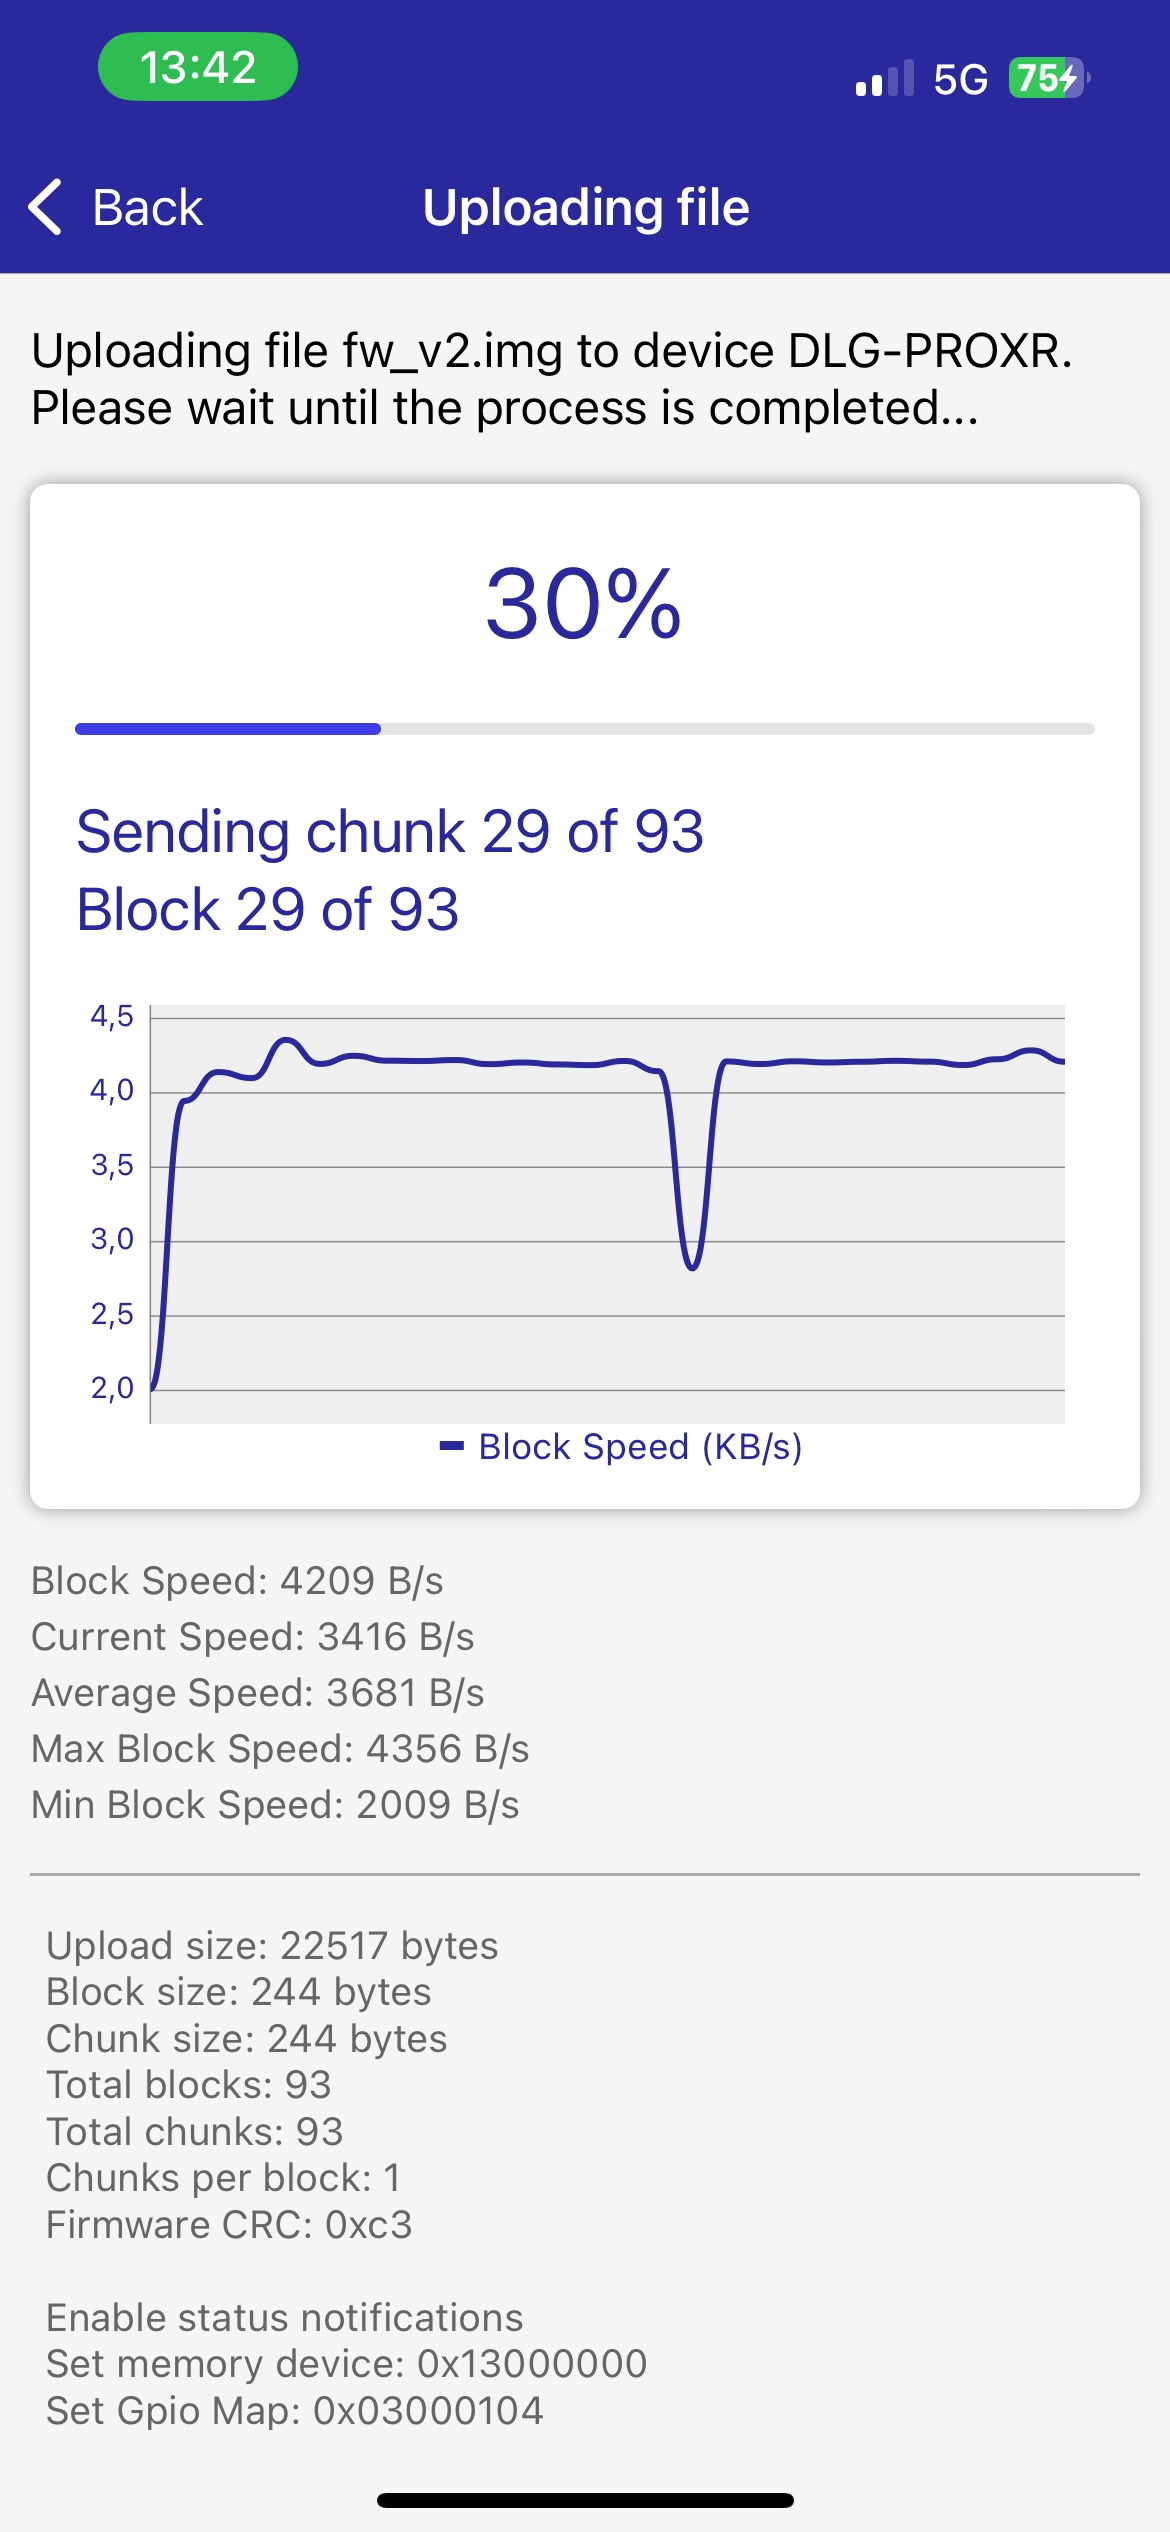
Figure 92 Update in progress
Once complete, you have the option to reboot the device. Select “Yes, reboot”, note that the device will only reboot once the SUOTA App has disconnected.
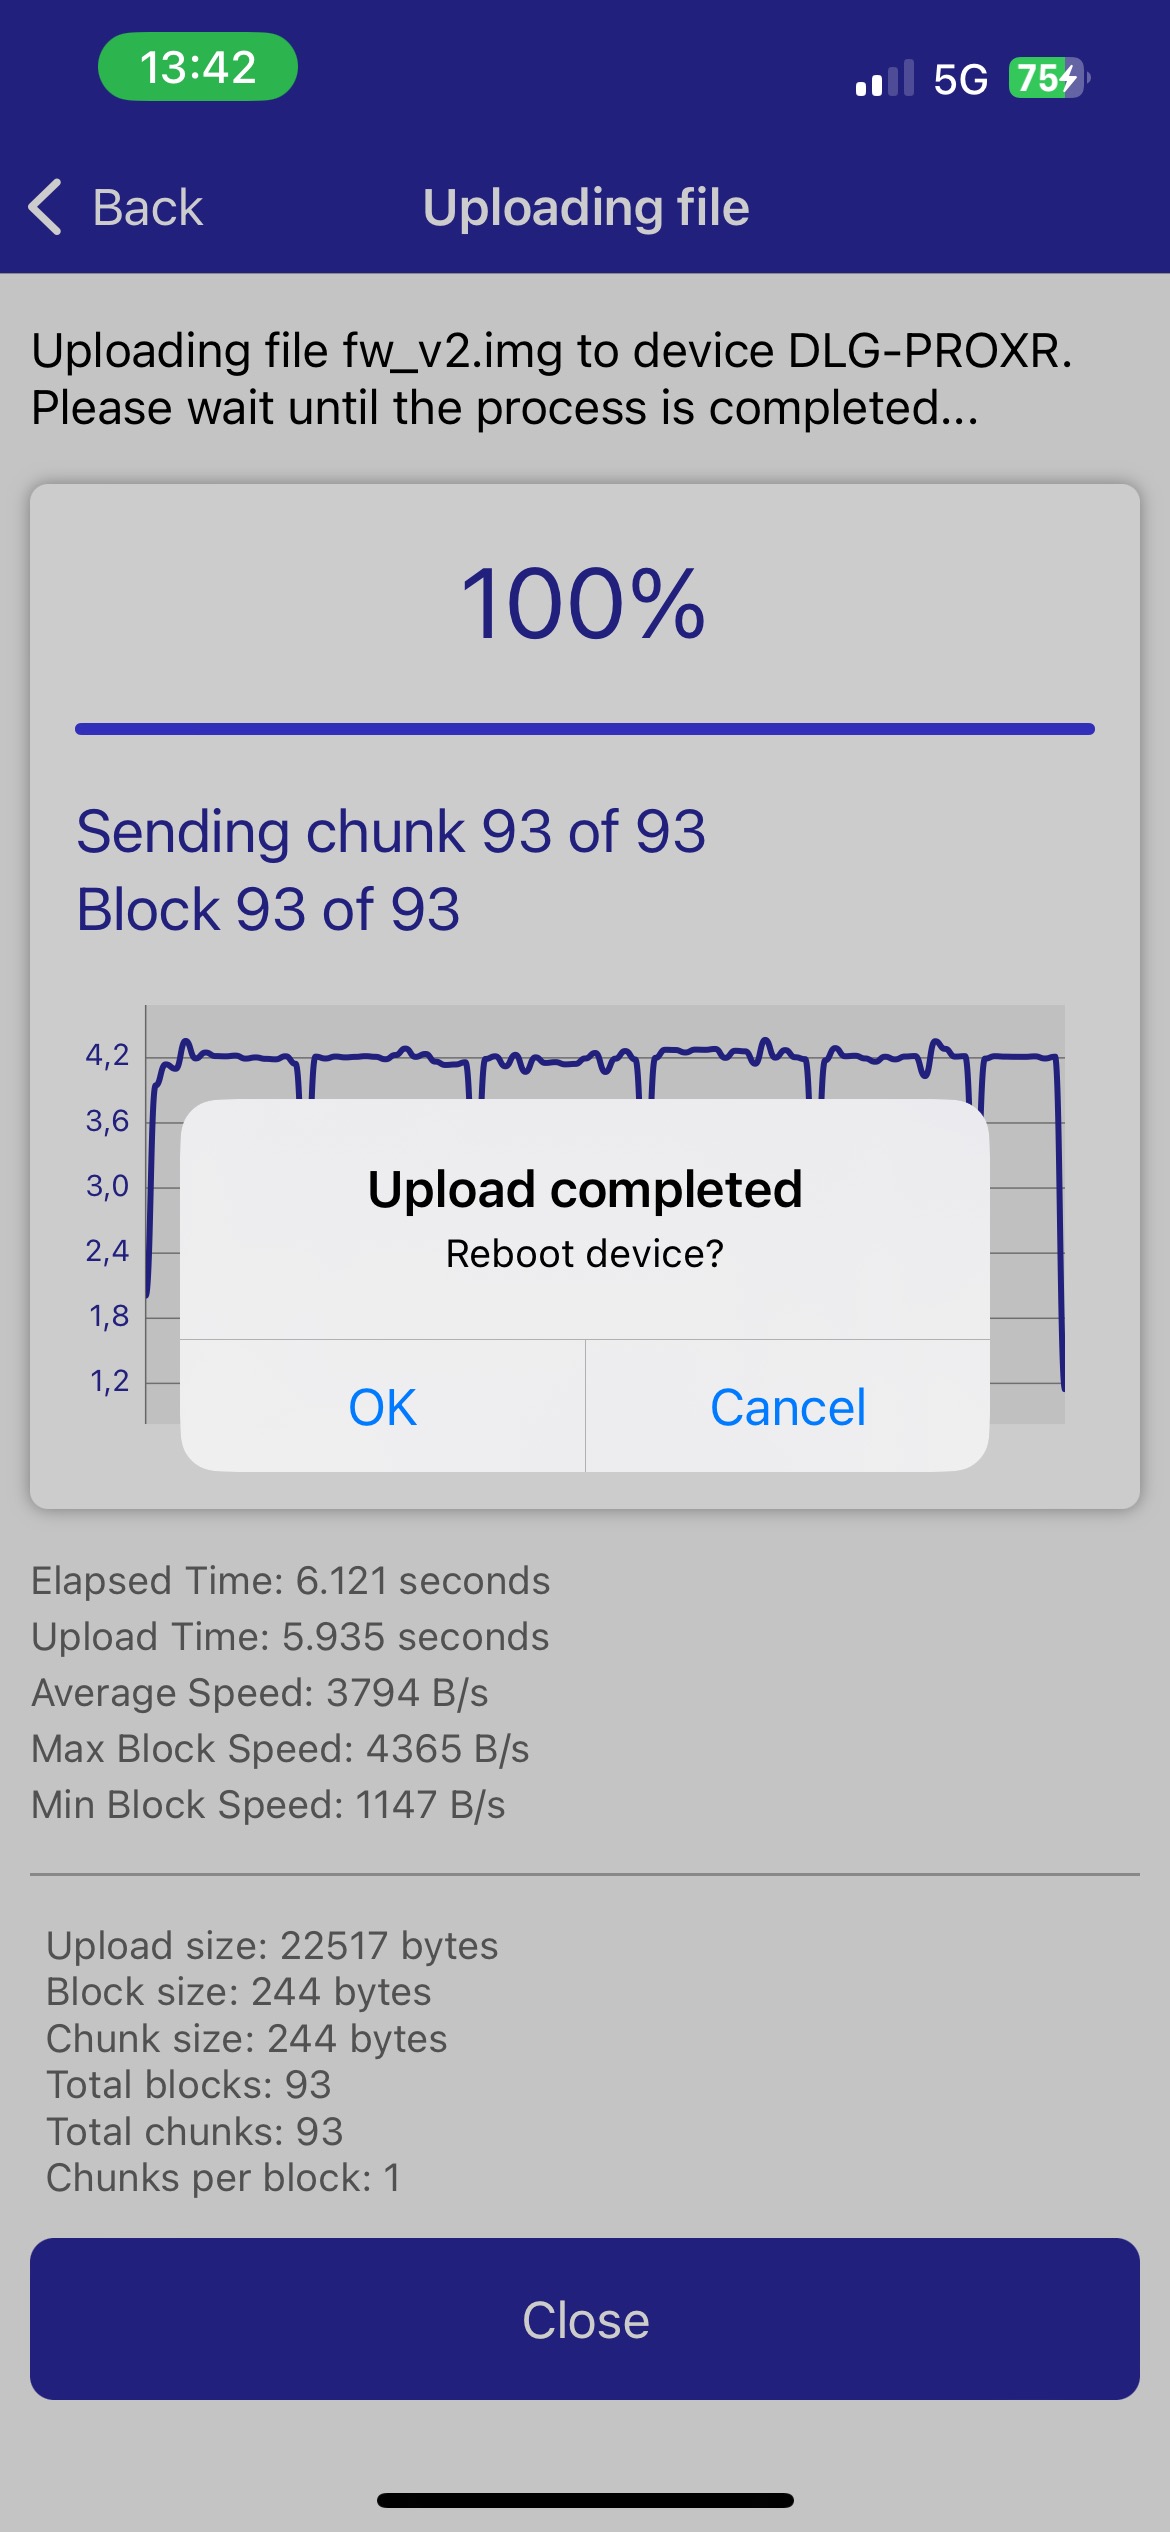
Figure 93 Update complete
The DA1453x or DA1458x45xx will now reboot, select it once again to confirm the update was successful.
Figure 94 Connect to updated device
Once again the contents of the Device Information Service will be displayed. This time note that the software revision number is 2.0.0, indicating the application image was updated to version 2.0.0.
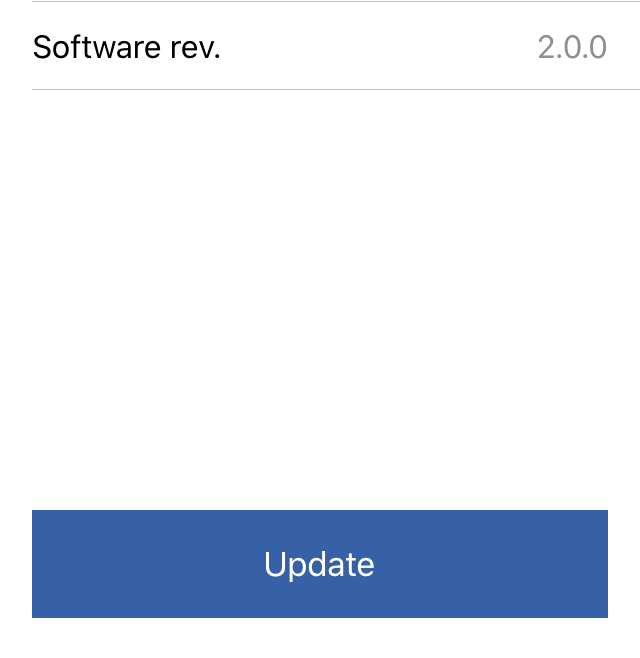
Figure 95 Review updated version number
24.6. SUOTA Technical Overview
New SUOTA features
The following enhancements improve SUOTA security and controlled firmware updates. Developers should carefully configure these settings based on their development and production needs.
24.6.1. Anti-Rollback Feature
A new anti-rollback feature has been introduced to enhance security by verifying the version of an incoming image and rejecting it if it is older than the currently running version.
This functionality is implemented through the new default SUOTA application handler function:
SUOTAR_IMG_VERSION_CHECK default_suotar_on_version_check(const uint8_t *cur_version, const uint8_t *new_version)
This function performs the following checks:
Ensures the incoming image version string adheres to the expected syntax, based on the firmware version format.
Verifies that the incoming image version is newer than the currently running version.
24.6.2. SUOTA Locking Feature
To prevent potential attacks, a new SUOTA locking feature has been added. This feature ensures that only one successful SUOTA session can occur per boot cycle, preventing attackers from downloading multiple malicious images in succession and potentially bricking the device.
To enable this feature, define:
#define SUOTAR_SECURE_LOCK_FEATURE (1)
This feature is enabled by default.
Once a SUOTA session ends, the device must be rebooted before initiating a new session. This forces the secondary bootloader to execute and validate the downloaded images. When SUOTA is locked, only the SUOTAR_REBOOT command is allowed.
24.6.3. SUOTA Auto Reboot Feature
A new auto reboot feature has been introduced, allowing the device to automatically reboot after a predefined time without waiting for a command from the phone.
To enable this feature, define:
#define SUOTAR_SECURE_AUTO_REBOOT_TIMEOUT_MS <timeout_value>
where <timeout_value> represents the auto-reboot timeout in milliseconds.
24.6.4. Bank Selection Restrictions
Before SDK 6.0.24, the SUOTA service application layer supported selecting which bank to write a new image. This functionality is now restricted to development and debugging purposes only.
For production environments, this feature should be disabled due to security risks.
Configuration:
#ifndef SUOTAR_ALLOW_BANK_SELECTION

#if DEVELOPMENT_DEBUG
#define SUOTAR_ALLOW_BANK_SELECTION (1)
#else
#define SUOTAR_ALLOW_BANK_SELECTION (0)
#endif // DEVELOPMENT_DEBUG

#endif // SUOTAR_ALLOW_BANK_SELECTION
24.6.5. SUOTA Same Image Error
system will reject an incoming image if the same version already exists in the flash:
#define SUOTAR_DO_NOT_ALLOW_SAME_IMAGE (1)
This prevents redundant firmware updates and helps maintain system integrity.