7. DA1459x Software Development Tools
7.1. Introduction
Renesas e²Studio is the Integrated Development Environment for Renesas embedded microcontrollers. e²studio is based on the industry-standard open-source Eclipse IDE framework and the C/C++ Development Tooling (CDT) project, covering build (editor, compiler, and linker control) and debug phases with an extended GNU Debug (GDB) interface support.
All Renesas BLE Development boards have an on-board J-Link debugger from SEGGER. This offers standard debug capabilities such as single stepping, setting breakpoints, software download and many more. For more details on the debugger capabilities, visit https://www.segger.com/.
7.2. System Requirements
Hardware Environment:
Processor: x64-based processor, at least 2GHz (support hyper-threading/multi-core CPU)
Main Memory: At least 4GB, recommended 8GB of free memory space.
Hard disk Capacity: At least 2GB of free space
Display: Resolution at least 1,024 x 768; at least 65,536 colors
Interface: USB 2.0 (High-speed/Full-speed). High-speed is recommended.
Supported OS: Windows 10 and Windows 11 (64-bit edition).
Supported OS: Ubuntu 20.04 LTS Desktop (64-bit version). Ubuntu 22.04 LTS Desktop (64-bit version)
Note
Supported features of Linux versions are different from Windows versions. Please refer to the Release Note for details.
7.3. Installation
e²studio Installation
The installation procedure outlined below is based on e² Studio 2023 Release. The same procedure applies to newer versions of e² Studio.
Download the Renesas e²studio (V2025-01 or newer) software from Renesas Website
Run the installation file.
In the Select Install Type page, select Custom Install, then click Next.
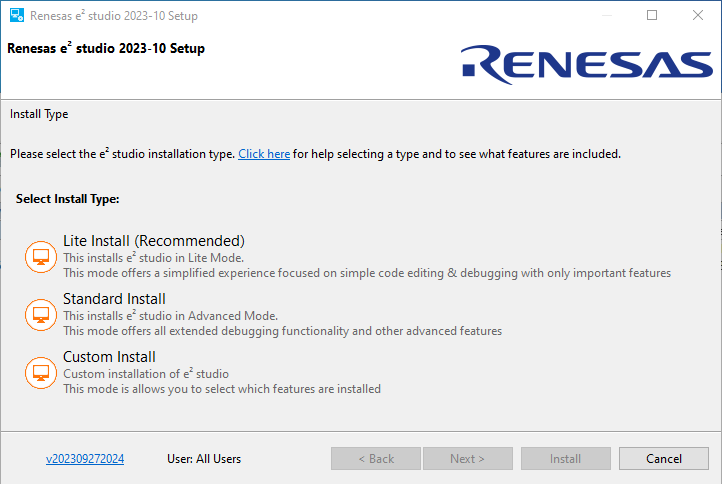
Figure 11 Installation - Select Install Type
In the Welcome page, you may use the default folder or change it by clicking [Change…]. Click Next to continue.
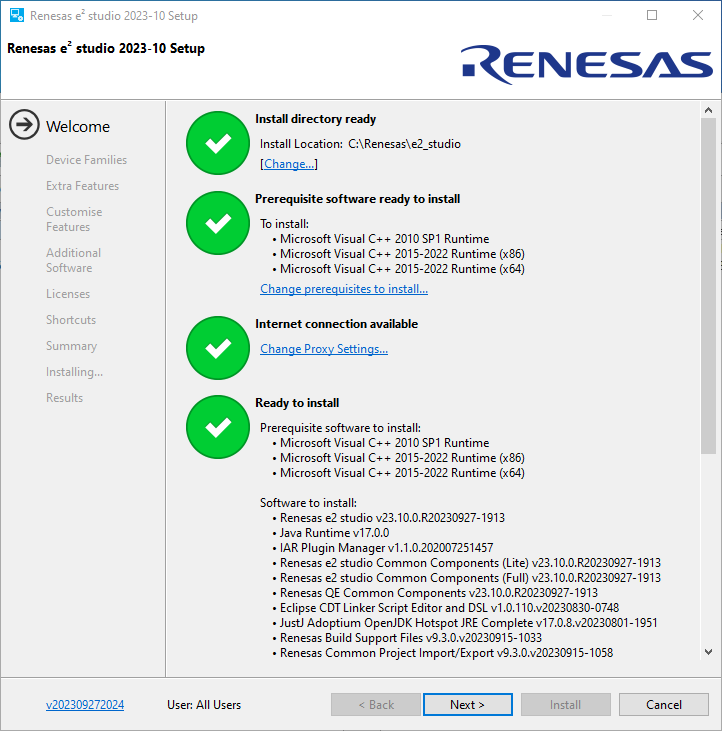
Figure 12 Installation - Welcome page
In the Device Families page choose DA (Dialog)
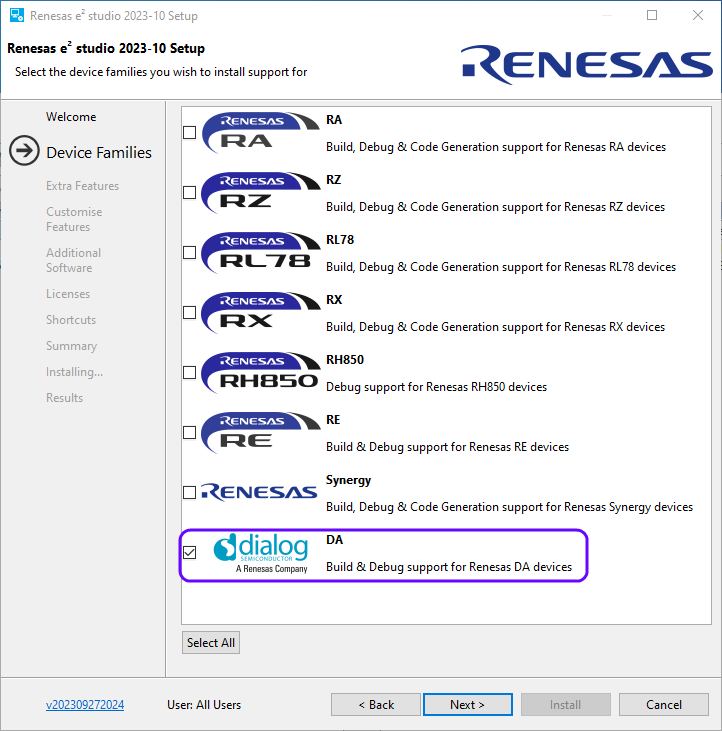
Figure 13 Installation - Device Families
In the Extra Features page, pick the extra features you like to install.
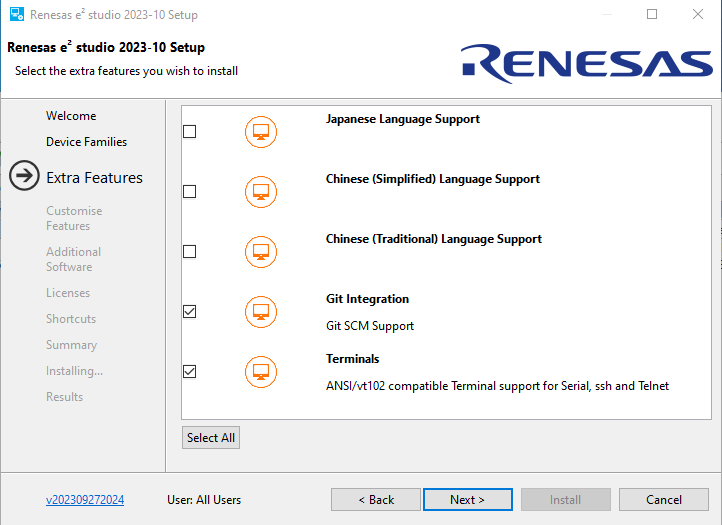
Figure 14 Installation - Extra Features
In the Customise Features choose (at least) the Common Components.

Figure 15 Installation - Customize Features
In the Additional Software page, select the GNU ARM Embedded 7.2.2017q4 to be installed, then click Next. This page is not shown if you selected Quick Install.
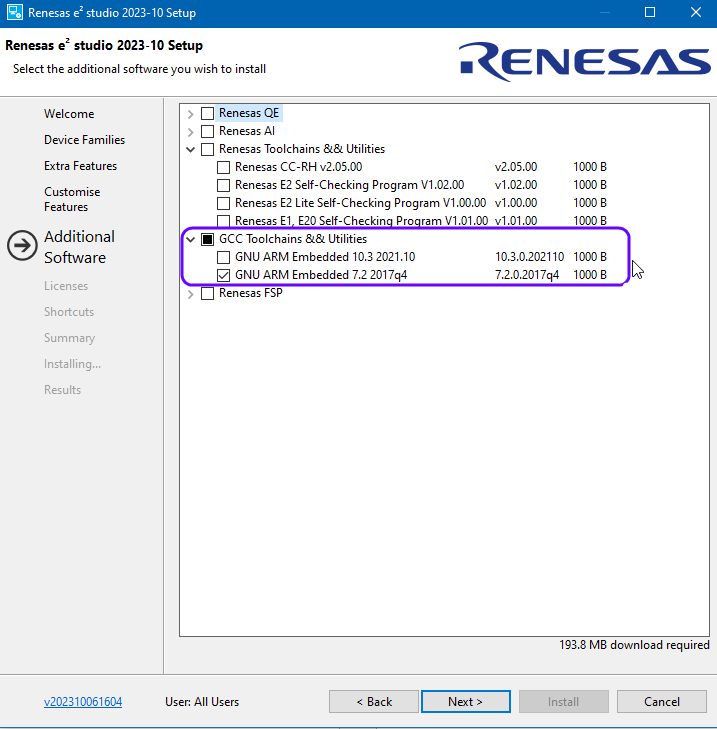
Figure 16 Installation - Additional Software
Note
If you have already installed e²Studio without GCC 7 tools, then please download and install the GCC 7 tools separately from github
Tick the checkbox to accept the license agreement, then click Next to continue.
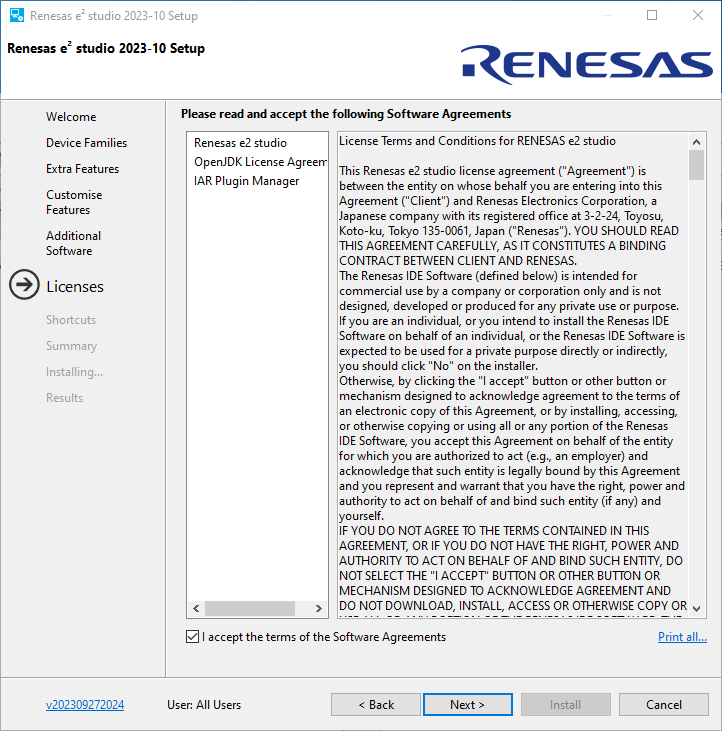
Figure 17 Installation - Software Agreements
In the Shortcuts page, select the shortcut name for the start menu and click Next button to continue.
Note
If you already have installed e²Studio in another location, renaming this installation is recommended to distinguish it from the other e²Studio(s).
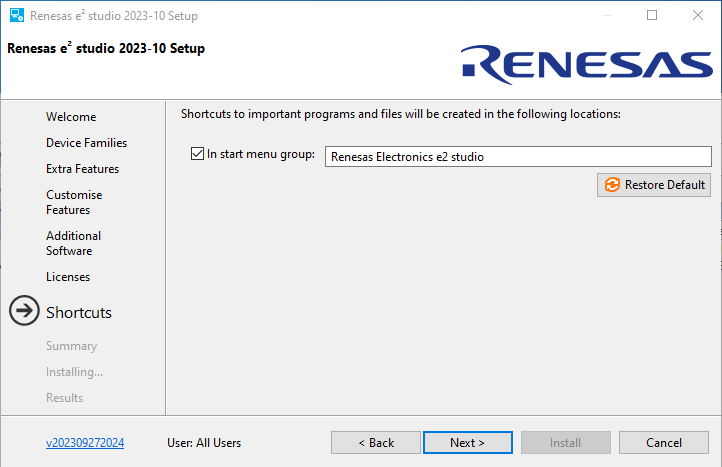
Figure 18 Installation - Shortcuts
Check the Summary and click Install to continue.
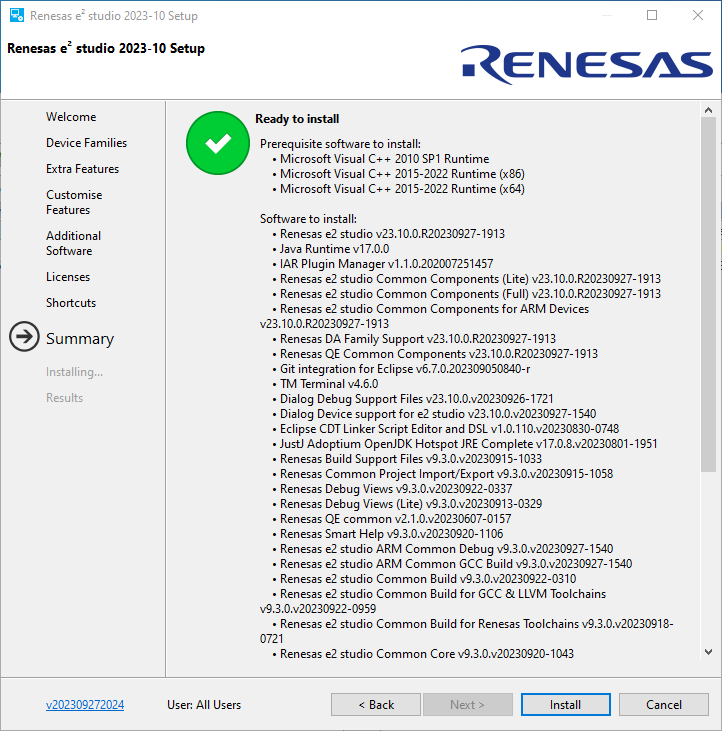
Figure 19 Installation - Summary
Installing… The installation starts. Depending on the items selected in the “Addition Software” dialog, new dialogs may open to proceed with the installation of these software packages.
When the installation completes the Results page is shown. Click OK to proceed.
7.4. DA1459x Software Development Kit (SDK)
After the installation of the e²Studio completes, you need to install the Smartbond™ DA1459x SDK. The Smartbond™ DA1459x SDK is used for application development using the DA1459x DEVKIT-PRO or custom hardware including the DA1459x SOC. The Smartbond™ DA1459x SDK includes a complete BLE Framework with a set of libraries, drivers, middleware modules and example projects which facilitate the creation of complex applications by fully exploiting the provided hardware resources of the connected DA1459x device. The Smartbond™ DA1459x SDK is based on the FreeRTOS operation system and supports execution-in-place (XIP) from internal eFLASH or external QSPI FLASH.
The Smartbond™ DA1459x SDK can be downloaded from Renesas Website and installed on your PC at any convenient location.
7.5. Additional Software
The SmartSnippets™ Toolbox, Figure 20, is focused on enabling the process of programming eFLASH and optimizing code for optimal power performance by allowing:
The re-programming of the eFLASH with the actual application compiled image.
An accurate examination of the power profile and the effects of any executed application software.
The seamless download and execution of a certain software image to RAM over UART.
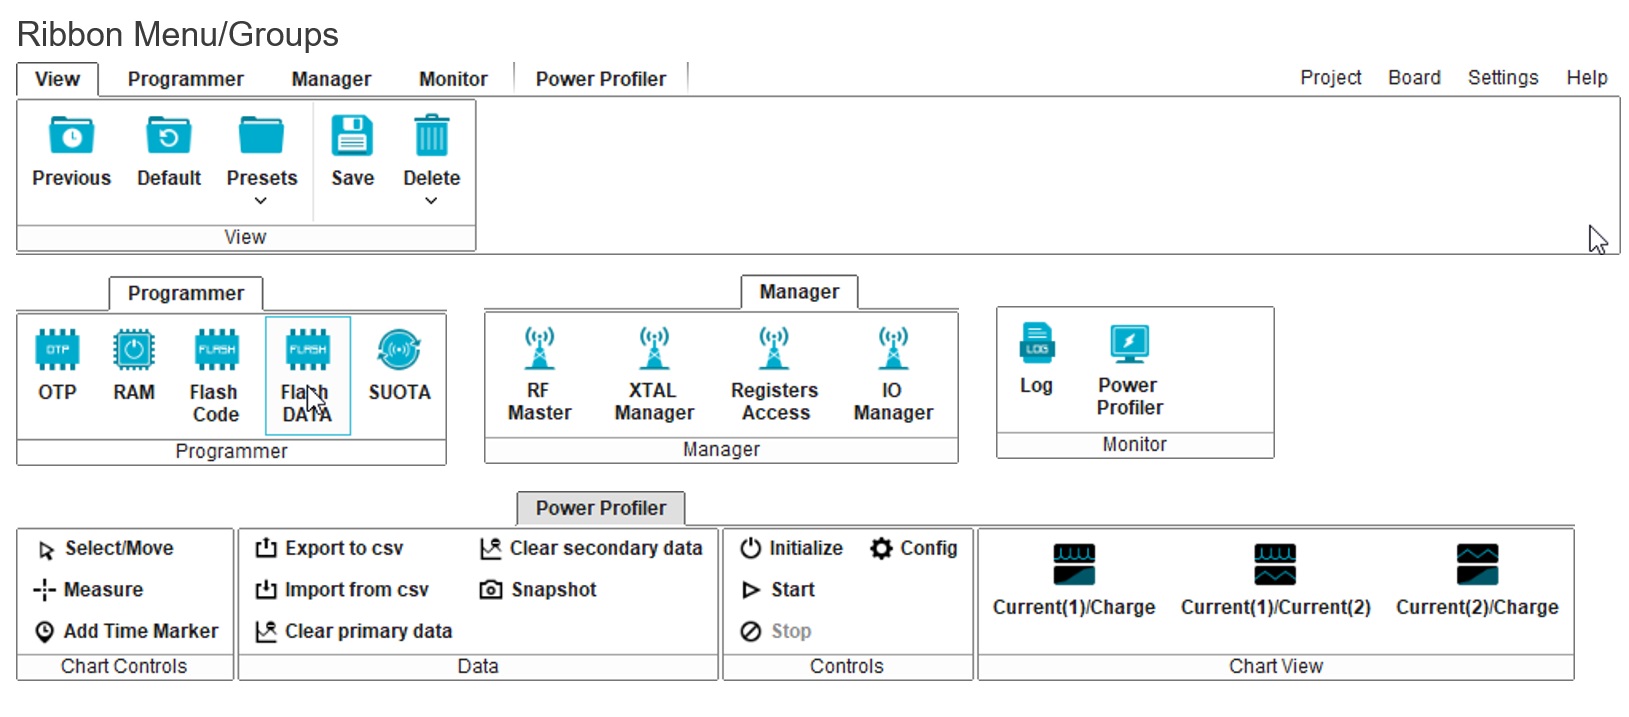
Figure 20 SmartSnippets™ Toolbox : Various Mode Views
SmartSnippets™ Toolbox is also supported by other utilities such as the Command Line Interface (CLI) Programmer. The CLI Programmer is a command line tool for programming the DA1459x family of devices. It allows erasing and programming the device eFLASH memory. This tool may be used both in development and on the production line. The CLI Programmer will be installed as an integrated part of the Smartbond™ DA1459x SDK.
The SmartSnippets™ Toolbox makes maximum use of the available features on the motherboard like the on board current sensing circuitry to allow developers of Bluetooth applications to work without expensive and bulky equipment such as a DC Power Analyzer. The tool provides full visibility on the chip activity, which is crucial in the development of ultra-low power wireless applications.
More information about the SmartSnippets™ Toolbox can be found in UM-B-083 SmartSnippets Toolbox User Manual