6. DA14592 Connecting The Board
This section describes the installation procedure for the drivers, the configuration of the serial port, and all necessary steps to verify the connection with the PC as well as solutions to any problems that may occur.
For proper evaluation and application development using the DA14592 SoC and the USB-DEVKIT an external host is required. This external host must have an operating system already installed (Windows or Linux) and USB ports as described in Prerequisites.Then you can connect the USB-DEVKIT to the host PC as shown in USB-DEVKIT connection
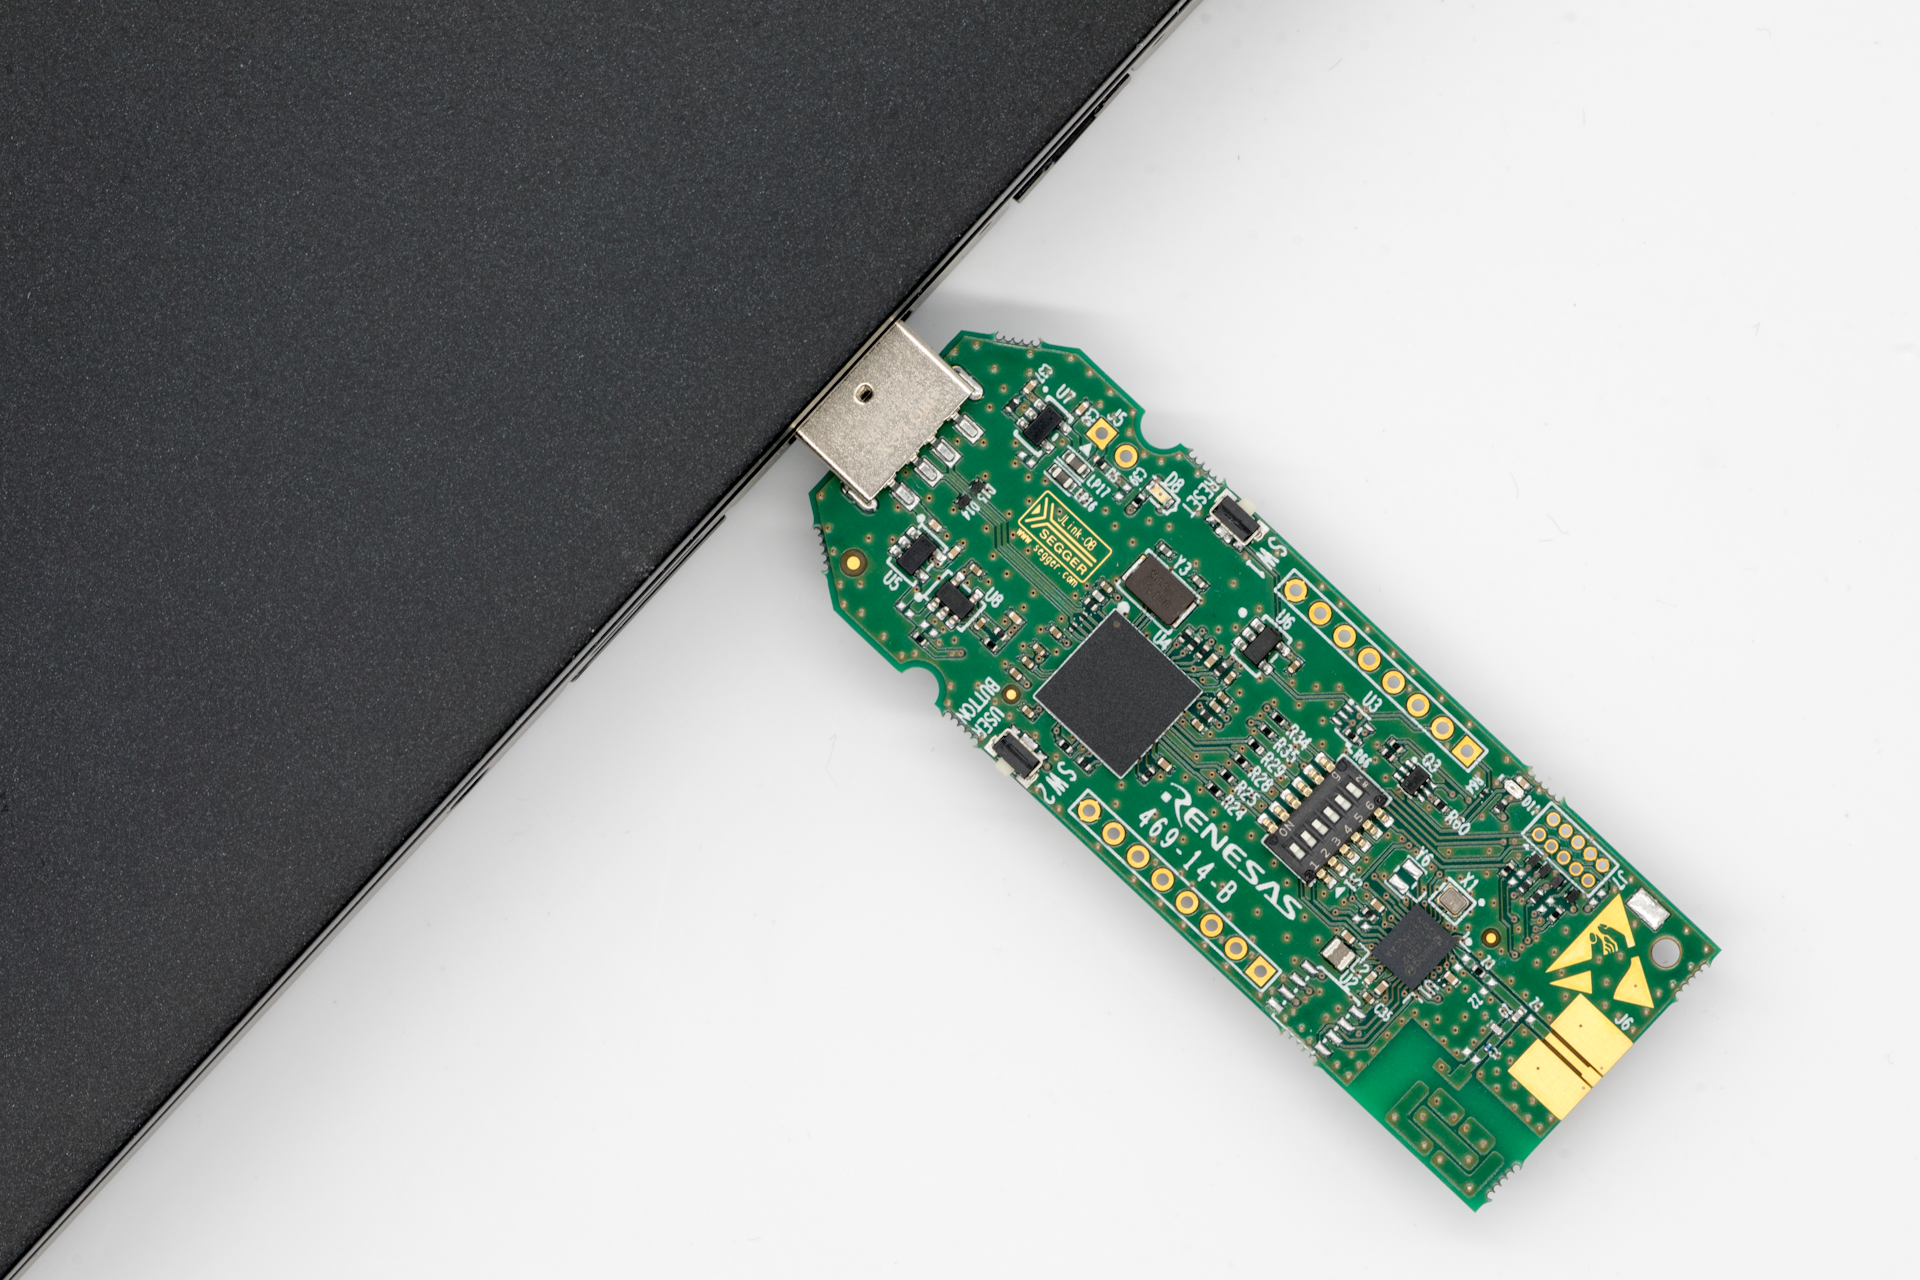
Figure 2 USB-DEVKIT connection
6.1. Microsoft Windows
On first connection to a host PC running Microsoft Windows, the system will detect several devices and will automatically install all necessary drivers. When the driver installation is complete, the system displays a Microsoft window similar to the one presented in Figure 3.
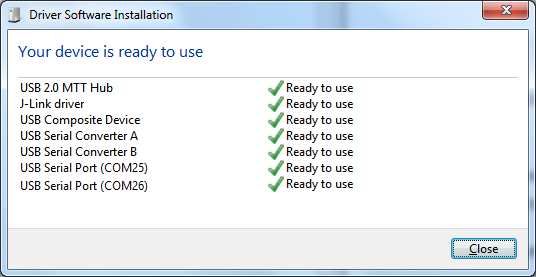
Figure 3 Windows driver installation
There is one virtual COM ports created by the Windows driver. The COM port provides a UART interface between the PC and the DA14592 device.
Note
The COM port assigned to the USB-DEVKIT motherboard might be different than the one shown in Figure 3.
The COM port number can be found in the Windows Device Manager (Control Panel>Device Manager>Ports(COM & LPT)) as shown in Figure 4.
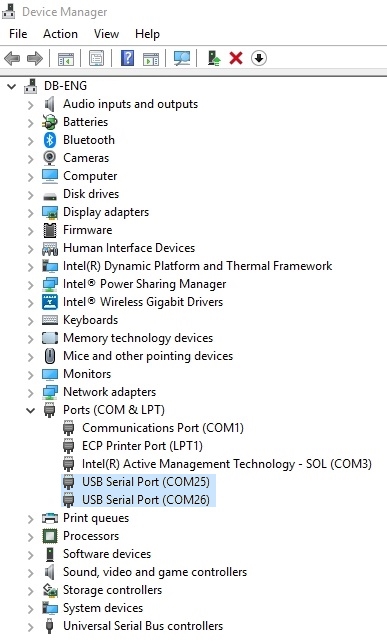
Figure 4 Device Manager Ports
6.1.1. Windows Host
On a Windows Host the utility Tera Term can be used to fully validate the connection to the USB-DEVKIT.
Tera Term is a free software terminal emulator (communication program) which supports multiple communication protocols, including Serial port connections. Download Teraterm from https://ttssh2.osdn.jp. Run the teraterm-x.yy.exe and follow the installation wizard.
To make sure that the communication between the USB-DEVKIT board and the development host is properly established.it is necessary to verify the UART connection between the two nodes.
- To do so, execute the following steps:
Step 1 Connect the USB-DEVKIT to the PC (see section : Figure 1).
Step 2 Verify that the host discovered the serial port (see section Section 6.1).
Step 3 Open Tera Term from the Windows Start menu.
Step 4 In the Tera Term: New connection dialog, select Serial, then select the COM Port to use, and click OK.
Step 5 Select Setup > Serial Port as shown in Figure 5 and configure your UART port using the parameters as shown in Table 1.
Table 1 Parameters for connecting to UART2 Settings
Values
Baud rate
115200
Data bits
8
Parity
None
Stop bits
1
Handshaking
None
Step 6 Open the COM port number assigned to the USB-DEVKIT, refer to Figure 4 to figure out which port number is used by Windows by running the Windows Device Manager. Make sure that the UART is configured as shown in the Table 1.
Step 7 Press the reset button on the USB-DEVKIT (Figure 1)
Step 8 Once you have a connection, you should start to see something as shown in Figure 5.
Besides the ‘Proximity Reporter’ text will display the device’s unique Bluetooth address and the alert status. The LED on the daughterboard will blink with a very low frequency and the system starts advertising as’Renesas PX Reporter’
Warning
To get the control of the COM port You need to be an administrator on your local machine.
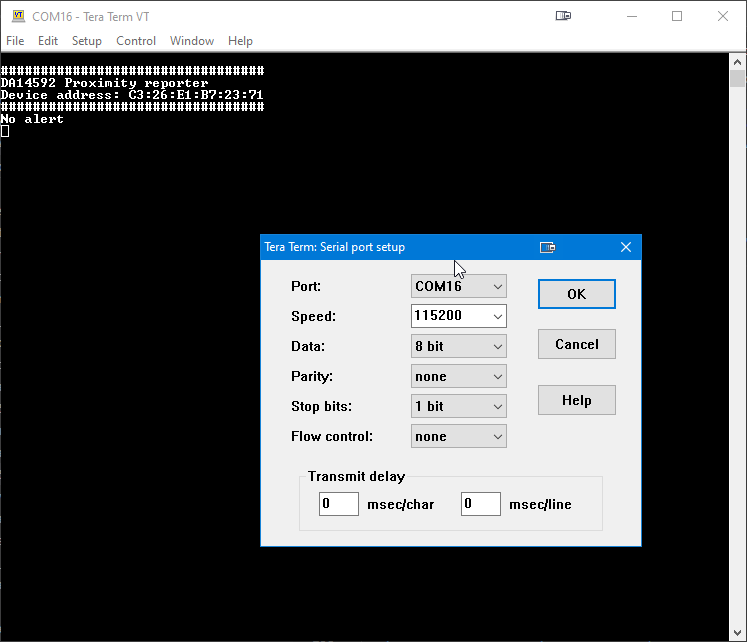
Figure 5 Terminal output via Tera Term (Windows)
6.2. Linux
When USB-DEVKIT is connected to a host PC running a Linux distribution (such as Ubuntu or CentOS)
and has Internet connectivity, the system will detect several devices and all necessary drivers
will be silently installed. Provided that the process has properly finished, an additional
devices will appear in the /dev directory under the name ttyUSB0 , as
shown in Figure 6. These names might be different in case other serial
converters are connected to the system beforehand. If no other serial port converters are
connected, the device that should be used with the terminal or programmer utility will be
called /dev/ttyUSB0. If there are more devices with the name ttyUSBx note which ones
showed up when the USB-DEVKIT was connected.

Figure 6 Ports assigned to USB-DEVKIT
COM port usage:
One virtual COM port is created by the driver with either Windows or Linux.
The COM port is used to export a UART from the DA14592 device.
In the previous sections this was either COM25 or /dev/ttyUSB0.
6.2.1. Linux Host
Under Linux there is a simpler approach to validate the connection using
a basic terminal such as putty. Connect putty to /dev/ttyUSB0 at 115200
baud using this linux command sudo putty /dev/ttyUSB0 -serial -sercfg 115200,8,n,1,N
or run putty as shown in Figure 7
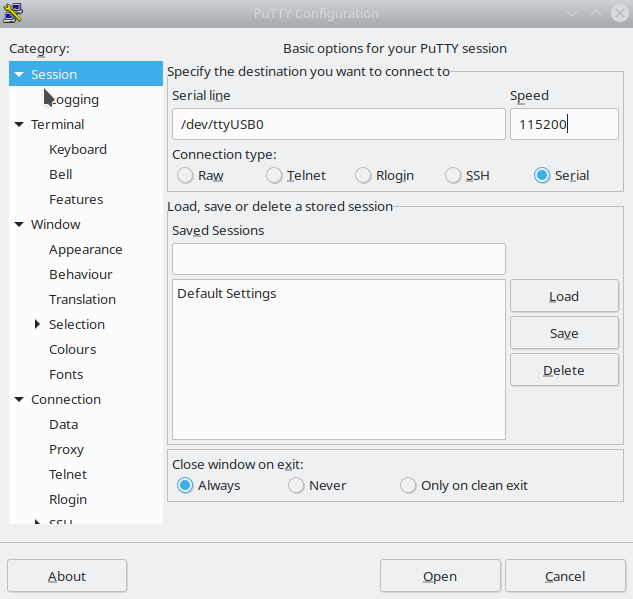
Figure 7 Setting port and testing connectivity in Linux
Once you have a connection, you should start to see something as shown in Figure 5.
6.3. Troubleshooting
- If there are any problems with the USB-DEVKIT connection to PC some possible solutions might be:
Make sure that the Host PC is connected to Internet
Make sure that no old FTDI drivers are installed. Drivers are available from the FTDI website.
Connect the two elements using a different USB port on the host PC
Note
If none of these actions resolved the issue, please contact Renesas Engineering Community.