2. Creating a New Project
This section describes how to import a project containing source code and start working with a custom one.
There are two ways to start working with a custom project, either import an existing sample design and make all the necessary changes after copying it or build a new one from the scratch. Since the latter is time consuming and out of the scope of this tutorial, only the first process is demonstrated.
2.1. Importing a Project
To import a project:
On the e2 studio Welcome page, click File (1.1) and then Import (1.2). (It’s possible that the Welcome page is not shown but instead the IDE (C/C++) is shown. Also click on File on the top bar).

Figure 1 Initial Welcome Screen
In the pop-up window double click General (2.1) and double click on Dialog SDK Project (2.1)
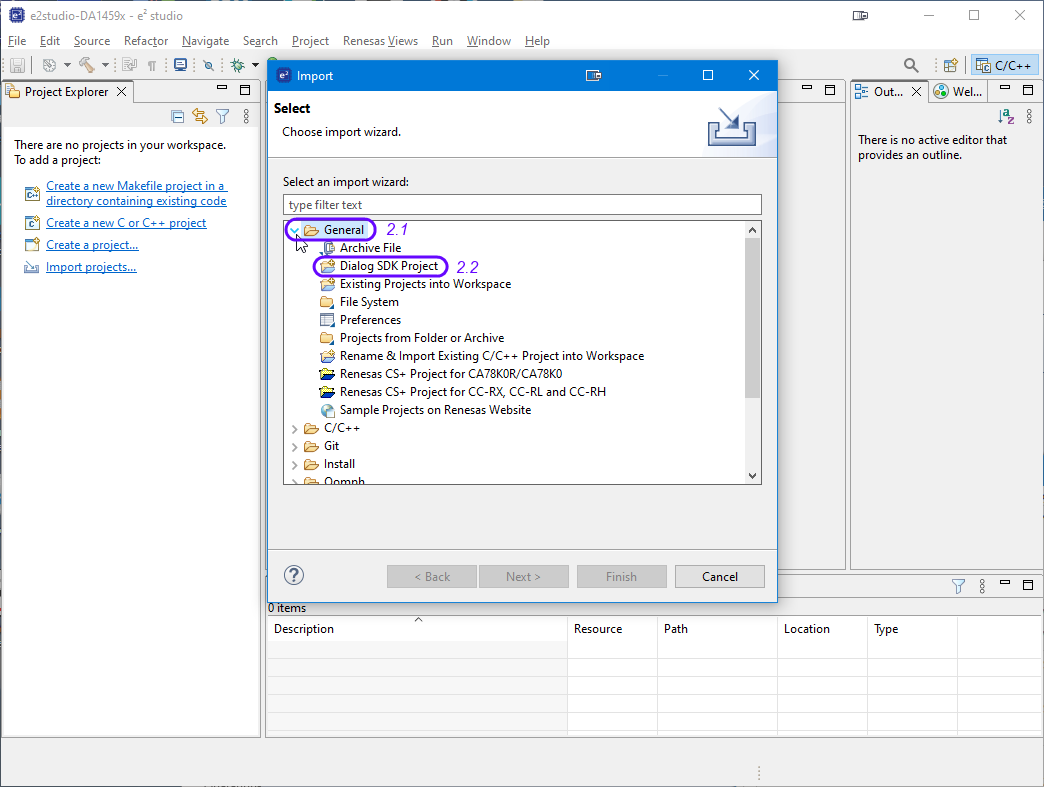
Figure 2 Import SDK project
In the pop-up window, click Browse and select your workspace directory.
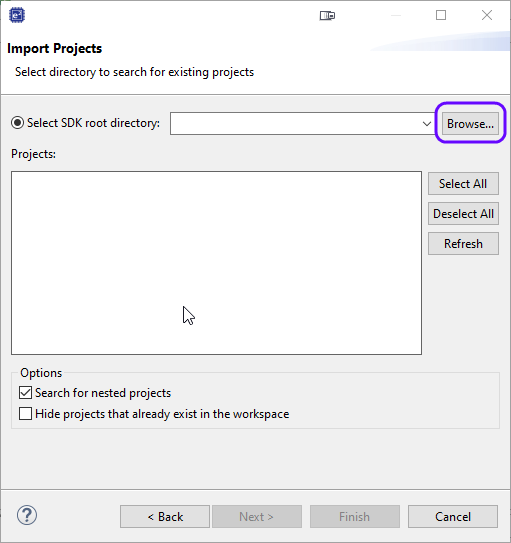
Figure 3 Select SDK Folder
The final step is to select the preferred project(s) to import.
Select the desired projects (freertos_retarget and python_scripts) by clicking on the respective tick boxes. Click Next.
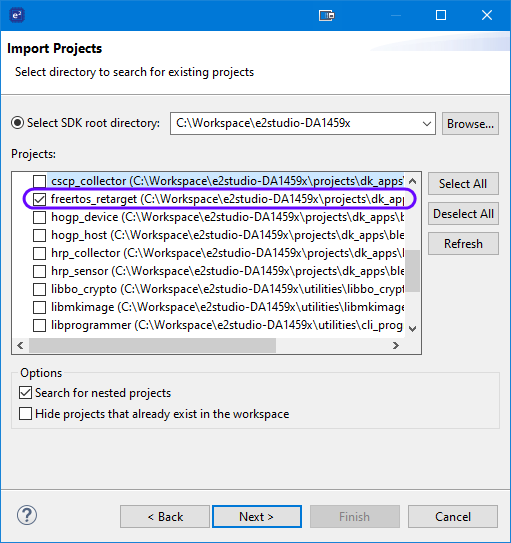
Figure 4 Project Selection
Most certainly a pop-up window will apear to select a target device.
Click on the 3 dots … (6.1) and
Select DA14592 or DA14594 as target device (6.2).
Click OK and Finish in the respective windows.
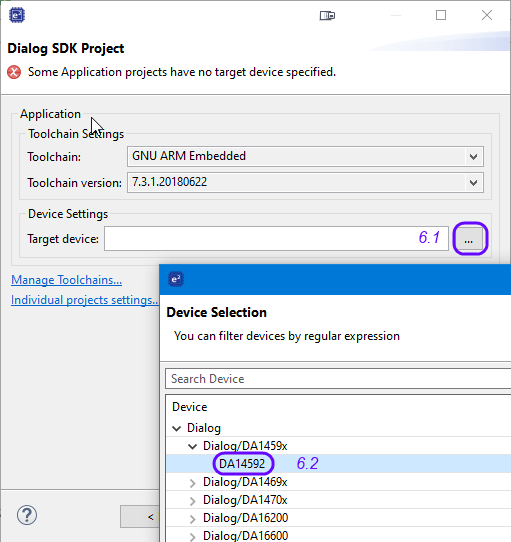
Figure 5 Target Selection
Note
At this stage, you can also choose the DA14594 as the target device.
Now you are ready to start working with the project.
2.2. Copying a Demo Project
As mentioned in previous section, there are two phases to start working with a custom project. The first stage is to import a demo project from Renesas’ SDK and the second is to copy it and make all the required changes. The recommended way to copy sample code is:
Right-click on the imported sample code folder and select Copy.
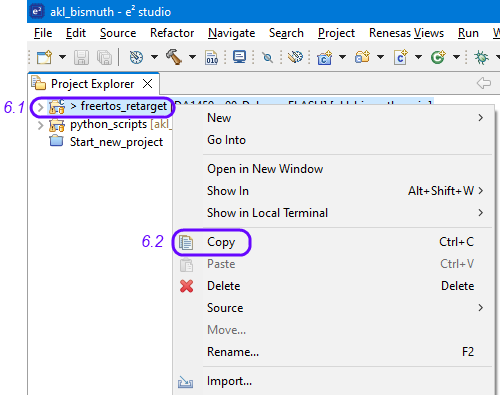
Figure 6 First Step to Copy a Project
Right-click on a blank area (in the Project Explorer) and select Paste. In the Copy Project window, enter a Project name (7.1) and uncheck Use default location (7.2). Browse… for a location to store the new project (7.3).
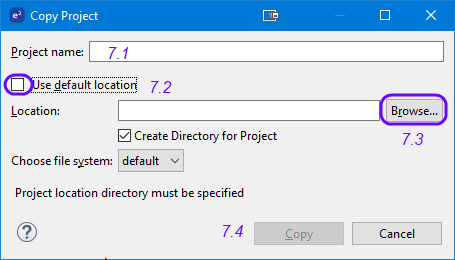
Figure 7 Second Step to Copy a Project
In the Browse For Folder window, select the location where the new project will be stored (8.1). It is recommended to select one of the folders under which the various sample codes are stored in the SDK (for example,
<sdk_folder>/projects/dk_apps/<imported_project_location>). Create a new folder by clicking on New Folder (8.2) and entering a folder name (8.3). Click Select Folder (8.4).
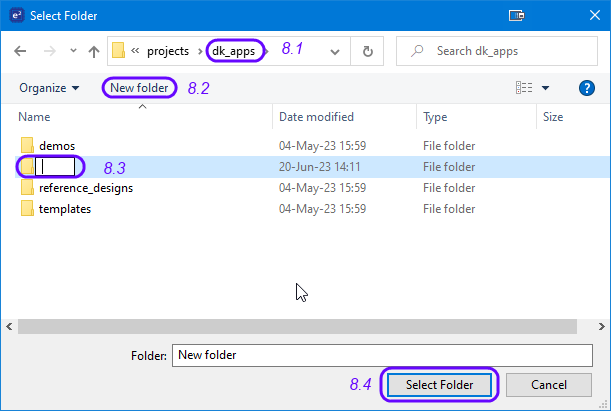
Figure 8 Third Step to Copy a Project
Click Copy in the Copy Project window (7.4). The newly copied project will be displayed in Project Explorer below the imported project.
Note
The new project must remain at the same hierarchical depth as the source project as some of the environment variables rely on the relative path. If the user fails to keep the depth consistent, the project will fail to compile.
2.3. Adding a New Folder/File to the Project
To add a new folder to your project, select File > New > Folder or right click on the new project (9.1).
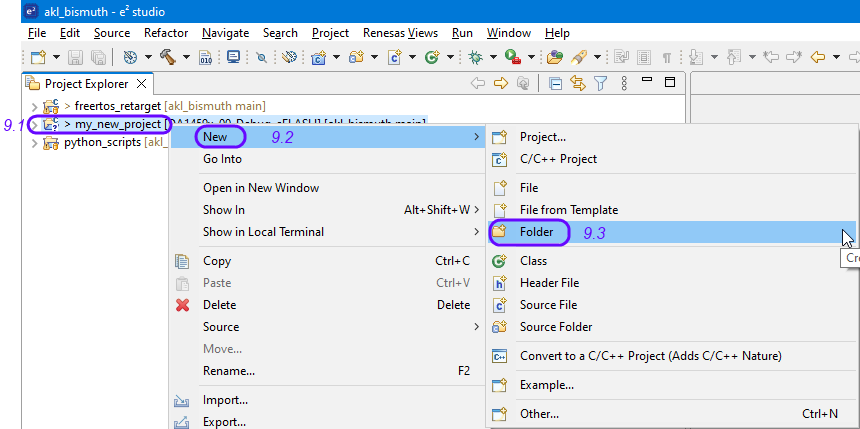
Figure 9 Select New Folder Menu
In the New Folder window, select the path under which the new folder will be added (10.1), enter the Folder name (10.2), and click Finish (10.3). The new folder will be displayed.
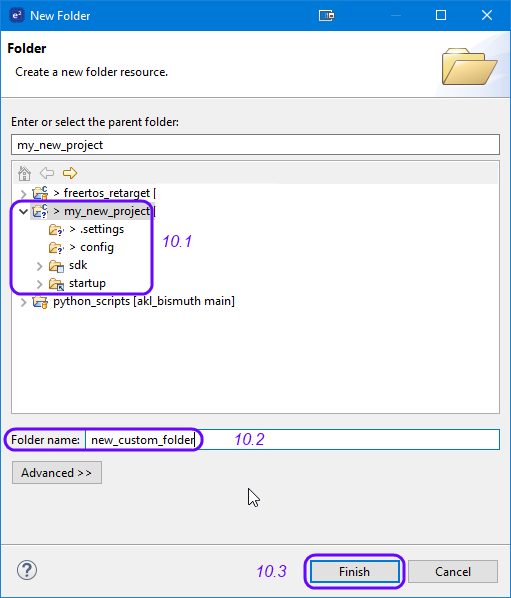
Figure 10 Select Parent Folder, Input New Name
Use the same procedure to define new source and header files (at step 1.3 select either Source File or Header File respectively, instead of selecting Folder). In this case, the preferred names (step 2.2) should end with a .c or .h suffix respectively (for example,
source.corheader.h).Every newly created folder must be placed inside the project’s path, in a folder that is in the compiler’s include path. To do this, select
Project > Properties > C/C++ Build > Settings > Tool Settings > Cross ARM C Compiler > Includesand click on the Add… icon (11.6).

Figure 11 Add the New Folder to the Include Search Path
In the Add directory path window, click Workspace… (12.1) and specify the path of the newly created folder/file. It will be displayed in the Directory section. Click OK (12.3) and then click OK in the previously opened window (12.4).

Figure 12 Input New Folder Name