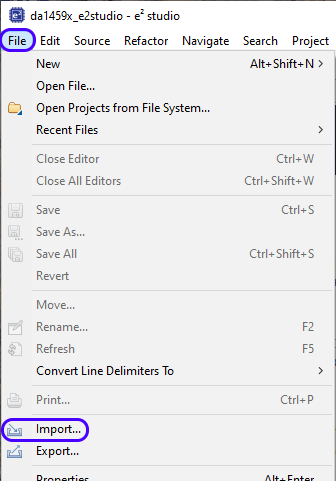
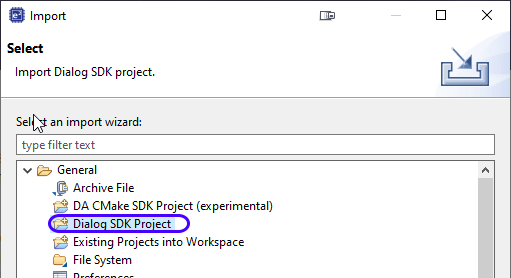
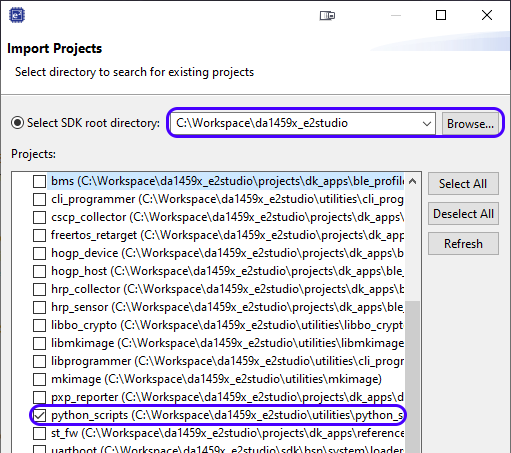
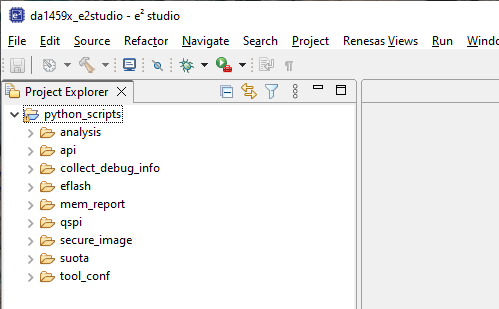
All functionality related to the secure boot feature can be found in the python_scripts subdirectory of the DA1459x SDK. This project contains a couple of scripts which can be executed either directly via a terminal or from e²Studio. In this tutorial the latter option is demonstrated.
Note
This step is not required if scripts are executed externally via a terminal/command line.
To avoid any misconfigurations it is highly recommended to work with the external tools as provided in e²Studio.
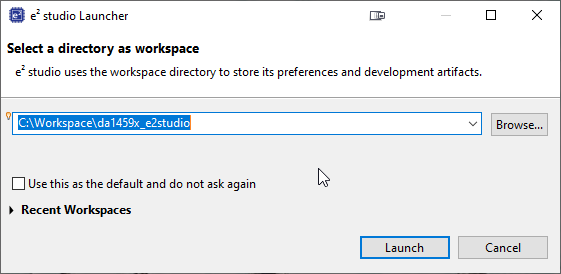
Open the e²Studio and in the Launcher browse to your workspace directory and click launch:
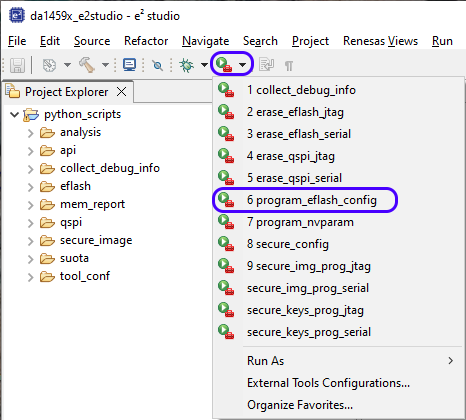
The Console window will show a couple of questions regarding the eFlash configuration. Please provide the following options:
Product ID: DA1459x-00
Flash Configuration: EFLASH
active FW image address: 0x2000 (default) or another specified address.
update FW image address: 0x2000 (default) or another specified address.
Note
If the configuration file already exists, the current Product Header settings will be displayed. Select either (C)hange or (K)eep to change or keep the current configuration values.
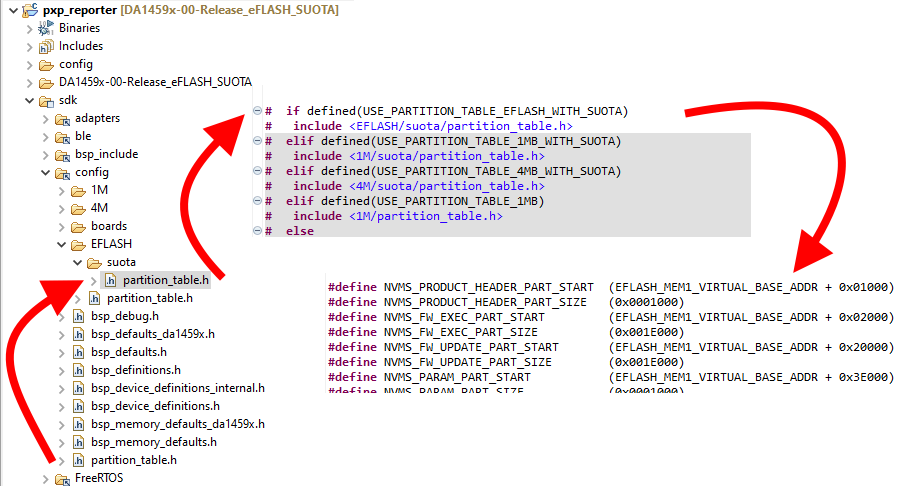
To find where the active_image_address is located, go to sdk//config//partition_table.h check which partition table file is utilized. Open the corresponding file and check the value of NVMS_FW_EXEC_PART_START.
Even if the project has SUOTA functionality enabled, both the active_image_address and the update_image_address are set to the same value.
Upon execution, the program_eflash.xml file will be generated in the directory ../utilities/python_scripts/eflash and the following log message will be printed out:
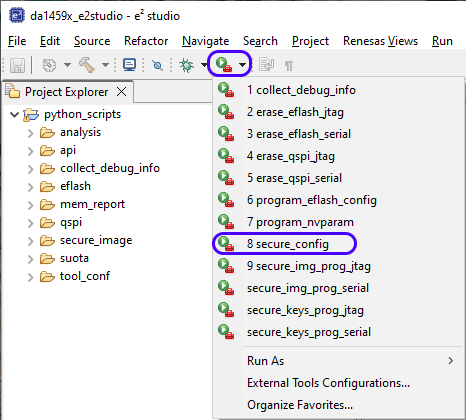
The Console window will show a couple of questions regarding the security configuration. Please provide the following options:
Would you like to create product keys file?: Yes
Product ID: DA1459x-00
Select elliptic curve used for asymmetric keys: EDWARDS25519
Skip key generation for User Keys slot 8, reserved for Device Unique Symmetric Key (DUSK)? Yes/No
.Writingkeystoproduct_keys.xmlGenerating8keys(256-bits)...#1: 0037FA922E1A281B6CB0FC256432623A357421F373214D85680E5169CF9242CF#2: C93C61F7568A13C23A0FE89F424AD977BEFA6B321BB8B784C608ED959A2F6463#3: 6BC65BC2506E848A7D6C29BFB6033775FDA2A7195A5E9D21668AB601BA1B6425#4: E1BFE7312D6CBBABD8E56A8FE8A104E543ABFE9E099BBF6F267570E090D50571#5: 94EDA2C2595E6D3143D7C02B79C410BC6F0F5A78AA19E8D08F58B01F2DB691C2#6: A33384FC91F12DD4C8EEFF41B210FE221F589AC972829A01DB4A200800B1CAA3#7: E54E9F763FCD4B08BB4A496D5A478F79A02A4312ACDD138727339028E55ACBCA#8: A96B40E8388BF0F3D63A603081F0AA211AED33C6CA464EF17ADE195F38E529E1Generating8keysonEDWARDS25519ellipticcurve...#1 (private key length: 32, public key length: 32):PRIVATEKEY:6F1DCAA21CDBA048C6876B0DDECDA7A94FEB5B5F671C85CA8960337BADE8A01CPUBLICKEY:7F858469416548F5D05FBC71332508E6634DA7CD7DA2FCC92EB010894BEF7F85#2 (private key length: 32, public key length: 32):PRIVATEKEY:BCB5504818187368A8C84406AFA10876ED729CF11B5136413CD96C67D4834E90PUBLICKEY:33D18AB2DE1D7C3DA4FB5015520B8EEE0E5F57FD2D3D1E133646E4A17BED5668#3 (private key length: 32, public key length: 32):PRIVATEKEY:F773428BEDB41D6229C8A47D8B6CCCB66E64EE931B8649B1E0B9702B35DD7F2CPUBLICKEY:2987190B7A3AD892D9CF6AFFD4417212D2E5AAA0778ADAACFFF8A3DEBF2C893B#4 (private key length: 32, public key length: 32):PRIVATEKEY:5F5740CE335BFB5C316FEFE6145B5F49802CF03B7723F169D2BC9CBB22ABE681PUBLICKEY:112D8370533F769A93C66155ADF8C5C63EED64B8BE3B3FDB0D3CD9A0FA713362#5 (private key length: 32, public key length: 32):PRIVATEKEY:E39CB6723908F27DA8E5E3D0763E9941780EA43963C6397F0DCDD78666C3BE49PUBLICKEY:7B10B5D55F3BA15217633BE894FB13A75B6C16D4D140B814AAC7EB492EC6F204#6 (private key length: 32, public key length: 32):PRIVATEKEY:D5643B08C7E8D42087868EA1056B3BA66D463B2F012712EB5B5061C27EA6AF53PUBLICKEY:9E225C0D2D685AC72F263D4CE41A264681F3228326E83A5CD2FA507BE33F338B#7 (private key length: 32, public key length: 32):PRIVATEKEY:8DD9A8A8C1651855A4620D7F34F2B2EB0C5D13B7446361091E2726F6F3FF6D80PUBLICKEY:8F58249F0466B4B39D38D0172D562970DE6E3173040D3CCABB9457B783C05C40#8 (private key length: 32, public key length: 32):PRIVATEKEY:77257C3A278AE22701751087A9D2A93AAFDEDA06C114D7EC73D4C2EA54ACE7CBPUBLICKEY:89DA51D9CBF4B9ECAAA855DDDA0DEB7D10F513F516B8D0C69ECE9FF2DE7CDB84.Usingproductkeysfile:product_keys.xml
Would you like to configure sticky bits in CS?: Yes/No
Select sticky bits to be enabled in CS:
PROT_INFO_PAGE
SECURE_BOOT
FORCE_CMAC_DEBUGGER_OFF
FORCE_M33_DEBUGGER_OFF
PROT_USER_APP_CODE
PROT_VALID_KEY
PROT_APP_KEY
PROT_CONFIG_SCRIPT
Select public key index: One of the provided options
Would you like to add key revocations?: No/Yes
Please provide current version of the firmware (in decimal):
Would you like to add minimal version?: No/Yes
Depending on the answers to the Yes/No questions there may be additional questions.
After successful keys generation 2 files are created in the
..//utilities//python_scripts//secure_image directory namely secure_cfg.xml and
product_keys.xml. The latter XML file contains the 8 arbitrary keys for the two product key categories.
Note
Ensure that you do not remove/misplace the product keys file. Without it, it will be impossible to update the software on a device with programmed keys and secure boot enabled. The same configuration/product keys file can be utilized for programming multiple devices of the same type.
Warning
When using software versioning and using Asymmetric SUOTA, be sure that both the version of the Asymmetric Suota and the version of the application software are higher than the minimal version. If the (new) minimal version is set higher than current version the Asymmetric SUOTA, the next time the application software is updated, the device will become completely unresponsive (bricked).
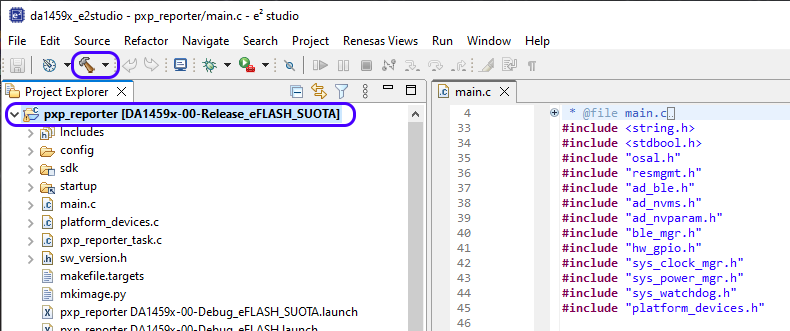
Build the application you intend to program into the device’s embedded flash memory. Make sure to choose either a Release or Debug build configuration, such as DA1459x-00-Release_eFLASH or DA1459x-00-Debug_eFLASH.
Please note that the secure image feature is only supported by the pxp_reporter and ble_adv applications provided by the SDK.
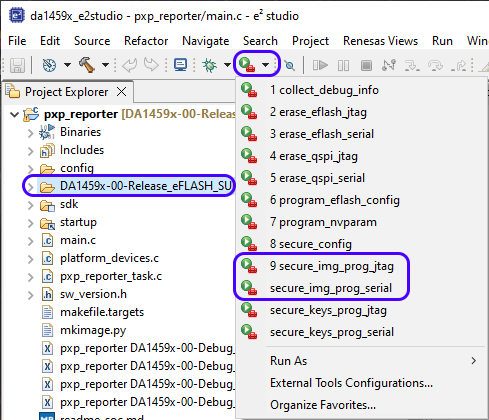
4.2.4. Program the (signed) application image into the eFlash
To generate a signed image from the application binary file, created in the previous step, and program it to the embedded flash memory, execute the secure_img_prog.py script via JLink or Serial interface.
Be sure that the product_keys.xml and secure_cfg.xml files are located in the default directory (..\utilities\python_scripts\secure_image\). Ensure that you have selected the application project before running the launcher. This step is crucial for the launcher to locate the necessary *.xml and binary files correctly.
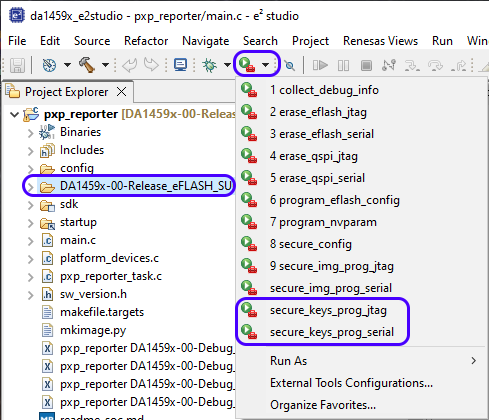
4.2.5. Program the Configuration Script and the Product Keys
During this step, the Configuration Script (CS) and the Product Keys, as specified in previous steps, will be written to their respective locations within the Embedded Flash (CS: 0x0000 - 0x07BF, Key indexes: 0x07C0 - 0x07FF, User Application Keys: 0x0800 - 0x0BFF, Signature Keys: 0xC000 - 0x0FFF). Depending on whether the mentioned fields are already written or not, and if they are, whether the new values match the existing ones, the script will execute specific actions accordingly.
To initiate the operation, execute the secure_keys_prog script via JLink- or Serial Interface:
4.2.6. Program the Device Unique Symmetric Key (DUSK)
If in the above sequence one has chosen to generate a Device Unique Symmetric Key then slot #8 in the symmetric key area is not programmed.
To program the Device Unique Symmetric Key into the device, a new command has been added to the cli_programmer(.exe) application which can be found in ../SDK_10.1.6.108/binaries.
Use the following command to generate (and program) a unique 256-bit key: