7. Securing your application using Secure Connections
Let’s take a look now on how we can enable the security features of your DA14585/DA14586 or DA1453x (DA14531,DA14535) device using Renesas’s SDK6. The use case that we will demonstrate is the setup of a peripheral that uses LE Secure Connections with privacy enabled. We will also show how you can define the access rights of your resources to better suit your needs.
7.1. Pairing procedure in Secure Connections
The pairing procedure using Secure Connections is very similar to the one in Legacy Pairing, with the exception that a public key exchange is employed. After a successful Pairing Feature Exchange, the two devices exchange public keys. The master sends its public key to the slave followed by the slave sending its public key to the master. Then the Initiator will start the key generation process by sending a Pairing Confirm command, which will be followed by a Pairing Confirm response from the Responder. Both ends compute the these values and verify that the received values match the ones that they have computed.

Figure 31 Pairing in Secure Connections
In the above picture, some values used in the pairing, like Na and Nb, are produced by a random number generator. These values are combined with device specific information, like the public key from the other side or the bluetooth device address, and these values are sent and confirmed by the other end.
7.2. Modifying the firmware
Go to you SDK6 installation folder and navigate to
projects/target_apps/ble_examples/ble_app_security/Keil_5/. In there, open theble_app_security.uvprojxproject file.Open the file
user_config/user_config.hand make the next changes:Define the address mode as a resolvable private address with public identity address. This mode resolves the address on the controller side.
#define USER_CFG_ADDRESS_MODE APP_CFG_CNTL_PRIV_RPA_RANDSet the capabilities of the device as one that has a display and a yes/no input mechanism.
#define USER_CFG_FEAT_IO_CAP GAP_IO_CAP_DISPLAY_YES_NOFor the authentication requirements, we will require bonding, MITM protection and we will use the LE Secure Connections pairing mode
#define USER_CFG_FEAT_AUTH_REQ (GAP_AUTH_BOND | GAP_AUTH_MITM | GAP_AUTH_SEC)For the device security requirements, we want to use authenticated LE Secure Connections pairing with encryption
#define USER_CFG_FEAT_SEC_REQ GAP_SEC1_SEC_PAIR_ENCIn the key distribution phase, we will distribute the LTK, CSRK, and IDK.
#define USER_CFG_FEAT_RESP_KDIST (GAP_KDIST_ENCKEY | GAP_KDIST_IDKEY | GAP_KDIST_SIGNKEY)
The next file that we will edit is the
user_config/da1458x_config_advanced.h. Check that the ECDH key creation is enabled.#define CFG_ENABLE_SMP_SECUREOpen the
user_config/da1458x_config_basic.h. In there, make sure that theCFG_APP_SECURITYmacro is defined and we have the UART output enabled. The UART module will be used to show the number in the Numeric Comparison method.#define CFG_APP_SECURITY#define CFG_PRINTFAs a last check, be sure that the
EXCLUDE_DLG_SECmacro is undefined in/user_config/user_config.h.#define EXCLUDE_DLG_SEC (0)Next we will modify the access rights of our resources. Open the file
user_custom_profile/user_custs1_def.c. In there you will find the implementation of the custom profile. The structcusts1_att_dbis populated with all the attributes of the profile, either services, characteristics, or descriptors. Let’s focus our attention on the second service:// Service 2 Declaration [SVC2_IDX_SVC] = {(uint8_t*)&att_decl_svc, ATT_UUID_128_LEN, PERM(RD, ENABLE), sizeof(custs1_svc2), sizeof(custs1_svc2), (uint8_t*)&custs1_svc2}, // Write 1 Characteristic Declaration [SVC2_WRITE_1_CHAR] = {(uint8_t*)&att_decl_char, ATT_UUID_16_LEN, PERM(RD, ENABLE), 0, 0, NULL}, // Write 1 Characteristic Value [SVC2_WRITE_1_VAL] = {SVC2_WRITE_VAL_1_UUID_128, ATT_UUID_128_LEN, PERM(WR, ENABLE) | PERM(WRITE_REQ, ENABLE), DEF_SVC2_WRITE_VAL_1_CHAR_LEN, 0, NULL}, // Write 1 Characteristic User Description [SVC2_WRITE_1_USER_DESC] = {(uint8_t*)&att_desc_user_desc, ATT_UUID_16_LEN, PERM(RD, ENABLE), sizeof(DEF_SVC2_WRITE_VAL_1_USER_DESC) - 1, sizeof(DEF_SVC2_WRITE_VAL_1_USER_DESC) - 1, (uint8_t *) DEF_SVC2_WRITE_VAL_1_USER_DESC}, // Write 2 Characteristic Declaration [SVC2_WRITE_2_CHAR] = {(uint8_t*)&att_decl_char, ATT_UUID_16_LEN, PERM(RD, ENABLE), 0, 0, NULL}, // Write 2 Characteristic Value [SVC2_WRITE_2_VAL] = {SVC2_WRITE_VAL_2_UUID_128, ATT_UUID_128_LEN, PERM(WR, ENABLE) | PERM(WRITE_COMMAND, ENABLE), DEF_SVC2_WRITE_VAL_2_CHAR_LEN, 0, NULL}, // Write 2 Characteristic User Description [SVC2_WRITE_2_USER_DESC] = {(uint8_t*)&att_desc_user_desc, ATT_UUID_16_LEN, PERM(RD, ENABLE), sizeof(DEF_SVC2_WRITE_VAL_2_USER_DESC) - 1, sizeof(DEF_SVC2_WRITE_VAL_2_USER_DESC) - 1, (uint8_t *) DEF_SVC2_WRITE_VAL_2_USER_DESC},
Every attribute has its own access rights. To write the value of the first Characteristic, be sure to have set the access rights to
PERM(WR, ENABLE) | PERM(WRITE_REQ, ENABLE). This will enable the modification of the characteristic value through the Write Request procedure. Using this procedure the server will respond with an acknowledgment when the request is received. You can also use thePERM(WRITE_COMMAND, ENABLE), as is the case with the second characteristic, to not invoke an acknowledgment. You can also set read permissions on the characteristic, by ORing it withPERM(RD, ENABLE). In this fashion, read or write access is always enabled for a connected peer.- You can set the appropriate level of access according to your needs by choosing the second argument as one of:
DISABLE: Access is always disabled
ENABLE: Access is always enabled
UNAUTH: Access requires an unauthenticated link
AUTH: Access requires an authenticated link
SECURE: Access requires Secure Connections pairing
For example, you could use
PERM(RD, UNAUTH)to enable read access only after the peer device has been paired with the Just Works method. You can set the permissions of the Characteristic Value attribute to the ones of your liking, but you should take care of setting the permissions of other attributes according to the BLE specification.
We can now build the software example. Choose your target in the drop-down box shown below and then hit the Build button or press F7.

Figure 32 Choose your target device and build the example
7.3. Running the example
7.3.1. Using the UART
We will use the UART peripheral of our device to print the number for the pairing. On your DA1453x hardware kit connect the left pin of the UTX jumper connector to the P06 pin, as shown in the following figure.

Figure 33 Hardware configuration for UART transmit on DA1453x/DA14535 Pro Development kit

Figure 34 Hardware configuration for UART transmit on DA1453x/DA14531 Pro Development kit
In case you own a DA14585 or DA14586 device, configure the hardware as shown in the following figure.

Figure 35 Hardware configuration for UART transmit on DA1458x
Next, we have to find out our serial port. Right click on “My Computer” and click “Manage”. Under “Ports” you will find two more ports that have been enumerated when you plugged in your device. Keep in mind the one with the lowest number.

Figure 36 Finding out the right port
Open up your serial port terminal. Set the serial port to the one you have identified in the previous step, and enter the parameters that you can see in the following figure.

Figure 37 Serial port configuration
7.3.2. Running the example
In Keil, run a debug session and in the next workspace run the example

Figure 38 Start a debug session

Figure 39 Run the example
Open the Lightblue App on your smartphone and locate the DLG-SECURITY device.

Figure 40 Locate the DLG-SECURITY device
Tap on the device name. The app will connect with your device and the Pairing Feature Exchange will start. When the I/O Capabilities have been exchanged, you’ll be asked to accept pairing the device with your phone. Press “OK”.

Figure 41 Secure connections pairing request
Your phone, as well as your device on your serial terminal, will display a number. Check that these numbers match and confirm the pairing.
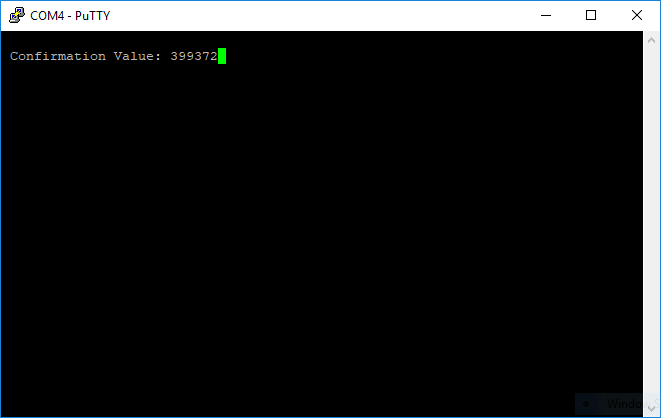
Figure 42 Confirmation value for Numeric Comparison
With these simple steps you have enabled the most secure algorithms for encrypting the message exchange of your embedded device with your smartphone. As you explore the Characteristics database, all accesses will be now entirely confidential.