6. Securing your application using Legacy Pairing
Let’s take a look now on how we can enable the security features of your DA1458x or DA1453x device using Renesas’s SDK6. The first use case that we will demonstrate is the setup of
a peripheral that uses the Passkey Pairing and Just Works procedure using LE Legacy Pairing.
Go to the SDK6 folder that you have downloaded on your hard drive and navigate to the projects/target_apps/ble_examples/ble_app_security/Keil_5 folder. In there open the ble_app_security.uvprojx
Keil project. This software example project already has a custom server implemented which uses the BLE security features, and we will use it as our basis for this tutorial.
You can see the project file structure on the left edge of your IDE.
In order to build proximity reporter project for DA14533 target, you select the DA14535 target and then add DA14533 define __DA14533__.
You can see that there are two types of folders included in the project, some that their name begins with sdk_ and some that begin with user_. User code is developed under the folders beginning with user_ and
all of our modifications will be on these files, but we will also take a look at some SDK6 functions when this will benefit our understanding.
user_callback_config.h appoints the callback functions that handle various events or operations.
user_profiles_config.h defines which BLE profiles (Bluetooth SIG adopted or custom ones) will be included in the user’s application.Each macro denotes the respective BLE profile that will be included.
user_modules_config.h defines which application modules are included or excluded from the user’s application. Define each macro to 0 if it’s included, or to 1 if it’s excluded. An important point to note is that these settings have no effect if the respective module is a BLE profile that it is not used in the user’s application.
user_config.h holds advertising parameters, connection parameters, compile-time security parameters, etc.
user_periph_setup.h defines hardware related settings relative to the used Development Kit.
user_platform/, contains the implementation of target related functions and especially configuration and initialization of peripheral devices in file user_periph_setup.c.
user_custom_profile/, contains our BLE server’s database declaration and configuration parameters.
user_app/, holds the user’s implementation of handling BLE events and any additional application code.
In the following figure you see the message flow diagram between the Server Application entity, the Custom Profile Service and the Remote Client.
When our device boots, the Custom Profile app initiates the service database creation of the Custom Profile. The creation of the database is confirmed and awaits for a client to connect. When the Remote Client connects,
the service gets enabled and the Remote Client can now initiate requests to our server. In the above use case, the Remote Client requests to write to characteristic 1. This is indicated by the Custom Profile to the
user application, which updates the value of characteristic 1. Finally our remote client disconnects, and this disables the Custom Profile Service, which in turn indicates that to the user application.
Open the file ..._config_advanced.h in here we are choosing DA14535 as build target (da14535_config_advanced.h). Change the default Bluetooth Device Address. This address has to be unique in a BLE piconet.
Define the address mode as a public Bluetooth device address
#define USER_CFG_ADDRESS_MODE APP_CFG_ADDR_PUB
We will now continue with the security related changes in our application:
Enable the application security flag in ..._config_basic.h file in here we are choosing DA14535 as build target (da14535_config_advanced.h).
#define CFG_APP_SECURITY
Go to file user_config/user_profiles_config.h and enable access to the profile characteristics using an authenticated link.
#define APP_CUSTS1_SEC_REQ SRV_PERM_AUTH
In case you will be using the JustWorks association model, you have to define this to
#define APP_CUSTS1_SEC_REQ SRV_PERM_UNAUTH
In the same file, enable the UART output functionality by defining CFG_PRINTF.
#define CFG_PRINTF
By defining this, you will enable the generation of a random number for the passkey. In case you want to use a predefined passkey, you would have to undefine the CFG_PRINTF macro
and set your passkey in the user_security.h header file:
#define APP_SECURITY_MITM_PASSKEY_VAL (123456)
Open the user_config.h file and make sure the next configuration is enabled:
Set the capabilities of the device as one that has only a display. This will invoke the Passkey Pairing procedure.
Define the LTK length to the default size, which is 16 bytes
#define USER_CFG_FEAT_KEY_SIZE KEY_LEN
In the key distribution phase, we will distribute the LTK, CSRK, and IDK. We will cover signing and address resolution in more detail in the next tutorial.
Before running the example we will take a moment to see on a higher level view how it works. All BLE events are processed using the following callbacks, which are assigned in the file user_callback_config.h.
By defining CFG_APP_SECURITY, the BLE_APP_SEC guard gets defined and the latter block of code will be compiled. The user can utilize Renesas’s SDK6 default handlers, or provide
their own implementation without sacrificing modularity of their code and call the default handlers when appropriate. The function invocations that take place between different
software entities can be seen in the next message flow diagram.
We will use the UART peripheral of our device to print the number for the pairing. If you are targeting a DA14535 device, on your DA14535 hardware kit connect the left pin of the UTX jumper connector to the P06 pin, as shown in the following figure.
Figure 20 Hardware configuration for UART transmit on DA1453x/DA14535 Pro Development kit
Figure 21 Hardware configuration for UART transmit on DA1453x/DA14531 Pro Development kit
In case you own a DA14585 or DA14586 device, configure the hardware as shown in the following figure.
Figure 22 Hardware configuration for UART transmit on DA1458x
Next, we have to find out our serial port. Right click on “My Computer” and click “Manage”. Under “Ports” you will find two more ports that have been enumerated when
you plugged in your device. Keep in mind the one with the lowest number.
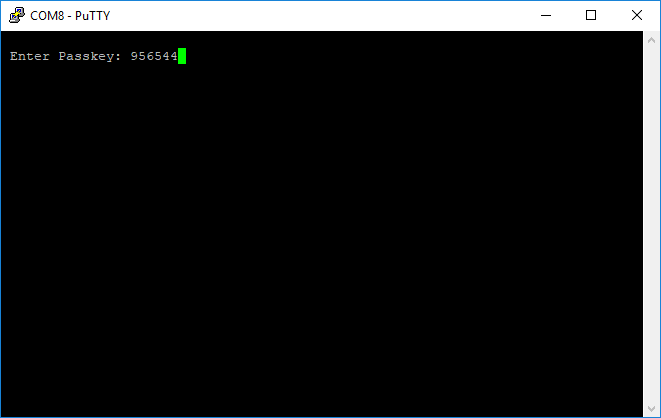
Open up your serial port terminal. Set the serial port to the one you have identified in the previous step, and enter the parameters that you can see in the following figure.
Tap on the device name. The app will connect with your device and the Pairing Feature Exchange will start. When the I/O Capabilities have been exchanged, you’ll be asked to
accept pairing the device with your phone by entering the PIN. In LE legacy pairing, Authenticated man-in-the-middle (MITM) protection is only obtained by using the passkey
entry pairing method or may be obtained using the out of band pairing method. The GATT database will be discovered without having the devices bonded,
but when you try to access (read or write) a Characteristic, the Bonding procedure will start.
With these simple steps you have enabled security on your connection using the LE Legacy pairing. In the next pages we will talk about privacy in BLE and the access rights
of your resources.