6. Running The Demonstration Example
This section describes the steps required to prepare the DEVKIT-PRO and other tools to successfully run the example code. A DA14592 DEVKIT-PRO, a BLE scanner APP as well as the SmartSnippets™ Toolbox are required for testing and verifying the code. If you are not familiar with the recommended process on how to clone a project read the Starting New Project tutorial.
There are two main methods to verify the correct behavior of the demonstrated code. The first method is to use a BLE scanner App on your smartphone and the second is to use the Power Profiler part of the SmartSnippets™ Toolbox. Both cases are demonstrated below.
6.1. Verifying with a BLE Scanner App
Establish a connection between the target device and your PC through the USB1 port of the motherboard. This port is used both for powering and communicating to the DA14592 SoC. For this tutorial a DEVKIT-PRO is used.
Import and then make a copy of the ble_adv sample code found in the SDK of the DA1459x family of devices.
Note
It is essential to import the folder named python_scripts to perform various operations (including erasing (eFlash)).
In the target application, add/modify all the required code blocks as illustrated in the Code Overview section.
Note
In cases where the defined macros are not immediately recognized and this leads to compilation errors, the following steps can be taken to address the issue:
Right-click on the application folder. Select “Index” from the context menu. Choose “Rebuild” to rebuild the project index. After the rebuild is complete, select “Index” again. This time, choose “Freshen All Files.”
By following these steps, you can ensure that the project’s index and the recognition of defined macros are up to date, potentially resolving any compilation errors related to macro definitions.
Build the project in either Debug_eFLASH or Release_eFLASH mode and burn the generated image to the chip.
Press the RESET button on DEVKIT-PRO to start the chip executing its firmware.
When the project starts running, the DA14592 Bluetooth SoC should be visible by any Bluetooth scanner application. For this demonstration the
Renesas SmartBond Scanner application was used.

Figure 4 SmartBond™ App

Figure 5 Verifying the Bluetooth Low Energy Device Output Using a Scanner App

Figure 6 Exploring the Various Services after Connecting to a Remote Peer
6.2. Verifying with the SmartSnippets™ Toolbox
Another useful tool that can be used both for debugging and power measurements is the SmartSnippets™ Toolbox, which can be found on the Renesas website.
To create a new session, in the SmartSnippets™ Toolbox, click on Project.
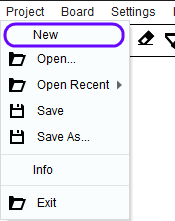
Figure 7 Opening a Project in the SmartSnippets Toolbox
In the pop-up window displayed, do the following:
Select New to create a new project. In the New Project window, enter a name for the project. (This step is optional if a project has already been created.)
Choose the newly created or an available project.
Next choose Board -> Device and select DA14592
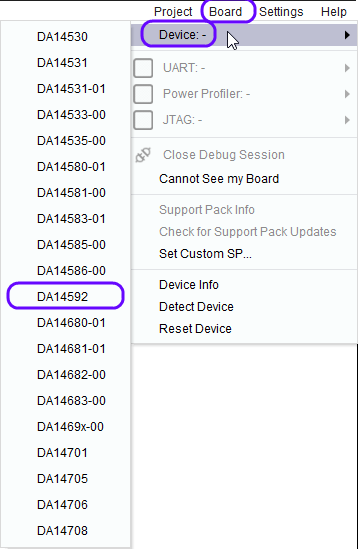
Figure 8 Select Device
Connect your development board and choose Board again and select the Power Profiler COMxx port.
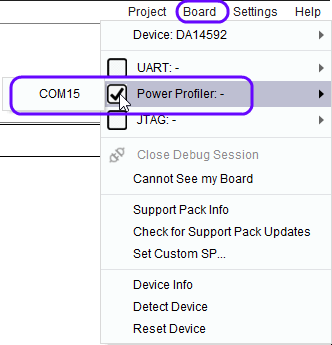
Figure 9 Select the Power Profile COMxx port.
If not already displayed click on Monitor and select Power Profiler
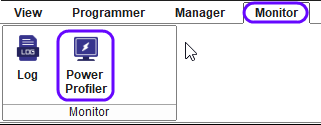
Figure 10 Select the Power Profiler.
The Power Profiler windows should appear:

Figure 11 Power Profiler Window.
In the Power Profiler Window click Initialize and then Start
Press the Reset button on the DEVKIT-PRO to (re)start the software execution.
Verify that the advertising interval has been set to power-save mode (the default value of the
FAST_ADV_INTERVALmacro is set to zero). In this case, the Renesas chip utilizes the maximum time interval (1000 - 1500 ms). The alternative option would be for the Renesas chip to use the minimum time interval (80 - 100 ms).

Figure 12 Verifying the Advertising Interval
Verify that advertising data are sent over the advertising channel #37 (instead of utilizing the default advertising channels #37, #38 and #39)
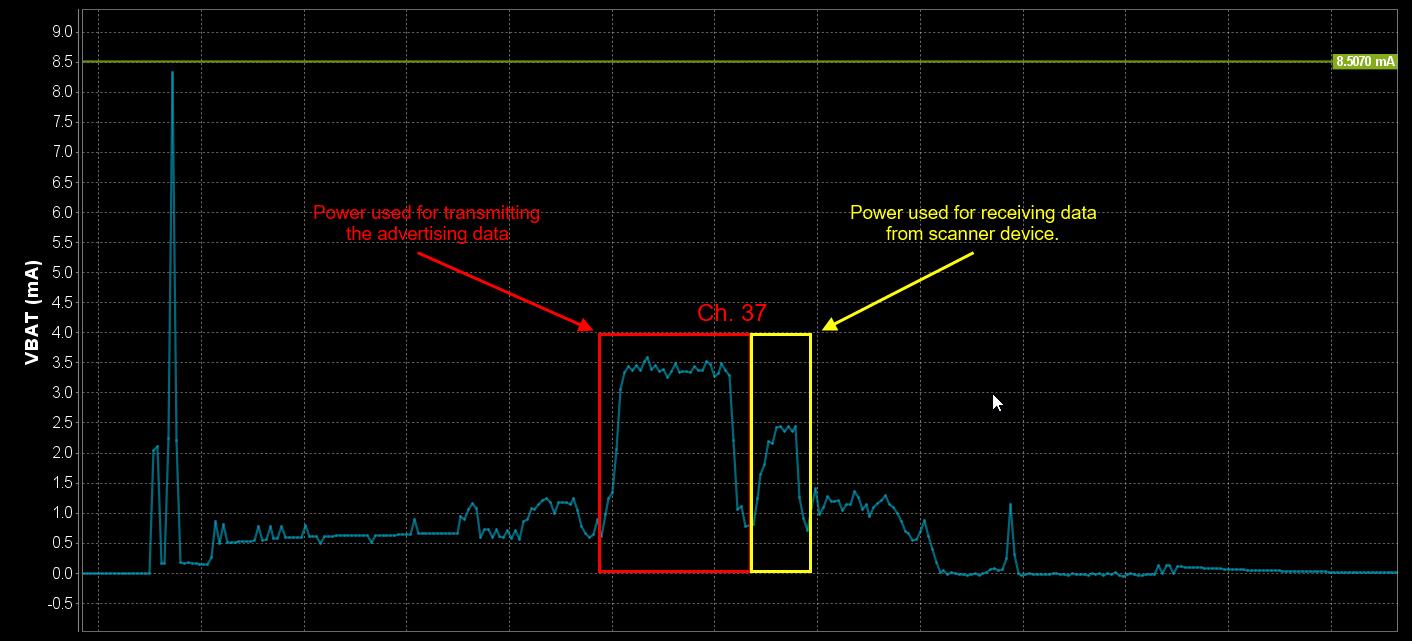
Figure 13 Verifying Advertising Channel Map
Using the scanner App to connect to the DA14592 Bluetooth chip.
Verify that connection parameters are being changed 5 seconds after a connection establishment.
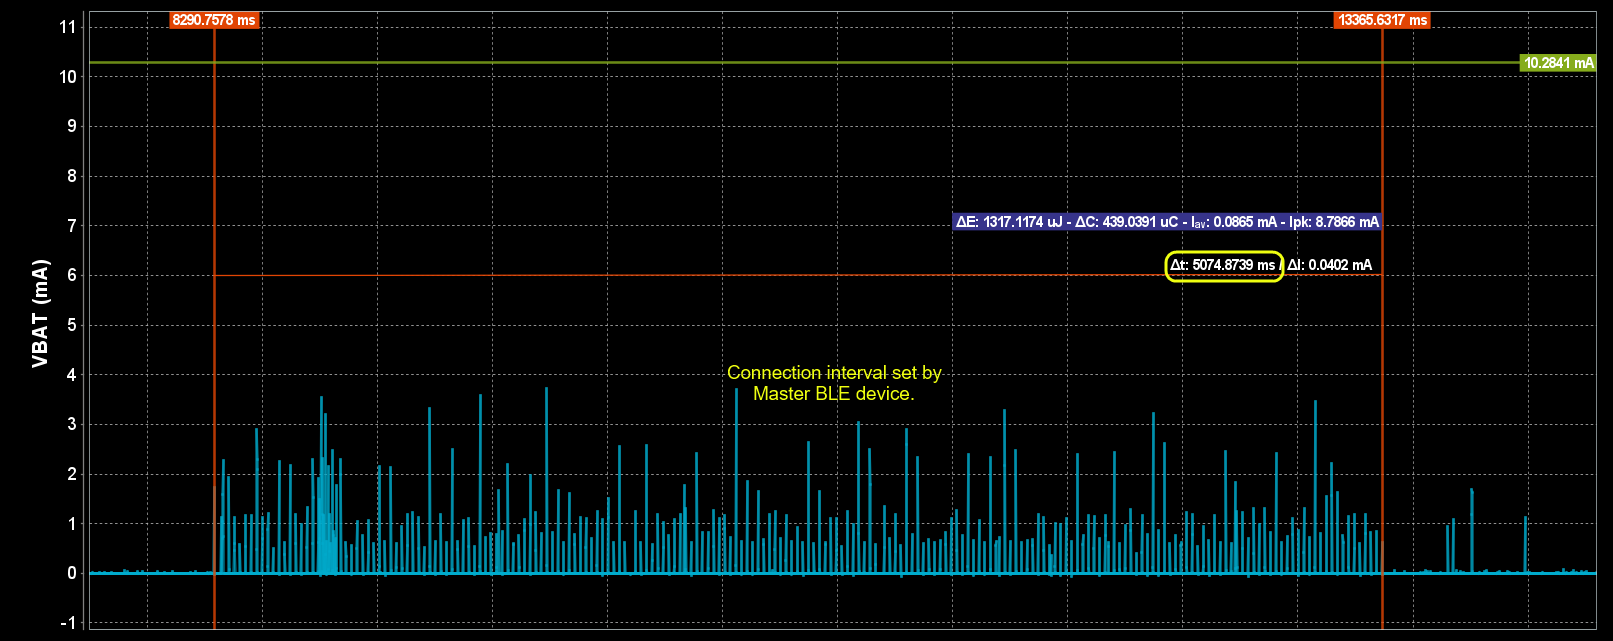
Figure 14 Verifying Connection Parameter Update (1)
Verify that connection parameters have been updated. In this case, the max interval value is used by the Renesas chip (750 ms). The alternative option would be the slow interval value (500 ms).
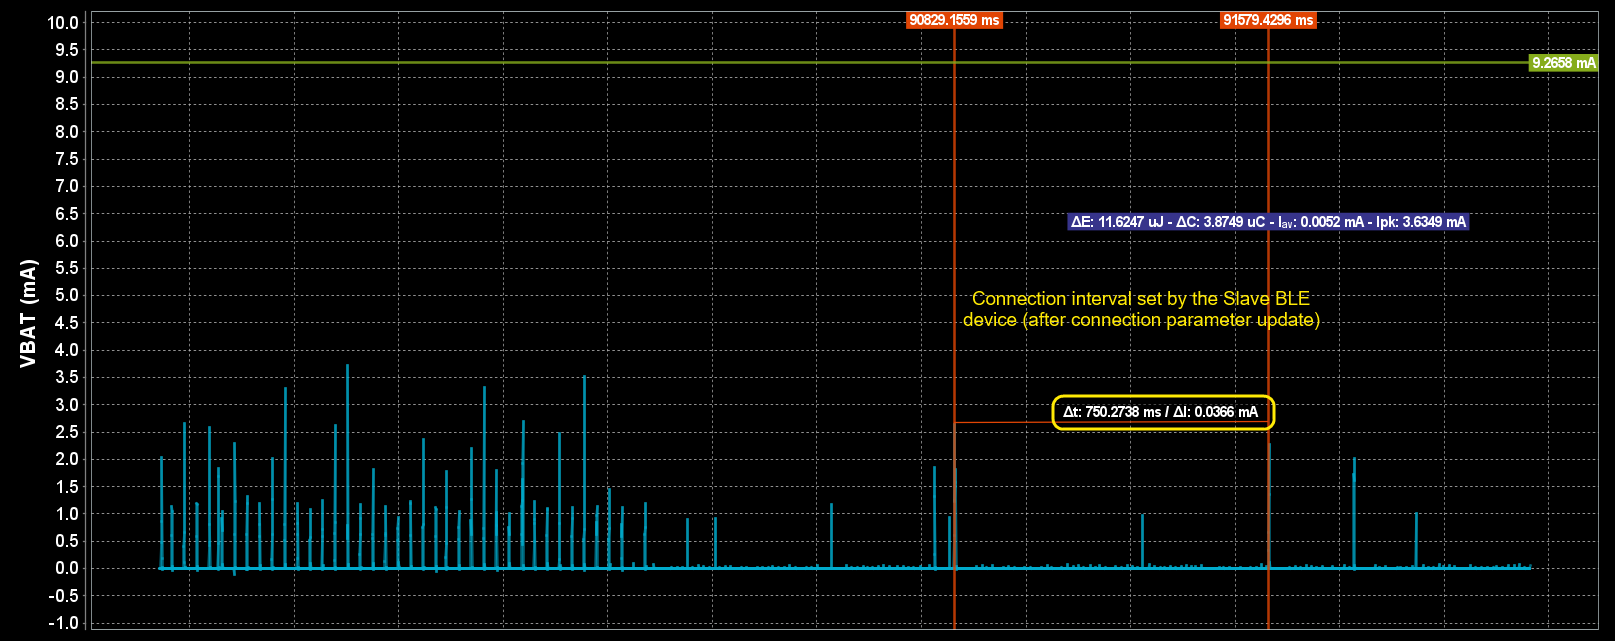
Figure 15 Verifying Connection Parameter Update