2. Migrating an SDK6 existing project into e2 studio
In this tutorial we are going migrate ble_all_in_one example located in SDK examples to e2 studio. Users can follow the same steps to migrate another SDK6 example of their choice.
Copy the e2 studio folder from: proximity reporter project
projects/target_apps/ble_examples/prox_reportertoprojects/target_apps/ble_examples/ble_app_all_in_oneproject folder.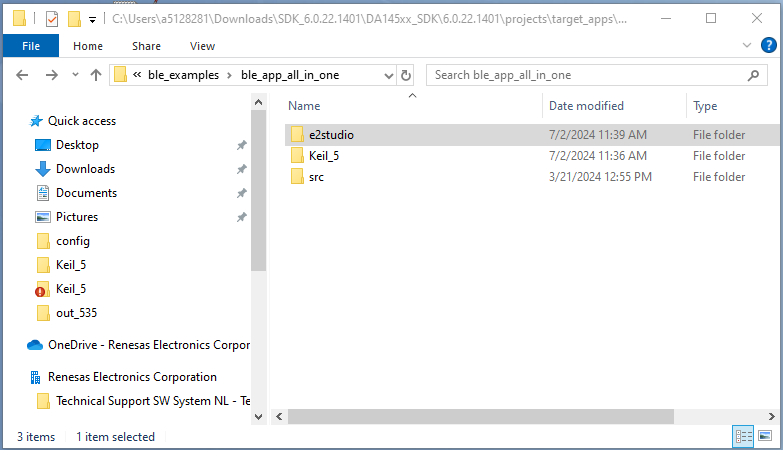
Figure 1 Copy |e2| studio folder
Now open the
.projectfile in e2 studio folder and edit the name from prox_reporter to ble_app_all_in_one (users can name the project as they want).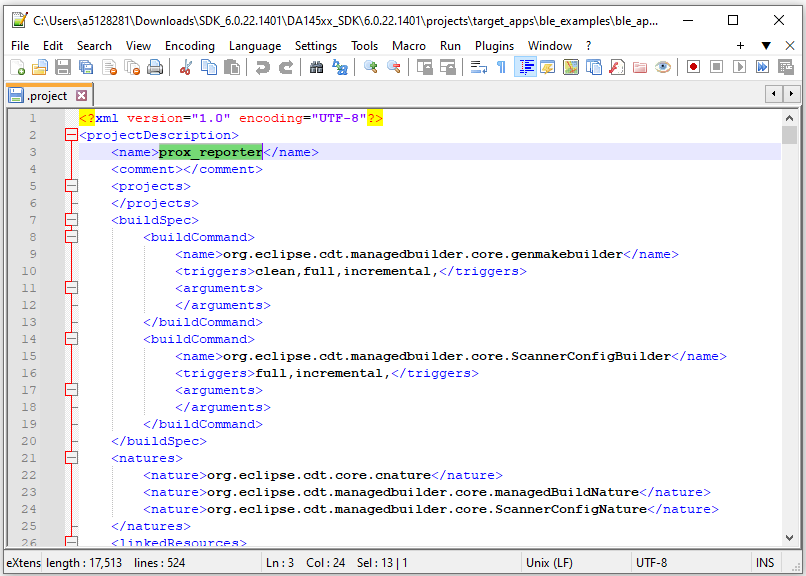
Figure 2 Change project name
Close the
.projectfile and open e2 studio.Open an existing Workspace to import the project. If the workspace doesn’t exist, creates a new workspace with a new name. At the end of e² studio startup, you will see the Workspace Launcher Dialog box as shown in the following figure.
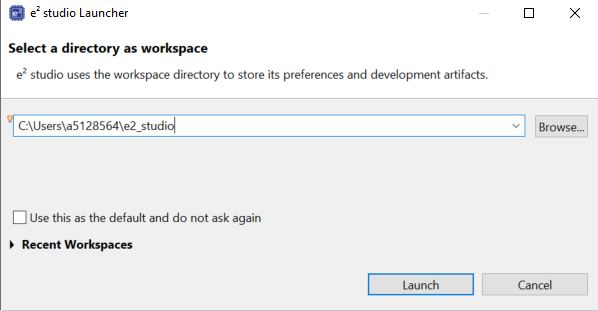
Figure 3 Workspace Launcher dialog
Click Launch.
When the workspace is opened, you may see the Welcome Window. Click on the Hide arrow button to proceed past the Welcome Screen as seen in the following figure.
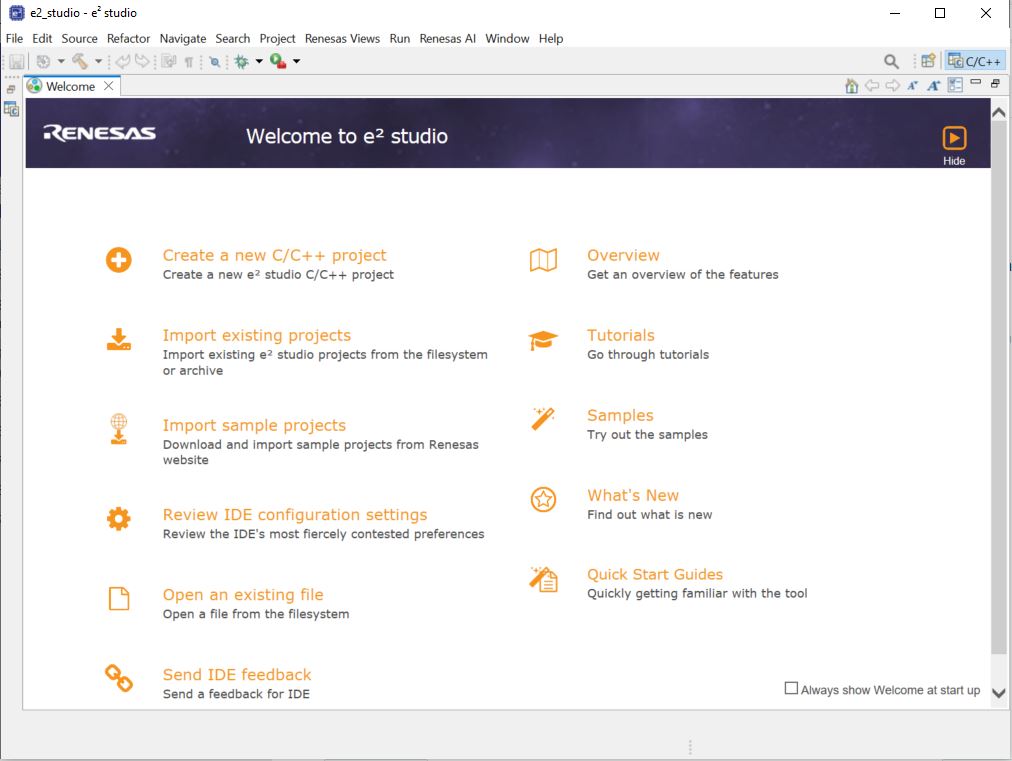
Figure 4 Workbench arrow button
Click Import on the File menu or in the menu bar, as shown in the following figure.
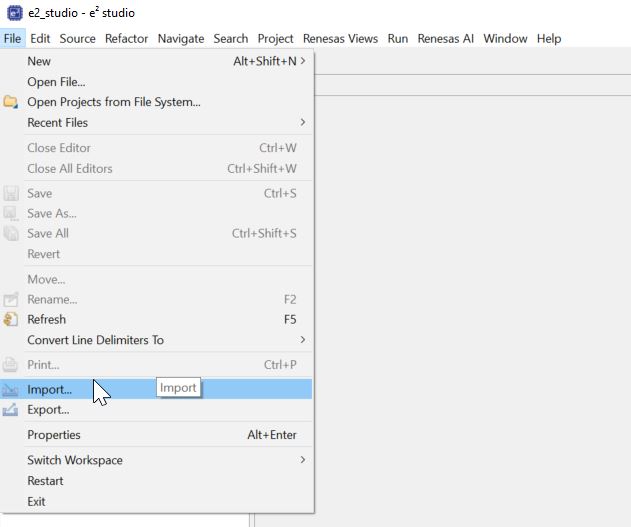
Figure 5 File drop-down menu
In the Import dialog box, as shown in the following figure, choose the General option, then Dialog SDK Project, to import the project into the current workspace.
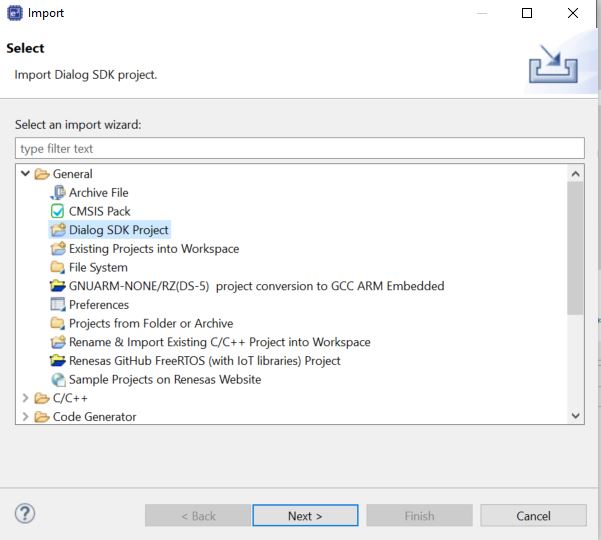
Figure 6 Project Import dialog with “Dialog SDK Project” option selected
Hint
In the General option, Choosing Existing Project into Workspace also works
Click Next
To import the project, use Select root directory
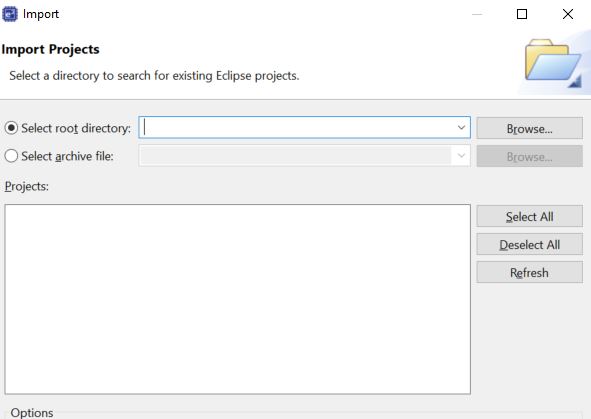
Figure 7 Import Existing Project dialog
Click Browse.
Browse to the
|e2| studiofolder of ble_all_in_one.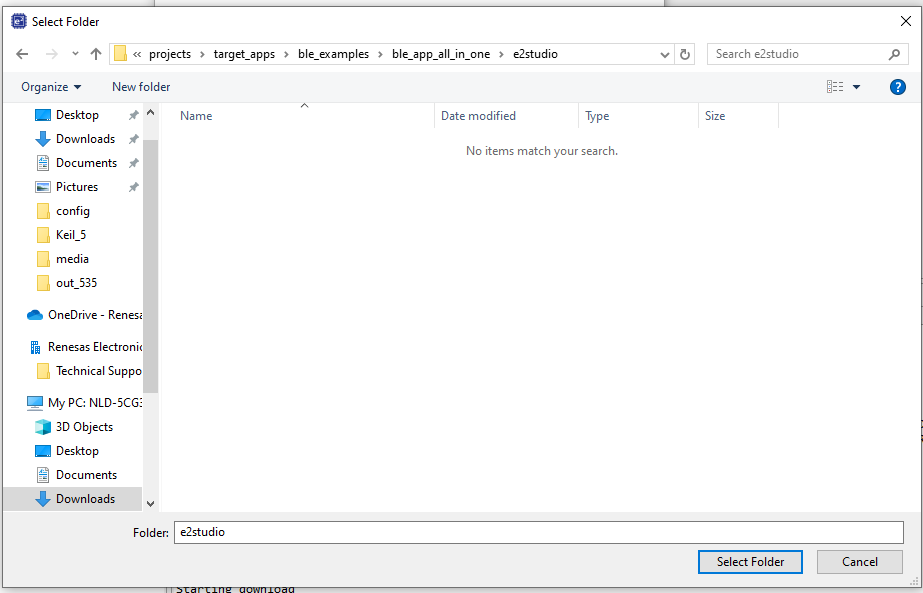
Figure 8 Import Existing Project dialog ble_app_all_in_one
Select the file for import. In our example, it is
projects/ target_apps/ ble_examples/ ble_app_all_in_one/ |e2| studio.Click Finish to import the project.
Now, in
user_appcategory, compare thesrcdirectory of ble_app_all_in_one with project that of imported project. Here, we need to link files of ble_all_in_one and remove references to proximity reporter project.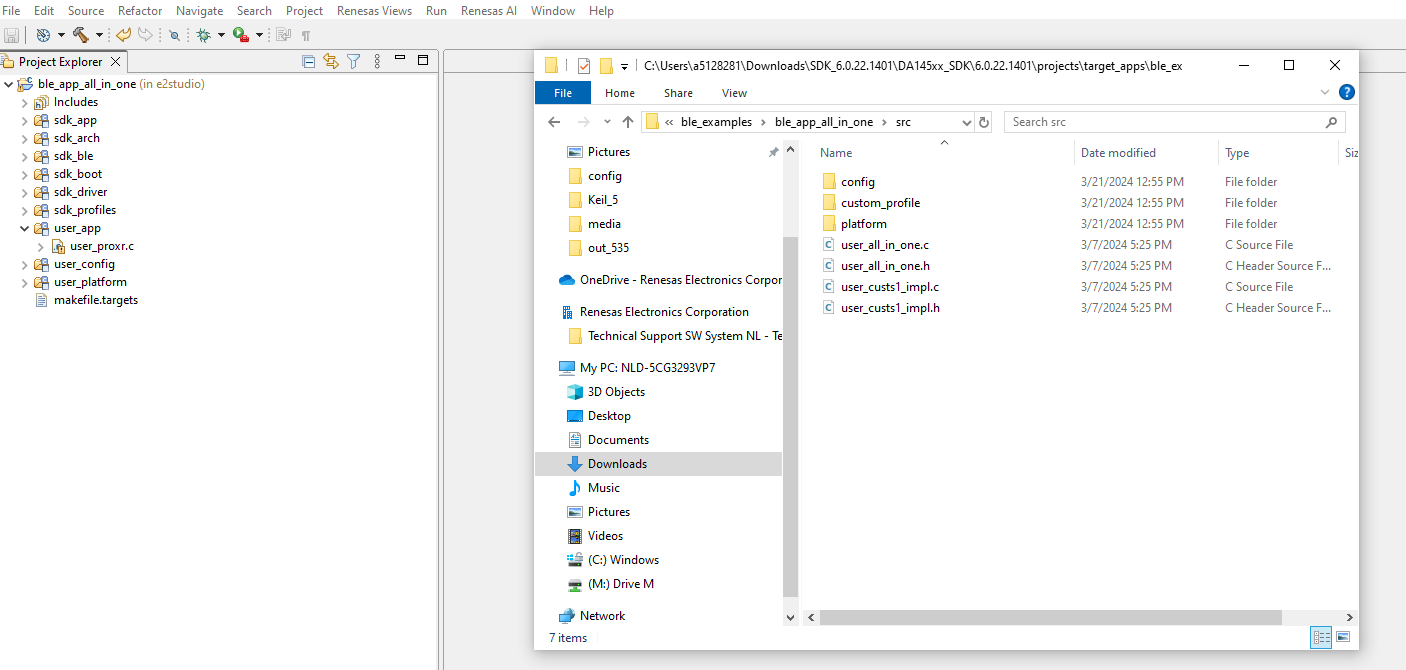
Figure 9 Compare src directory with imported project
Delete user_proxr.c file.
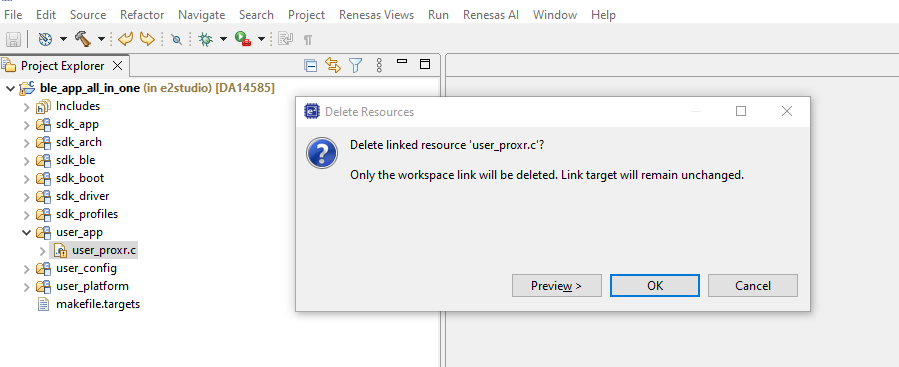
Figure 10 Delete is user_proxr.c
Right click on user_app and select New → File to add new files to this folder.
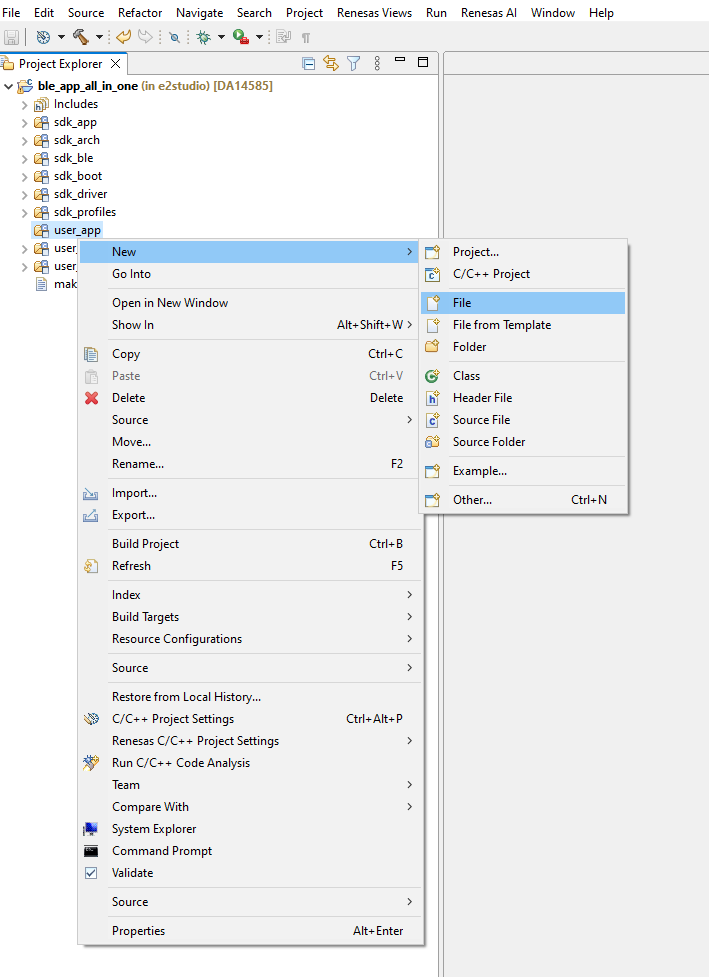
Figure 11 Add New File
Select Link to the file system and copy the below file location.
PROJECT_LOC\..\src\user_all_in_one.c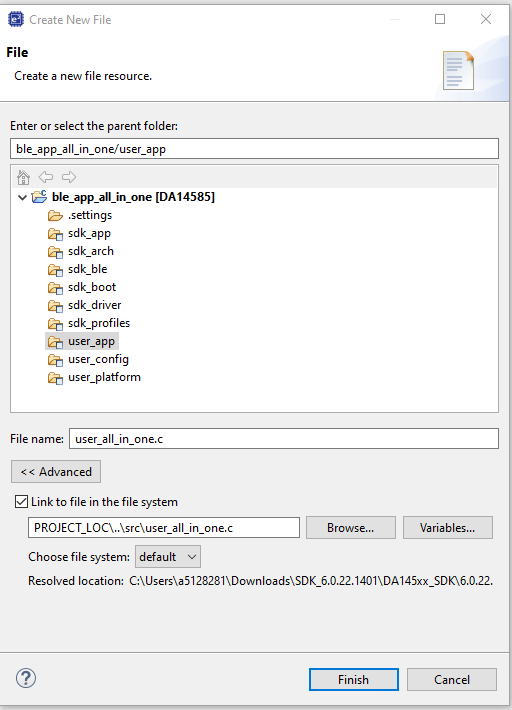
Figure 12 Add Linked File
Similarly add user_custs_impl.c to user_app copying the below address.
PROJECT_LOC\..\src\user_custs1_impl.c
As we observed when comparing the src directory and imported project that custom_profile folder was missing. Hence we need to add this folder to the project. Right click on ble_app_all_in_one and select New → Folder to add folder.
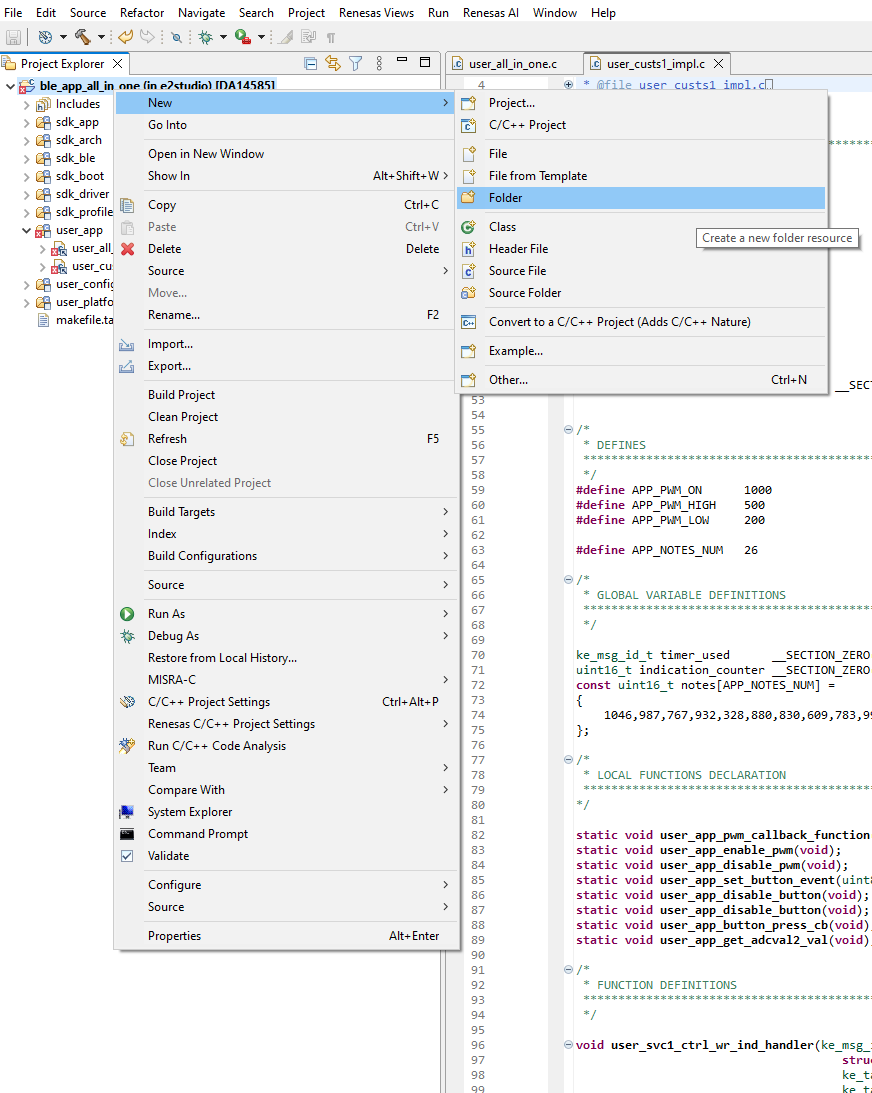
Figure 13 Add New Folder
Name the folder
user_custom_profileand select (Virtual Folder) option to create new virtual folder.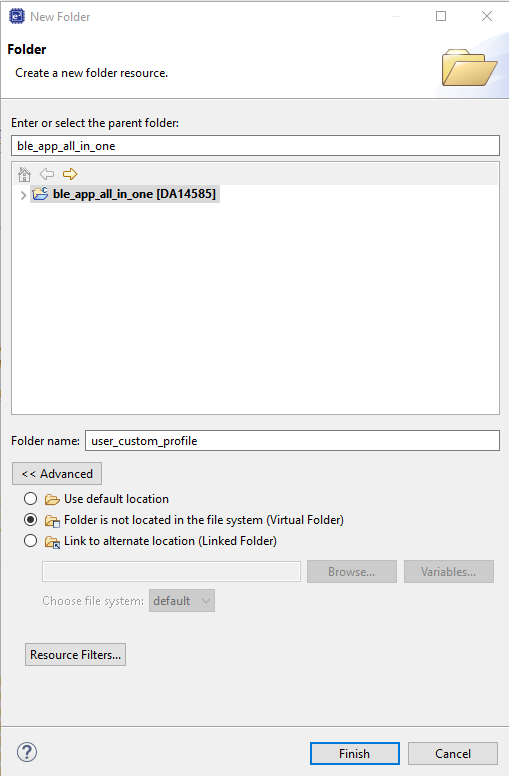
Figure 14 Add Virtual Folder
To this new folder we will add two .c files. Similar to Step. 10.
${PARENT-1-PROJECT_LOC}\src\custom_profile\user_custs_config.c${PARENT-1-PROJECT_LOC}\src\custom_profile\user_custs1_def.c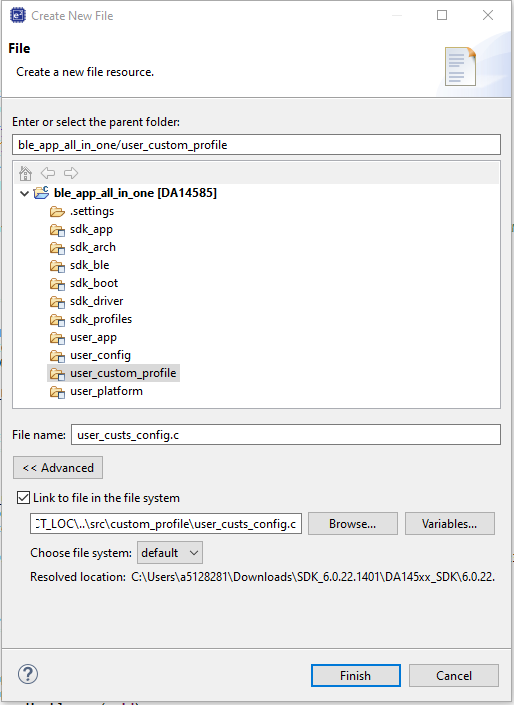
Figure 15 Add New File
After adding two files, make user_custom_profile folder a Source Folder. Right click on ble_app_all_in_one and select New → Source Folder to add folder.
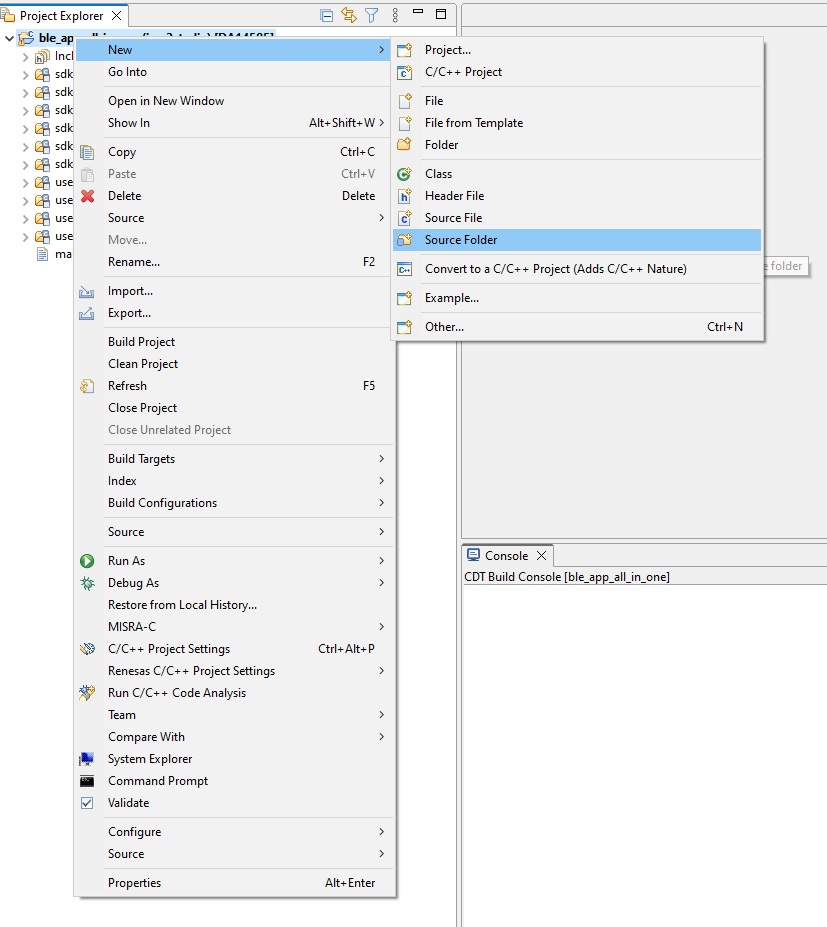
Figure 16 Add New Source Folder
Select the folder by clicking on Browse… besides Folder name. Then select user_custom_profile and press Ok.

Figure 17 Select Source Folder
This newly added folder also needs to be included in path. Select ble_all_in_one project and Press ALT + Enter to open Properties dialog box.
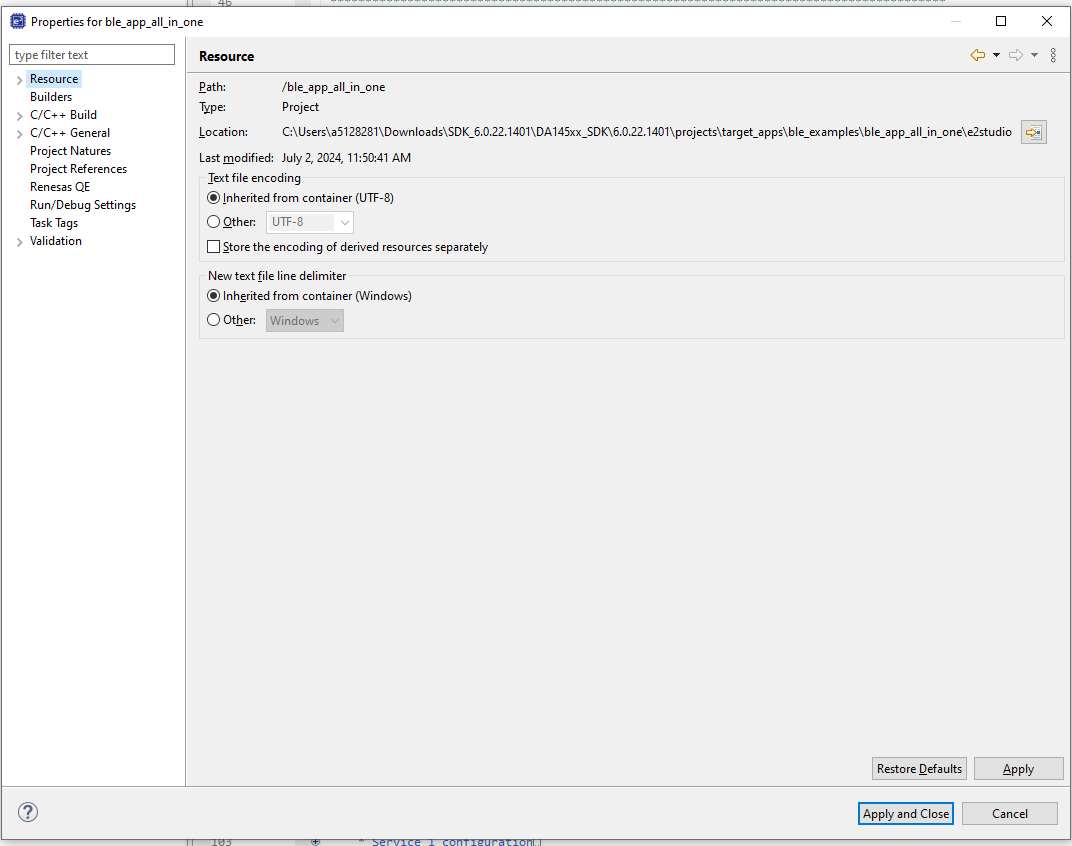
Figure 18 Open Project Properties
Go to C/C++ Build → Settings. There in Tool Settings tab Compiler → Includes. Select [All Configurations] in Configuration.
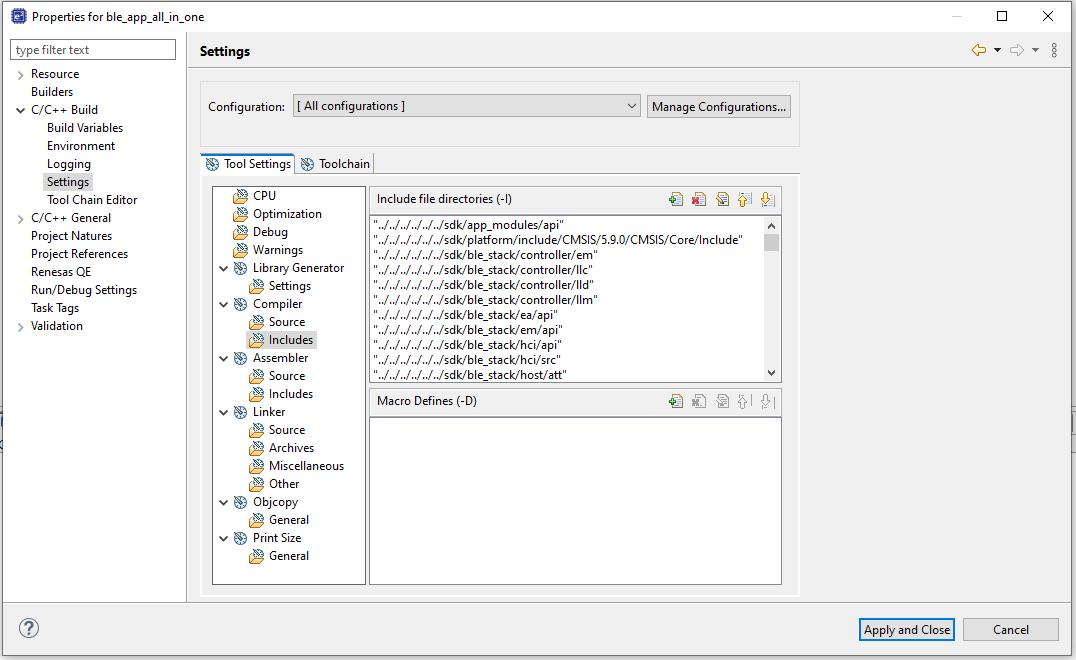
Figure 19 Properties Tool Settings
Press the + Button. In Add directories path dialog add the below path:
"${ProjDirPath}/../src/custom_profile".
Figure 20 Add directory path
Then Press Apply, this will prompt a new window. Here press “Rebuild Index” button to rebuild the project index paths.
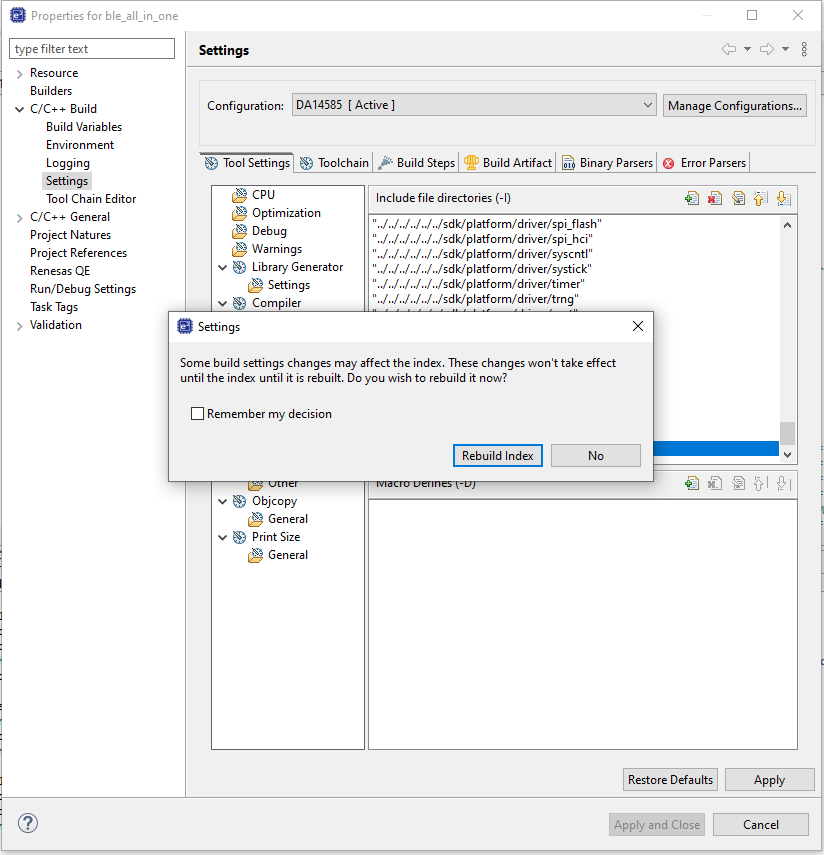
Figure 21 Rebuild Index
As ble_app_all_in_one uses custom profile and timer0, these source files need to be added to the project. Link these files as shown in Step 10.
To sdk_app link:
${PARENT-5-PROJECT_LOC}\sdk\app_modules\src\app_custs\app_customs_task.c${PARENT-5-PROJECT_LOC}\sdk\app_modules\src\app_custs\app_customs.c
Figure 22 sdk_app folder after adding files
To sdk_profiles
${PARENT-5-PROJECT_LOC}\sdk\ble_stack\profiles\custom\custs\src\custs1_task.c${PARENT-5-PROJECT_LOC}\sdk\ble_stack\profiles\custom\custs\src\custs1.c${PARENT-5-PROJECT_LOC}\sdk\ble_stack\profiles\custom\custom_common.c${PARENT-5-PROJECT_LOC}\sdk\ble_stack\host\att\attm\attm_db_128.c
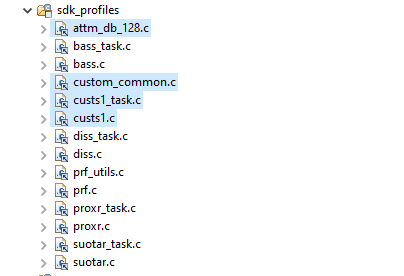
Figure 23 sdk_profiles folder after adding files
To sdk_drivers
${PARENT-5-PROJECT_LOC}\sdk\platform\driver\timer\timer0.c

Figure 24 sdk_drivers folder after adding files
The project ble_all_in_one is only DA14585, DA14586 and DA14535. Hence we need to delete configuration for DA14531 and DA14531-01.
Select ble_all_in_one project and Press ALT + Enter to open Properties dialog box. There in Build Variables section click on Manage Configurations button, this will open a new dialog box. In this box select “DA14531” and click on the Delete button to delete that configuration. Similarly delete DA1531-01 too.

Figure 25 Delete Configuration
Note
The previous step is only necessary when a particular project doesn’t have configuration for all DA1458x and DA1453x devices.
Now build the project for any build configuration you want. To debug the project refer to this e2 Studio SDK 6 Getting Started Guide’s Debug section.
3. Conclusion
The above-mentioned process is just a guideline. When migrating a project from Keil® to e2 studio, users need to ensure that all necessary files, folders, and include directory paths are properly linked according to their project requirements. It’s essential to thoroughly compare the e2 studio project setup with the original Keil® project to identify any missing or misconfigured files.
Additionally, users may encounter various compilation errors due to compatibility issues between Keil® and e2 studio. These errors might arise from differences in compiler behavior, project settings, or library configurations. Here are a few common areas to check and adjust:
Compiler Settings: Ensure that the compiler settings in e2 studio match those used in Keil® . This includes optimization levels, language standards, and target device settings.
Include Paths: Verify that all include paths are correctly set up in e2 studio. Missing or incorrect include paths can lead to unresolved references and other compilation errors.
Linker Scripts: Check that the linker scripts used in e2 studio are compatible with those from Keil®. Differences in memory mapping and section definitions can cause linking errors.
Library Versions: Ensure that the same versions of any libraries used in Keil® are available and correctly linked in e2 studio. Incompatibilities in library versions can lead to runtime issues.