6. Exploring our Service
If everything went well in the previous section, your server should be up and running at this time. All we now need is a client that will connect and request to change our LED state. For this reason we will use the LightBlue® application, which you can find at the Play Store for Android devices, or at App Store for Apple devices.
Open the app. It will enumerate all advertising devices in the air. Look for the
DLG-PRPHentry and tap on it.
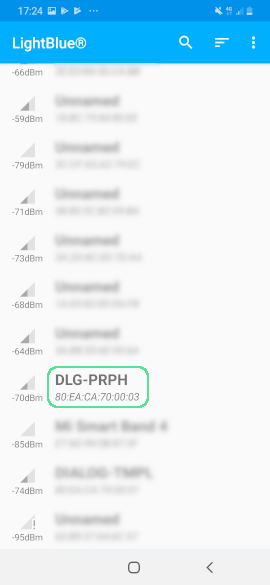
Figure 11 Advertising BLE devices
The app will immediately connect on our device and explore our services. He have configured our device to advertise two of its services, one of which is the service we have examined previously with UUID “184243987C…5A59”. You can also inspect the Bluetooth Device Address which we defined.
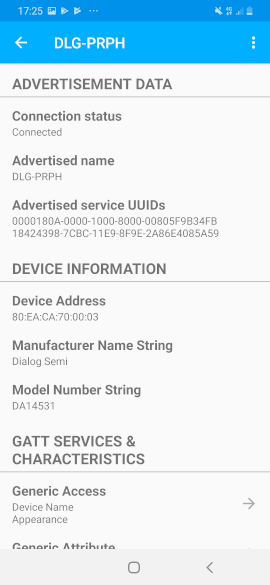
Figure 12 Connected on DLG-PRPH
Select the “184243987C…5A59” service.
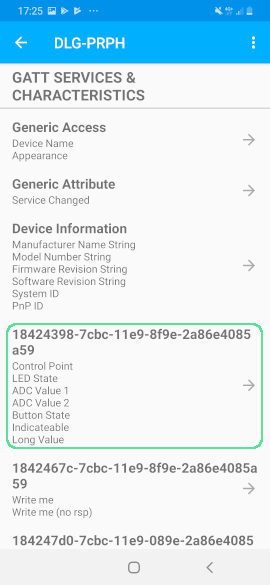
Figure 13 GATT Service
You will see a pop-up Renesas box in which you can select the LED State Characteristic to explore.

Figure 14 Custom Service Characteristics
LightBlue will explore the Characteristic and list its properties. You will see the UUID that we have assigned and the access properties.

Figure 15 The LED Characteristic
Scroll down to the “Written Values” field. You will now be able to write a value to the LED State Characteristic. Insert “1” into the input field and tap on “Write”. You will see the LED on your board to switch on. After that, try writing a “0” to the Characteristic and you will see the LED to switch off.

Figure 16 Writing the Characteristic
Congratulations on building your first Custom Profile Service Characteristic using SDK6. As you can see, the LED State Characteristic is only one of the defined Characteristics that the ble_app_peripheral
example implements. You could also have a look at the rest and even try to implement your own functionality around them.