1. Example description
This example shows:
- Create MIDI service on BLE peripheral side as BLE-MIDI specification required.
- Demonstrate playing note on an iOS APP that supports MIDI profile, by pressing the buttons on the DA1458x Pro Development kit.
- The example can be downloaded from Here
You can watch this intro video:
Demonstration of Dialog SmartBond™ DA14531 Module BLE Midi
2. HW and SW configuration
- Hardware configuration
- This example runs on the DA14531 and DA14585/586 Bluetooth Smart SoC devices.
- The DA145xxDEVKT-P PRO-Motherboard with jumper setting for SPI flash programming. The user manuals for the development kits can be found Here for the DA145xxDEVKT-P PRO-Motherboard.
- For the DA14531 getting started guide you can refer to this LINK
- For the DA14531 Module getting started guide you can refer to this LINK
- For the DA14585/586 getting started guide you can refer to this LINK.
The example is running from SRAM. To run the program from flash please visit chapter 17 of the SmartSnippets Toolbox User Manual
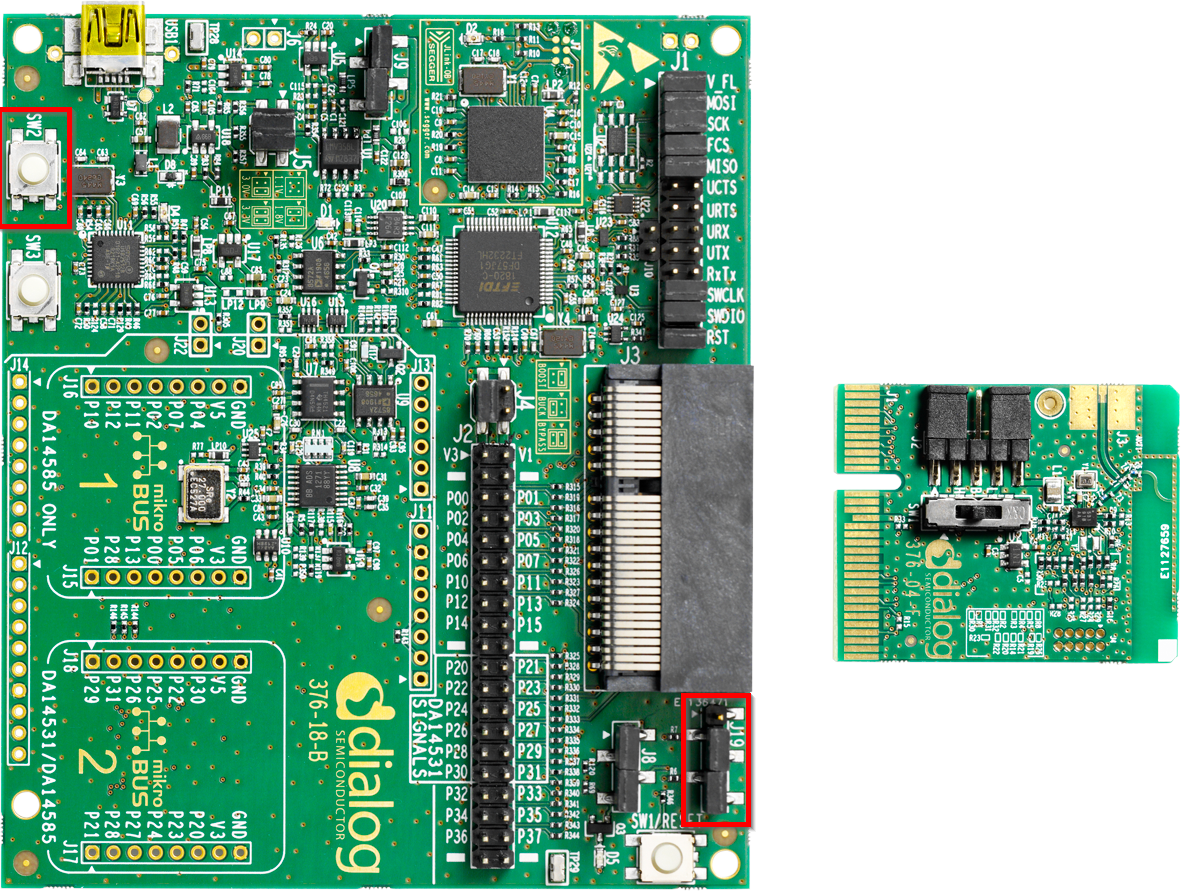
Hardware configuration DA14531 using DA145xxDEVKT-P PRO-Motherboard
- SW2 (button 2) is configured to P0_11, located on J19 (red box)
- Connect the DA145xxDEVKT-P PRO-Motherboard to the working station through USB1 connector.
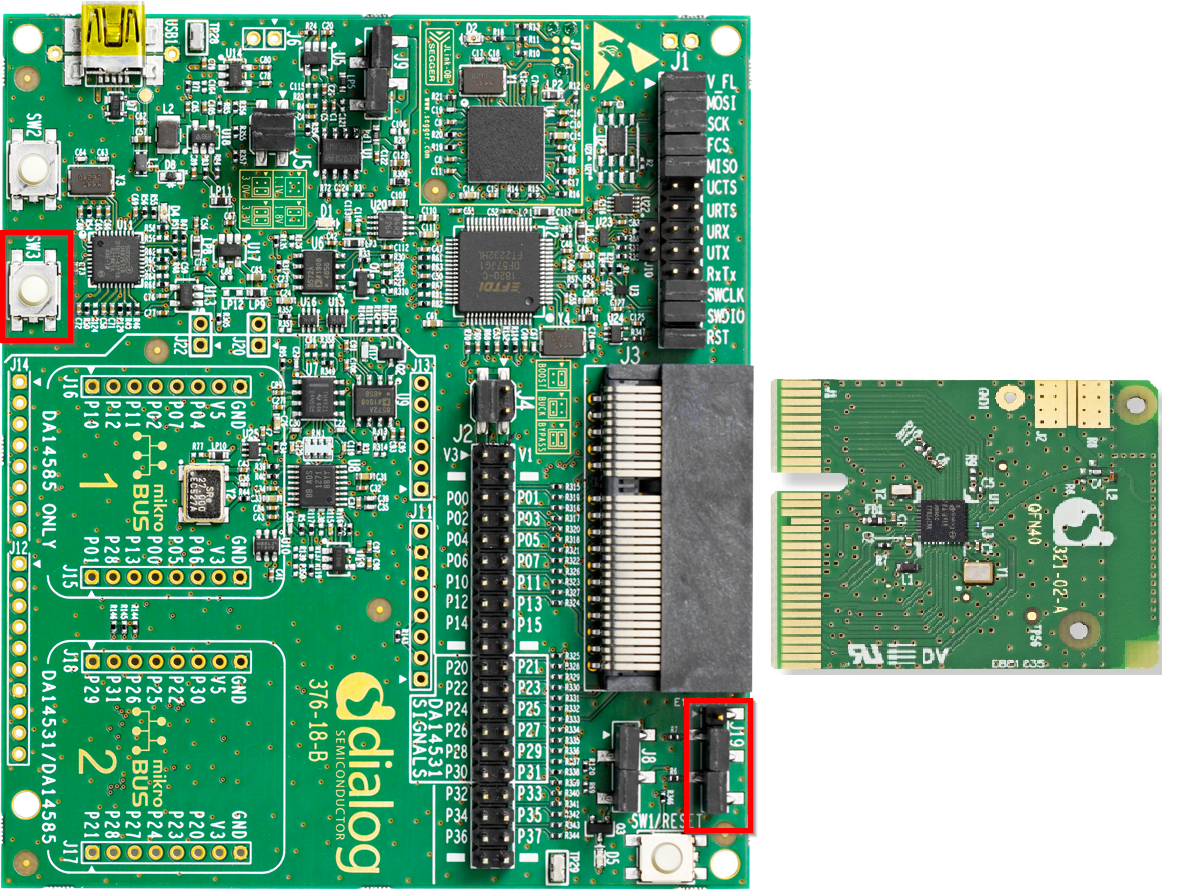
Hardware configuration DA14585 using the DA145xxDEVKT-P PRO-Motherboard
- SW3 (button 3) is configured to P1_1, located on J19 (red box)
- Connect the DA145xxDEVKT-P PRO-Motherboard to the working station through USB1 connector.
- Software configuration
- SDK6.0.14
- SEGGER’s J-Link tools should be downloaded and installed.
- An iOS smartphone with a MIDI app (for example KORG Module).
3. How to run the example
3.1. Initial Setup
- Before launching the Keil project, make sure to link the SDK and project environment using the Python linker script
dlg_make_keil_vx.xxx. More information Here.
3.2. Compile & Run
Navigate to
project_environmentfolder and open the Keil project.Compile and then launch the example.
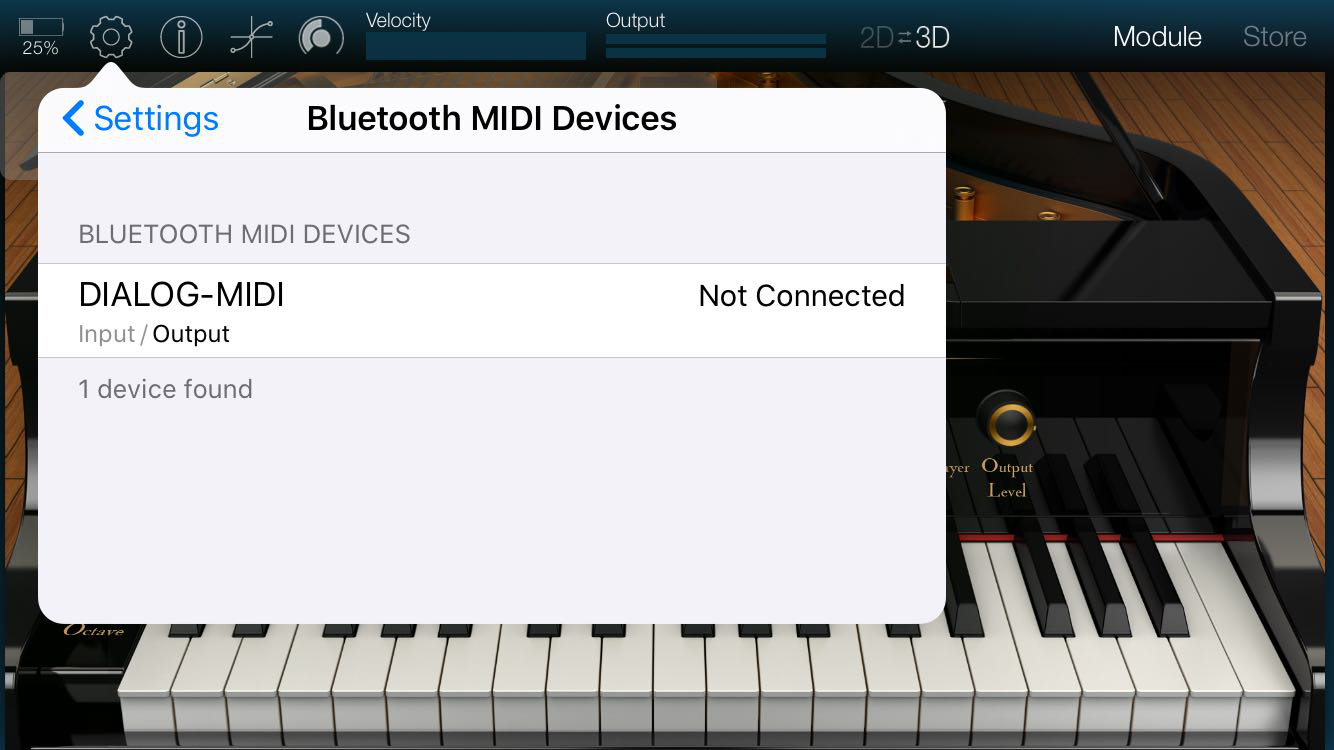
To verify please open KORG Module app:
Open Settings page and tap the Scan button

Find the device named DIALOG-MIDI and connect to it.
Pair the device
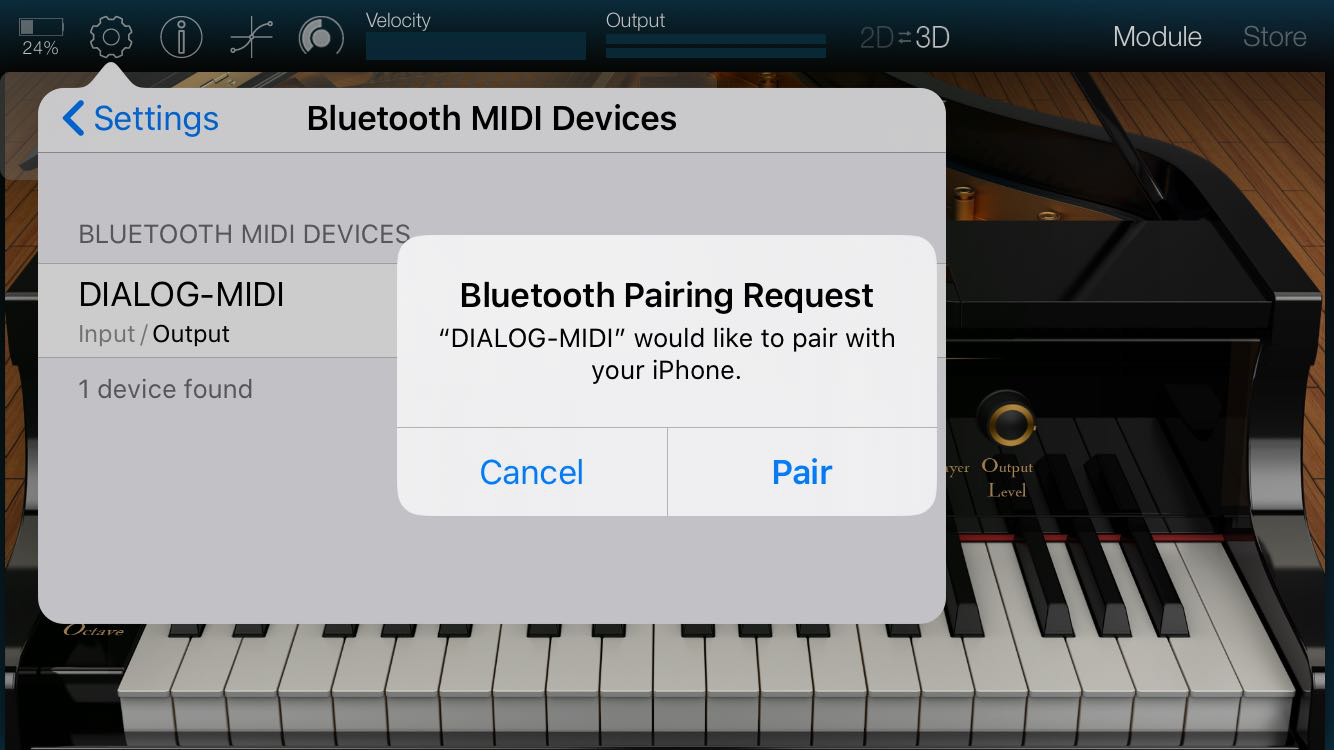
Press the button on the dev-kit to play the note.

4. Known Limitations
- There are No known limitations for this example. But you can check and refer to the following application note for DA14585 known hardware limitations
- Refer to the following application note for DA14531 known hardware limitations
- Also refer to Dialog Software Forum Link
5. License
Copyright (c) 2020 Dialog Semiconductor. All rights reserved.
This software (“Software”) is owned by Dialog Semiconductor. By using this Software you agree that Dialog Semiconductor retains all intellectual property and proprietary rights in and to this Software and any use, reproduction, disclosure or distribution of the Software without express written permission or a license agreement from Dialog Semiconductor is strictly prohibited. This Software is solely for use on or in conjunction with Dialog Semiconductor products.
EXCEPT AS OTHERWISE PROVIDED IN A LICENSE AGREEMENT BETWEEN THE PARTIES OR AS REQUIRED BY LAW, THE SOFTWARE IS PROVIDED “AS IS”, WITHOUT WARRANTY OF ANY KIND, EXPRESS OR IMPLIED, INCLUDING BUT NOT LIMITED TO THE WARRANTIES OF MERCHANTABILITY, FITNESS FOR A PARTICULAR PURPOSE AND NON-INFRINGEMENT. EXCEPT AS OTHERWISE PROVIDED IN A LICENSE AGREEMENT BETWEEN THE PARTIES OR BY LAW, IN NO EVENT SHALL DIALOG SEMICONDUCTOR BE LIABLE FOR ANY DIRECT, SPECIAL, INDIRECT, INCIDENTAL, OR CONSEQUENTIAL DAMAGES, OR ANY DAMAGES WHATSOEVER RESULTING FROM LOSS OF USE, DATA OR PROFITS, WHETHER IN AN ACTION OF CONTRACT, NEGLIGENCE OR OTHER TORTIOUS ACTION, ARISING OUT OF OR IN CONNECTION WITH THE USE OR PERFORMANCE OF THE SOFTWARE.
