4. Running The Demonstration Example
This section describes the steps required to prepare the Pro DevKit and other tools to successfully run the example code. A Pro DevKit as well as a smartphone are required for testing and verifying the code.
4.1. Verifying with a Scanner App
Establish a connection between the target device and your PC through the USB1 port of the motherboard. This port is used both for powering and communicating to the DA1459x SoC. For this tutorial a Pro DevKit is used.
Import and then make a copy of the ble_peripheral sample code found in the SDK of the DA1459x family of devices.
In the target application, add/modify all the required code blocks as illustrated in the Code Overview section.
Note
It is possible for the defined macros not to be taken into consideration instantly. Hence, resulting in errors during compile time. If this is the case, the easiest way to proceed with is to: right-click on the application folder, select Index > Rebuild and then Index > Freshen All Files.
Build the project in either EFLASH_Debug or EFLASH_Release mode and burn the generated image to the chip.
Press the RESET button on Pro DevKit to start the chip executing its firmware.
When the project starts running, the DA1459x Bluetooth SoC should be visible by any Bluetooth scanner application. For this demonstration the Renesas Smartbond application was used.

Figure 11 Verifying the Bluetooth Low Energy Device Output Using a Renesas Smartbond App
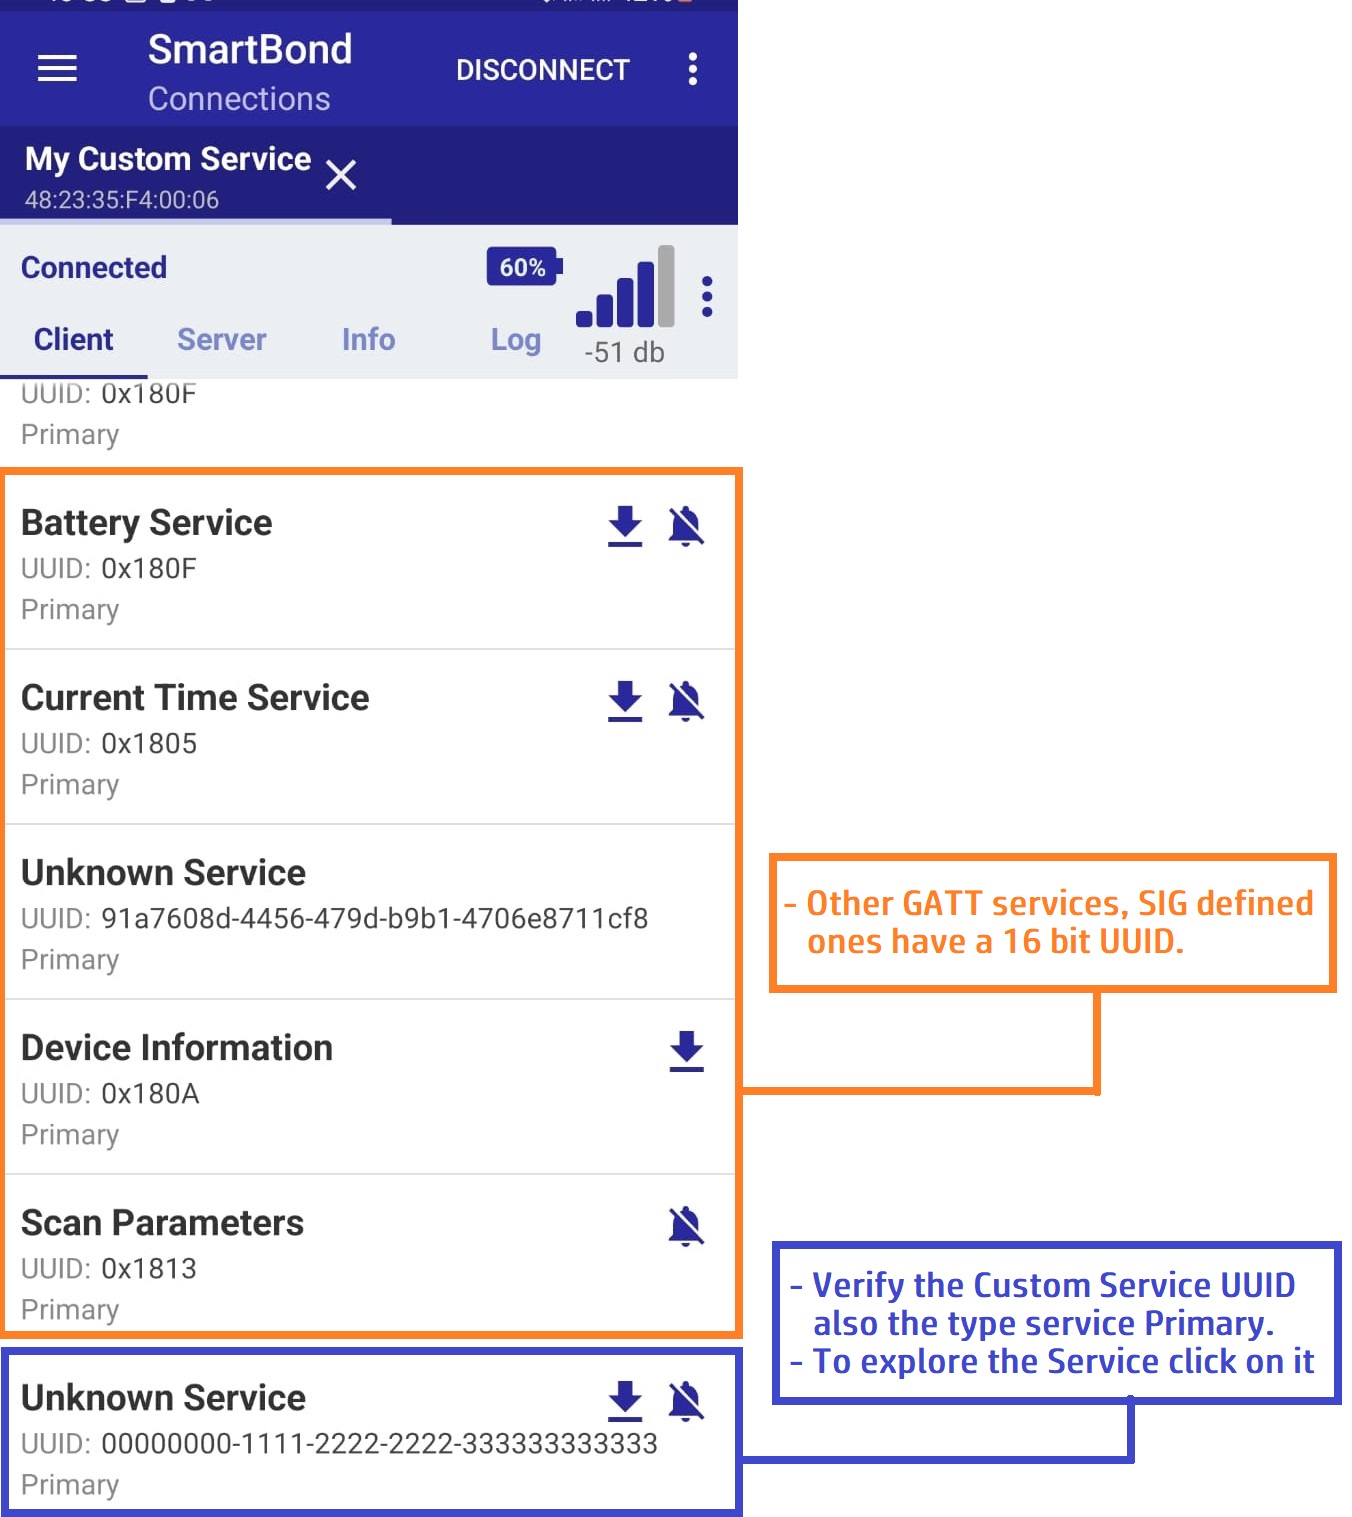
Figure 12 Exploring the Bluetooth Services after Connecting to a Remote Peer
Verify the custom 128-bit UUID as well as the properties of the characteristic attribute. Depending on the assigned properties, the scanner App will draw the corresponding symbol, for example ↓ for reading, ↑ for writing and Bell for enabling/disabling notifications.
The descriptor attribue with UUID equal to
0x2902indicates whether notifications/indications are enabled or not. By default, notifications should be disabled. The descriptor attribute with UUID equal to0x2901gives a small description of the target characteristic.
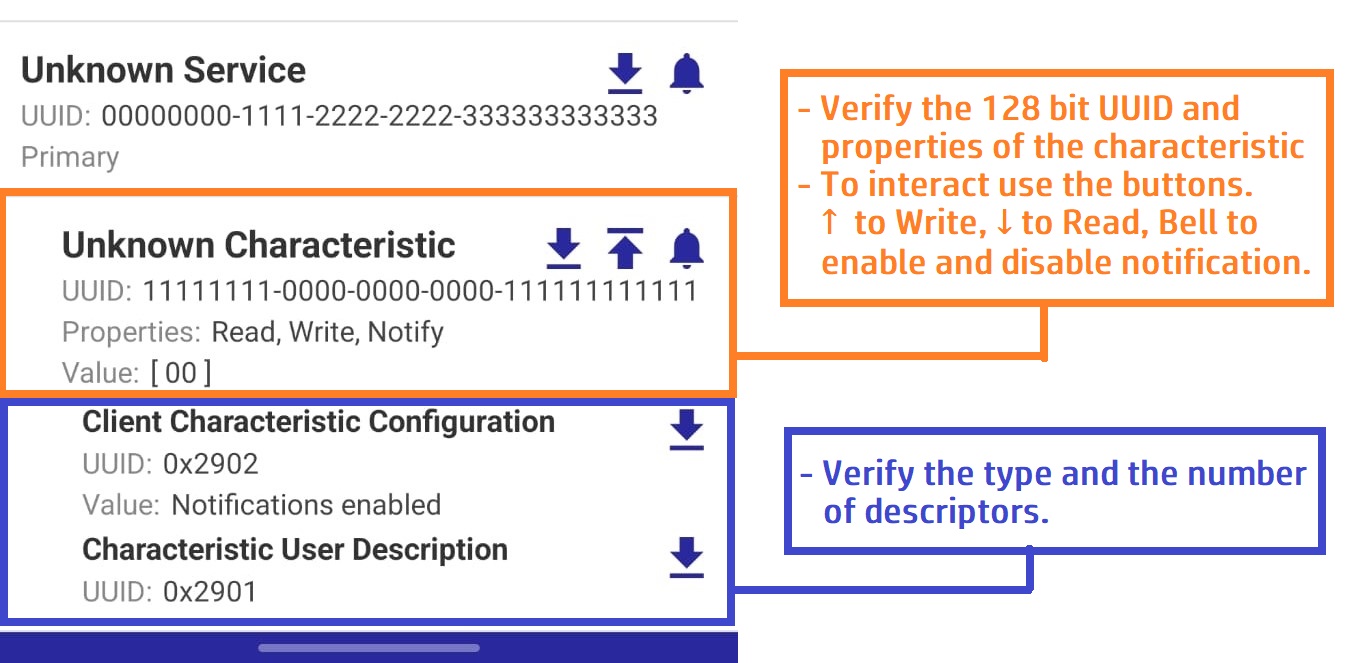
Figure 13 Verify the Service Characteristics
Verify the behavior of the characteristic attribute which consists of 1-byte value. User can read as well as modify that value. If the attribute value is equal to
0x01, then the LED1 on the Pro DevKit is turned on. For all other cases, the LED D1 is turned off.

Figure 14 Verify the Characteristic Behavior (Write Operation)